Greenhouse Prep

Greenhouse Prep

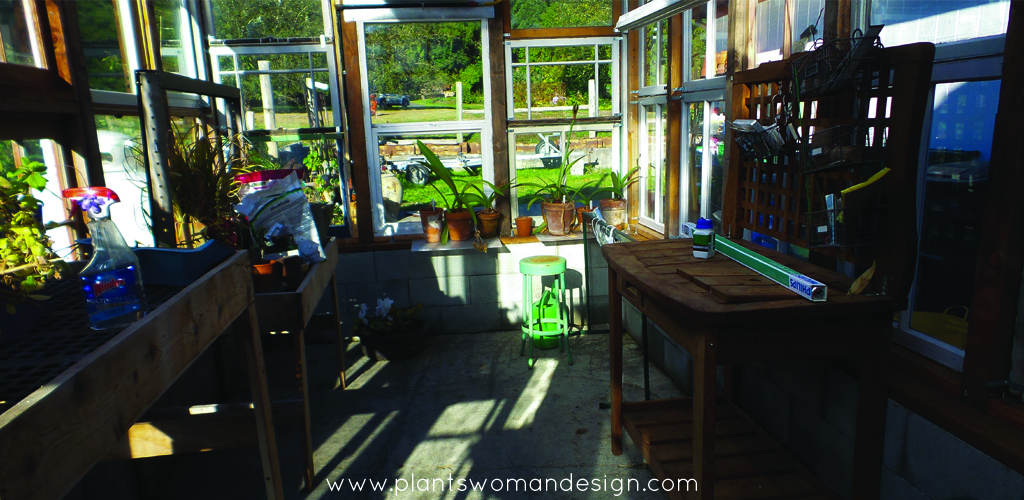
BRR it’s getting cold out there… How can it be 37 degrees last night? I’m beginning to realize my neighbor was right when she said we lived in a frost pocket. It was 37 when I got in my car and by the time I turned off my road onto the main road it was 45. That is a pretty big difference in temperatures. My plants are ready to move inside and the greenhouse is almost ready.

Many times greenhouse keepers clean out their greenhouses in the spring after all the plants are moved out into pots or the ground. My greenhouse becomes home to my collection of hardy orchids during the summer so I don’t do a big spring clean out. I usually wait until after summer before the temperatures really drop to make tackle the task. It’s nice to have a little warning before the temps drop but three years ago we did not. It was warm and sunny with lows in the 50’s until November then one day in it was 30. Many plants were still in full leaf and blooming! That quick-freeze killed many established plants.

This year I’m ready and will get my non-hardy plants into the greenhouse before its too late. Before I do that though, I needed to get it finished.

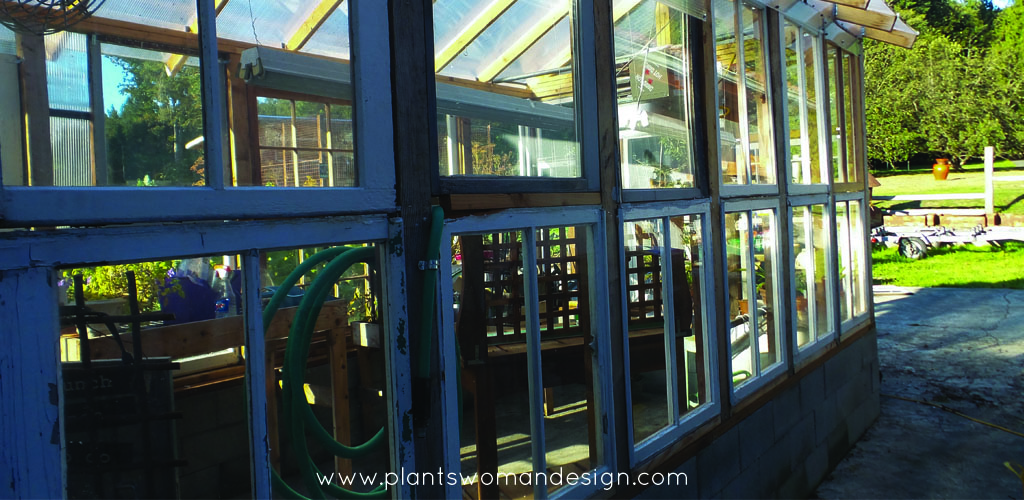
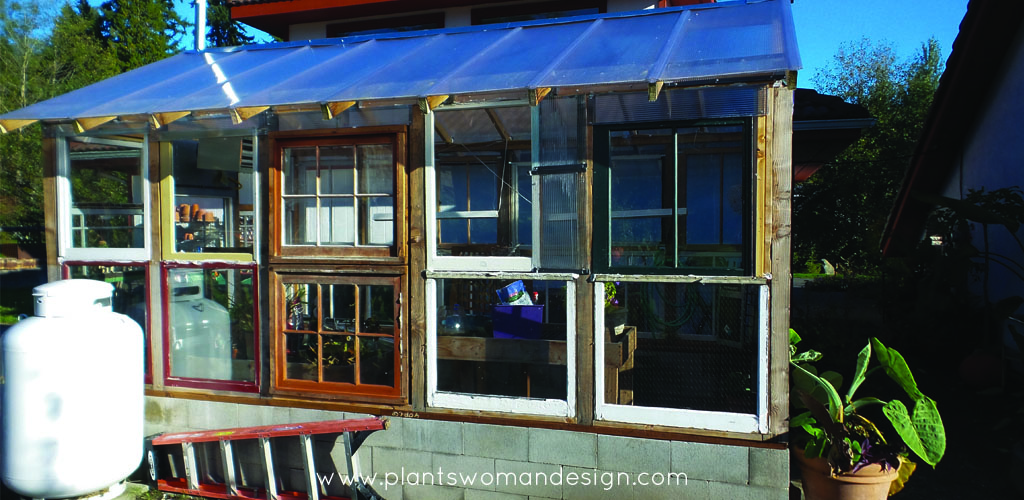
Many of you saw the beginning of the greenhouse last year (click HERE to read about it). The bottom is made of cinderblock and the top of recycled windows. I only had enough windows last year to make the bottom row of windows and the rest was plastic. This year it was time to finish the top rows and take off the plastic. The windows I like to use are usually $4.00 each pane, if you get a craftsman style window it can be $20 or more. I usually opt for 1 or 2 pane windows. A total bill of $35.00 is pretty easy to swallow after looking at new window options or the polycarbonate at the hardware store. I used the polycarbonate for the roof last year and this year bought one more piece to fill in where the glass didn’t fit just right. Flexibility is the key to using recycled materials. Being precise and rigid will not help in making this greenhouse. Once the gaps are filled the eclectic look is rather fun.

After placing the rest of the windows I pressure washed the interior, cleaning out debris and old pots, throwing away dead plants and dumping it all on the compost heap.

Windows were washed and panes checked for cracks and or broken molding. I repaired what was important and left the rest. It is rustic after all.

greenhouse disinfectantThe feed store has a safe disinfectant that I uses to spray the interior. It is the same type used at a Vet’s office or horse barn and is non-toxic to animals and people. Some bugs, viruses and fungus can hang out in the cracks and crevices of the greenhouse even after pressure washing. A good dose of disinfectant can solve MANY problems before they start.

After the interior was dry I filled the cracks and large spaces with foam weather-stripping. This is a type of material that you stuff in crevices and then caulk over the top and fills the space so the caulking can seal it. If the space was big I added a piece of wood, cut to fit. After the foam filler was in place the cracks can be caulked. I like to use a clear silicone exterior adhesive caulk. The windows have different paint colors so using a clear caulk looks better than white. (Next year I may paint the exterior).

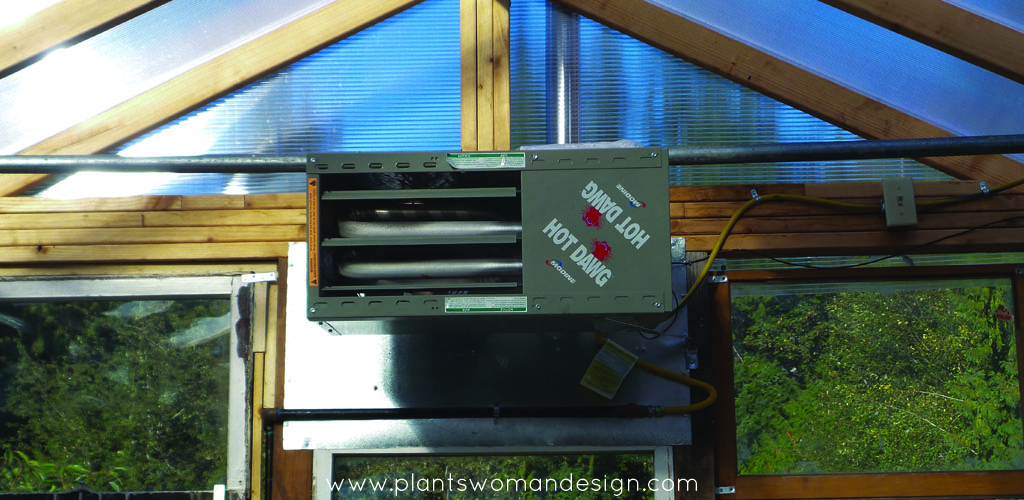
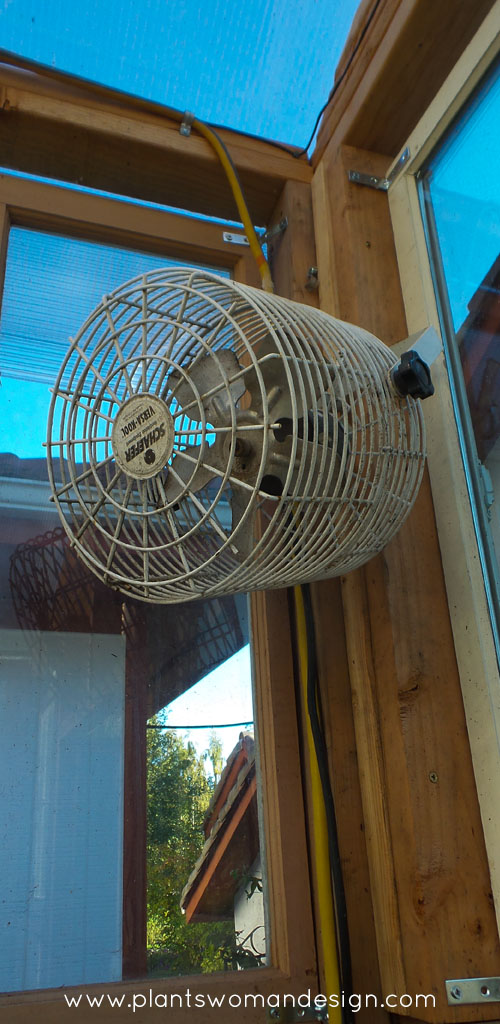
Next, I checked the heater, filled up the propane tank and replaced lights. I have grow lights on a timer so the lights are on when I’m usually in the house in the evenings and it also extends the growing period.

greenhouse prep 003

BRINGING PLANTS INTO THE GREENHOUSE

Check each and every one for slugs and snails. One slug or snail can cause serious damage and lay eggs to hatch out all winter long.

Sometimes an organic ‘safe’ fungicide and pesticide is a good preventative idea. Usually mealy bugs and spider mites are killed in the summer sun but not always. Citrus is especially hard to keep pests off.

Water all transplants well. I usually put my tropicals in the garden so they have a chance to really grow. Putting them back in a container can be traumatic so give them some love.

Leave air space around all the plants. Do not try to cram too many in at one time (that is my biggest problem). If it is a coleus that you love just take cuttings and root those instead of trying to bring the whole thing in. Begonias can be overwintered as bulbs as can cannas and colocasias. Let them go dormant before bringing them in and save space for shrubs that can’t (check out this Little Bytes post for how to overwinter bulbs). Even bananas can be overwintered in a garage without soil.

This type of greenhouse is fun, economical and functional. It has plenty of space for tall plants as well as shelving for small succulents. There is usually a dry area of the greenhouse and a wet area. The dry area has the humidity but not constant water. Occasional water is best for those so not watering one whole section is easier to remember. If it gets really cold you can wrap the whole house with another layer of plastic to aid in insulation. I live in Zone 7 so seldom does it get in the below freezing for any length of time. The recycled windows are usually not double paned or insulated so they will lose heat if there is no sun and it gets extremely cold.

A greenhouse is a wonderful thing.

2015 Fall Checklist

2015 Fall Checklist

After a terrific summer fall seems to be hitting me hard. I HATE wearing socks, putting on long sleeves and even wearing long pants again. Even though I love being a ‘Child of Winter’ (Warren Miller ski film term) I think I may also be a Child of Summer. The winds of fall are throwing branches and trees down already and the tomato crop is furiously producing fruit, almost as if it knows the time is limited.

As the season pushes through the remains of summer I start to think of the things I need to get ready to do for fall. Everybody’s list is a little different but gardening tasks never really cease, they just change.

Clean-up: Finish the last bit of weeding and mulching. If the garden is weedy at the onset of winter the weeds will remain and gather strength through the fall and winter. Just like fall planting the roots grow well in the fall and winter. Getting your areas cleaned up and weeded through will give you a head start on spring.
Mulching: I mulch with compost in the fall and spring. This year the mulch was spread most of the year through. When planting a new bed I spread mulch as the final top dressing. This means I don’t have to use much in the way of fertilizers. Healthy soil is the best way to have amazing gardens.
Compost: Speaking of compost now is the time to add to the pile. I actually have two separate piles of compost. One is weeds and invasive plants. This weed pile grows throughout the summer and is removed at the end of the year or whenever it gets large. I don’t attempt to compost weeds because I also have horsetail on my property so I want it gone. The actual compost pile is vegetables, leaves, pruning bits, and some grass. I build layers with cardboard and will use it in the spring. Many times I add a top of Black plastic to help heat it up and keep it from getting too wet (I live in a wet climate).

Pruning: Some plants need to be cut back now. Many times I wait and enjoy the shapes of the dead flowers and grasses in the winter. Birds love any seeds left on the plants and I get to enjoy their gathering. I like to wait until the first frost and clean up the flopped plants. Often our fall lasts until October or November with dahlias and cannas still in bloom.

Greenhouse: If you have a greenhouse it needs to be cleaned out and hosed out. If you have had pest problems a good cleaning with an environmentally friendly disinfectant will insure a good success for the winter. My greenhouse will overwinter tropicals and other non-hardy plants. Most of the summer it houses my orchids but remains mostly empty. I clean pots and get rid of dead plants. Glass needs to be cleaned and insulation checked.

Seeds: Collect seed from plants now for next year. As the world changes it may be vital someday to collect seed. I use non-GMO seeds so all my vegetable seeds can be collected and replanted. Look for an upcoming post on seed collecting.

Enjoy: Enjoy the beautiful season. Collect and gather leaves, nuts, seed heads and see the amazing world in your garden go dormant. Take a hike to see massive amounts of leaves in color and the freshening of the forest as the mushrooms re-emerge and mosses start to grow again.

What are you doing in your garden this fall?

Name That Plant: Orange Answers

Name That Plant: Orange Answers

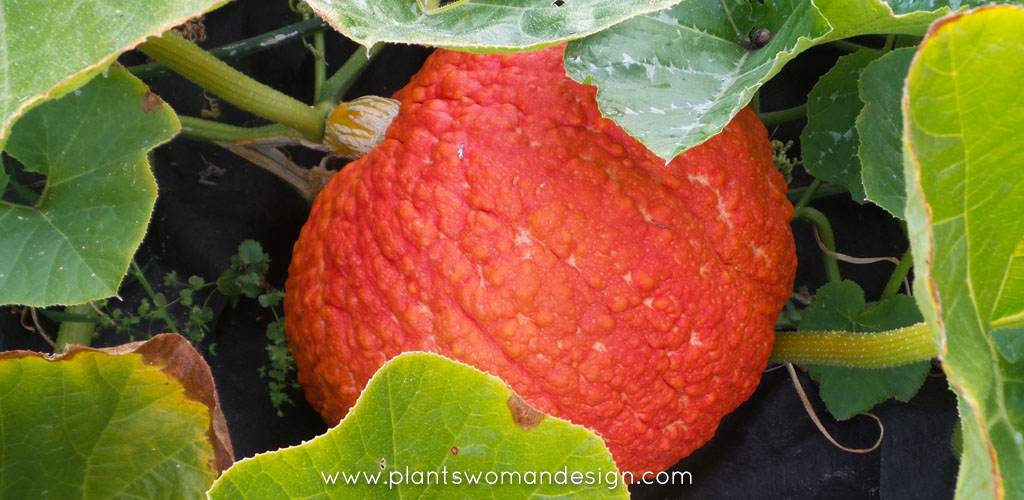
warty thing pumpkin

Yes, even pumpkins can be beautiful. I love orange in the garden and even when I’m growing pumpkins I enjoy the color.   This fabulous thing is a Warty Thing Pumpkin (Cucurbita maxima). Yes these are giant and lovely, a great eating squash and good for pies. Could make a super scary jack o lantern!! Grab seeds next year from (link) Botanical Interests Seeds.

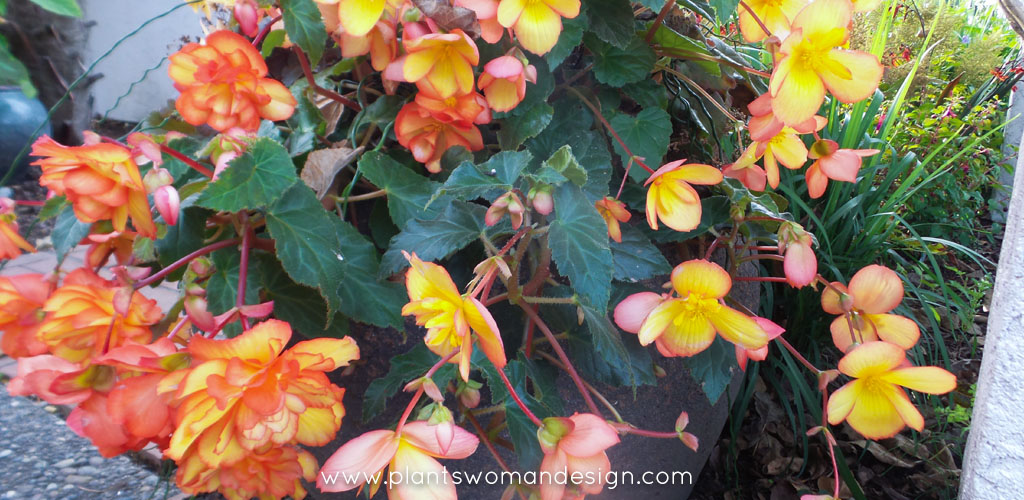
Begonia Non-stops

Lush Begonia Non-stops are a must have every year. I just can’t leave them alone at the nursery and add to my collection each year. Try the Non-Stop apricot for amazing combinations of orange, yellow and peach. Take a look on the Little Bytes page for more information on over wintering the tubers each year.

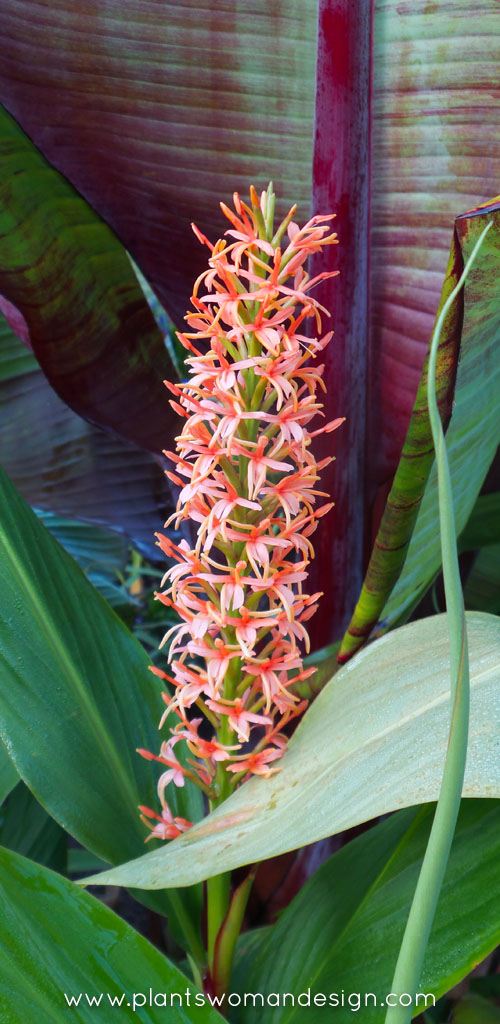
hedychium densiflorum

Anything tropical that will prove hardy always has a place in my garden. The hardy hedychium densiflorum is easy to grow and is a spectacular accent. This one has moved with me several times and more is always available at (Link) Far Reaches Farms.

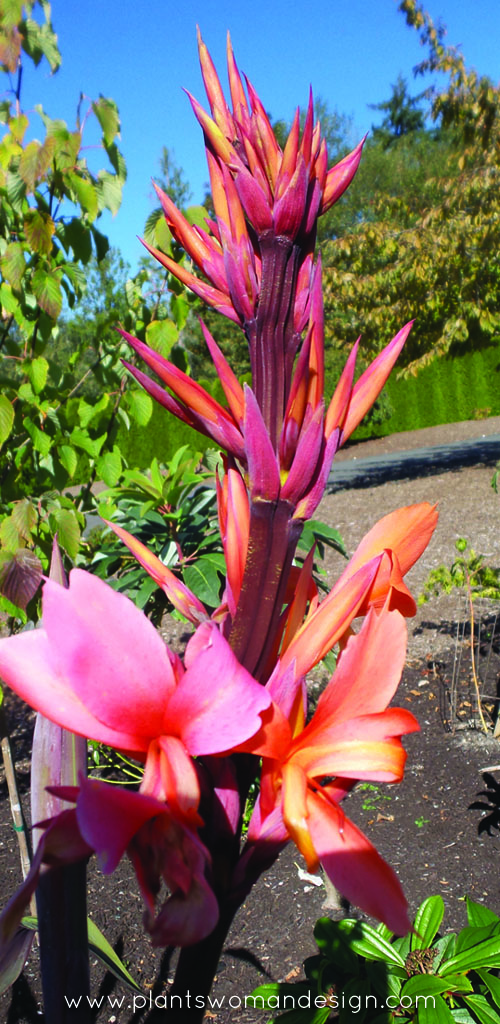
Just last night I hear Helen Dillon (Irish garden fame) mention this plant in her garden. This is a canna musaefolia (syn canna musifolia) or Banana Canna. Named for its banana like foliage it is lush, tropical and perfectly hardy at zone 7.

Banana Canna
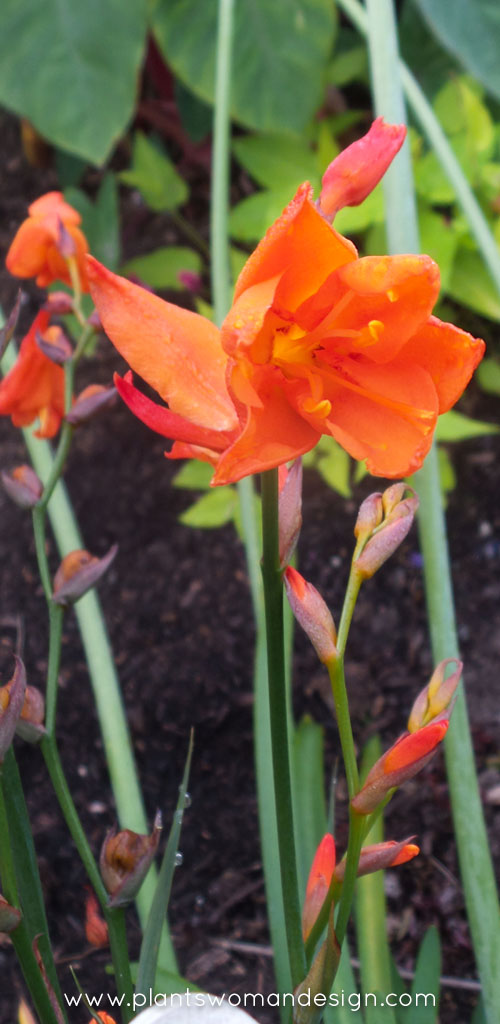
Crocosmia Venus

Crocosmia Venus tagged along with an Agapanthus that I brought from my old garden. It pushes its way into the mix and has to compete with some shade but is a bright spot against the red banana leaves in the background. Nils Sundquist from Sundquist nursery grows this and many other lovely crocosmias.

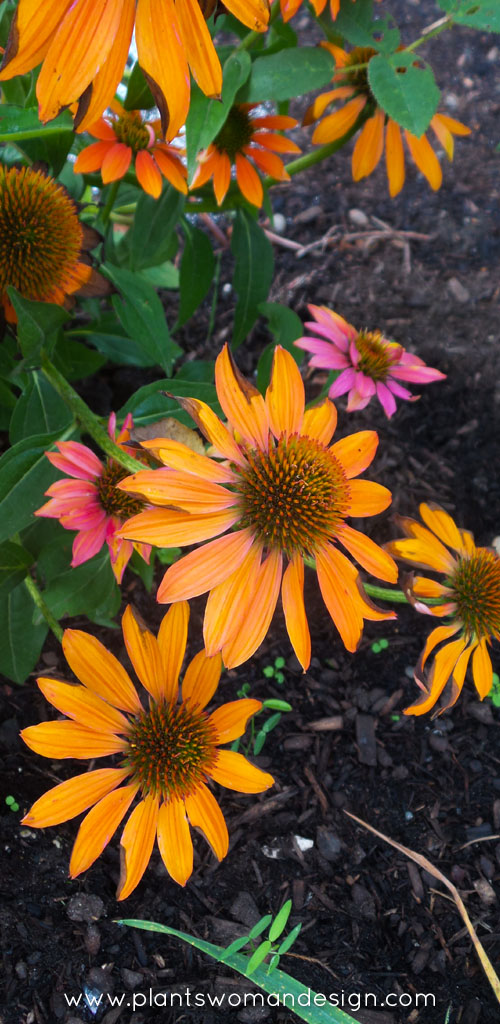
The bright sunny Echinacea ‘Sombrero Adobe Orange’ is new to me this year. I love the fact it has various shades of orange/pink/peach on the same plant. The flowers change as they age. Recommended to my by one of the growers at TandL Nursery I agree with their pick. It has a strong growing habit and seems to be a prolific bloomer.

Echinacea ‘Sombrero Adobe Orange’
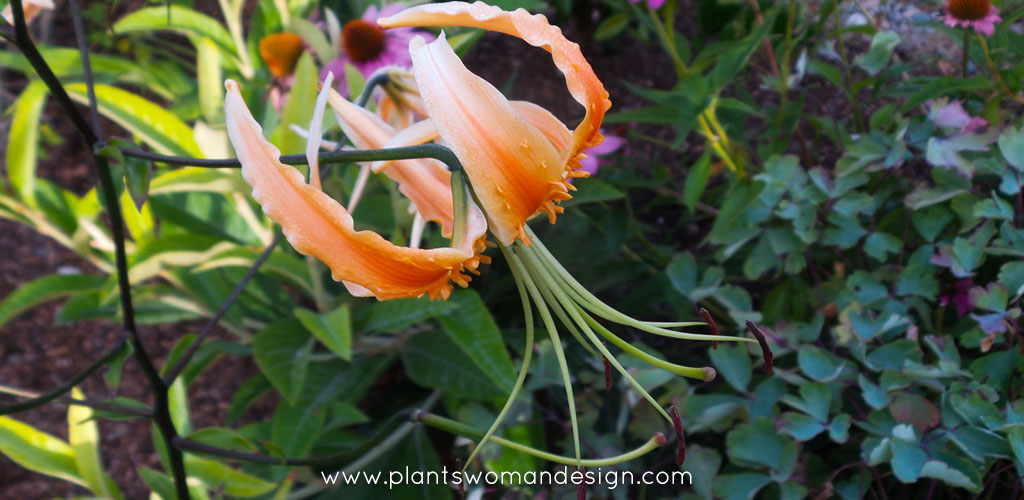
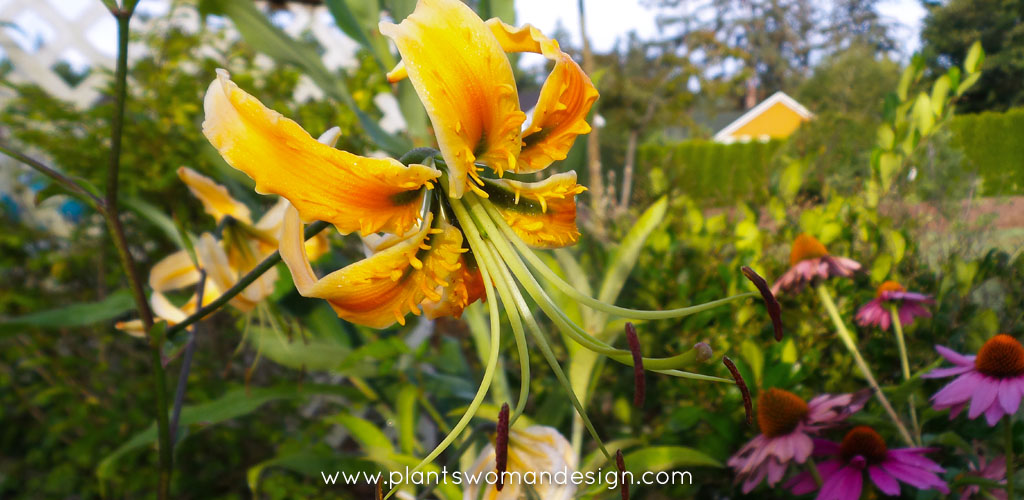
Lily (Lilium Rosthornii)

Graceful with recurving petals the Lily (Lilium Rosthornii) from Far Reaches Farms is also new to my garden this year. I have several others including a double Tiger Lily (Lilium flore-pleno). Unbelievably brilliant!

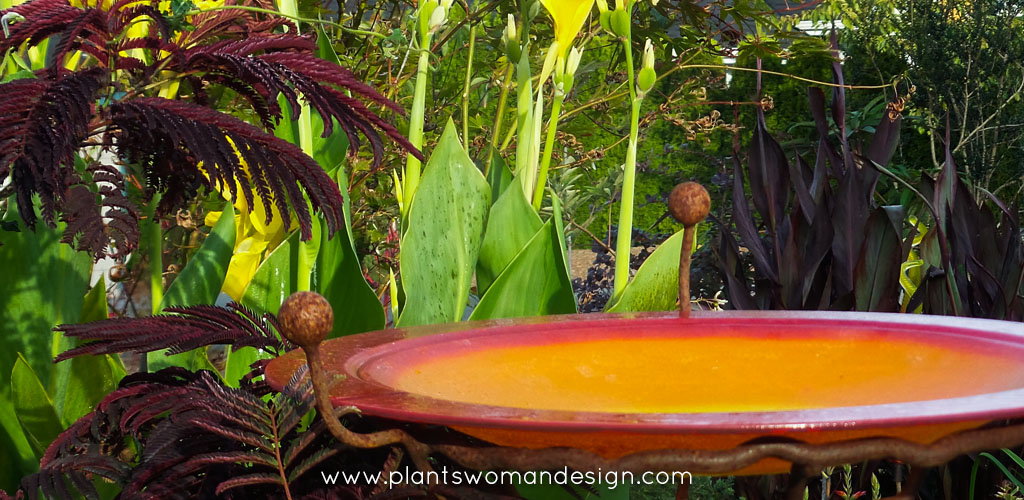
How about a little Orange Garden Art? Tucking in the orange birdbath on a rusty stand with a Chocolate Silk Mimosa Tree (albizia julibrissin “Summer Chocolate’) adds a punch of color and contrasting textures.

Chocolate Silk Mimosa Tree (albizia julibrissin “Summer Chocolate’)
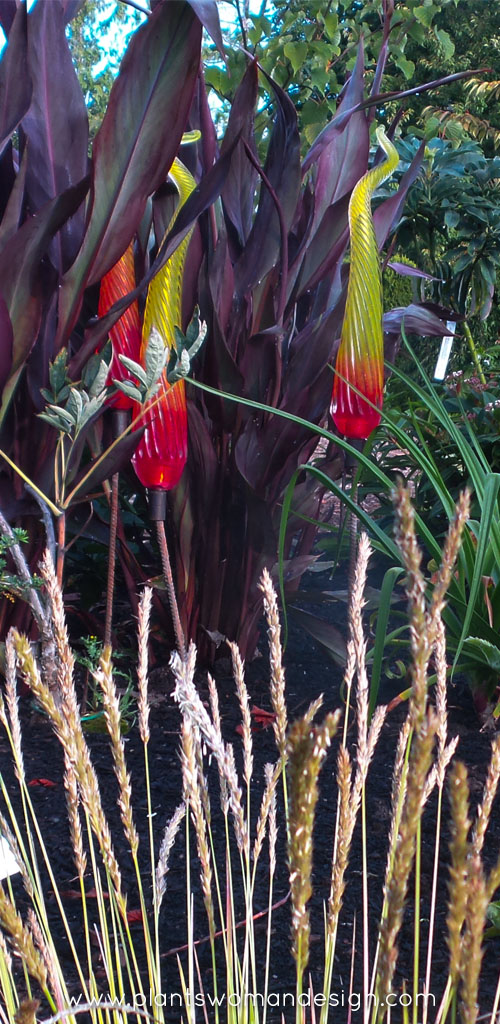
Canna Intrique
Canna Intrique

Speaking of garden art. I repeat the theme here with orange glass and Canna Intrique. It also blooms orange –here is a picture of the orange flower! Zow. ( Insert picture of flower here. )

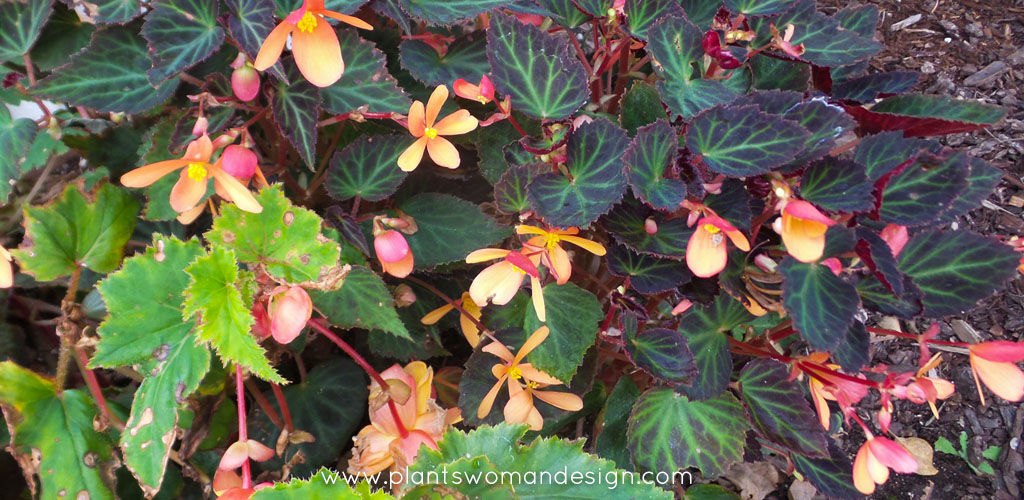
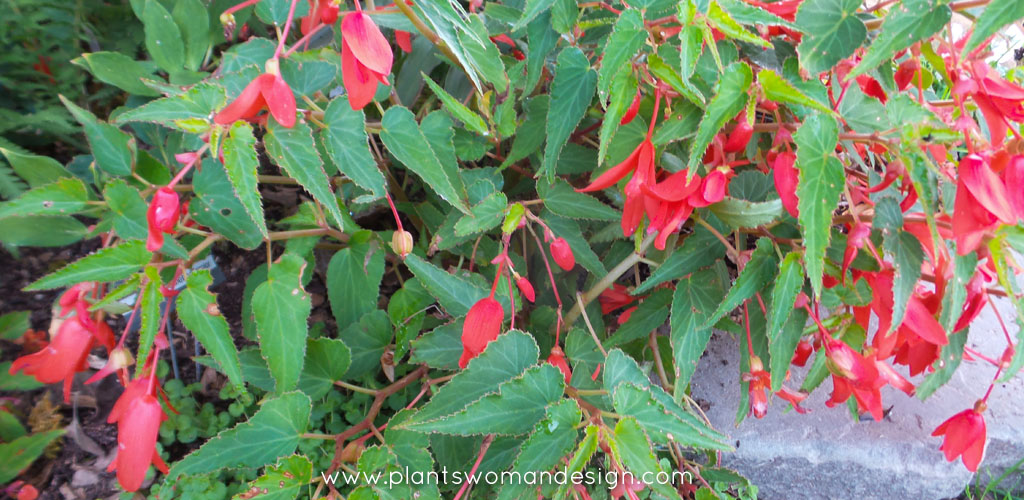
More Begonias and more begonias, I told you I couldn’t help myself. The Begonia ‘Sparks will fly’ has very cool dark foliage, while the bright green foliage of Begonia Boliviensis ‘Bonfire Orange’ has a fernlike texture mixed with other ferny things under the apple tree. Bright orange in the shade is a must.

Begonia ‘Sparks will fly’
Begonia ‘Bon Fire Orange’
Dahlia ‘mystic spirit’

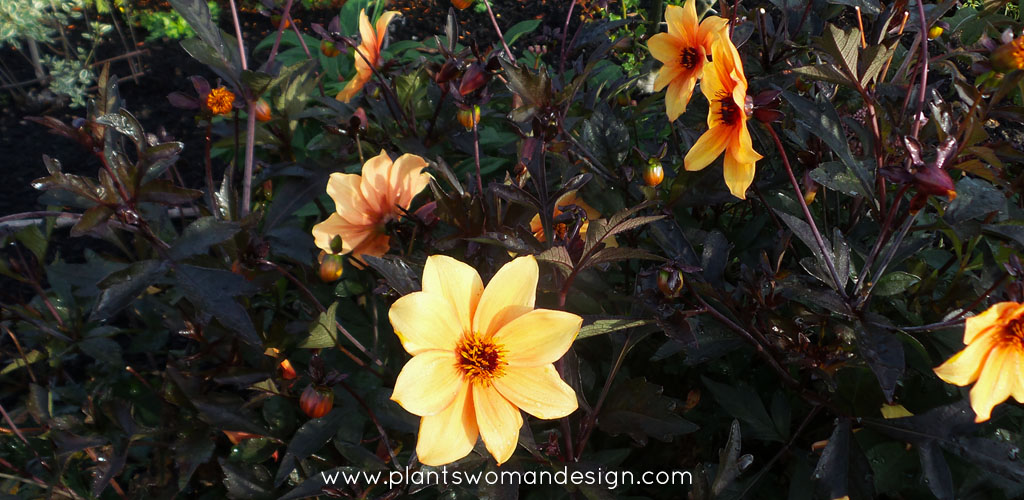
This Dahlia has a funny story behind it. I was shopping for a customer’s bright orange in a blue/orange bed. The recommendation from the grower was Dahlia ‘mystic spirit’. Well it came in and was not a great clear orange but a peachy/pink. It would not go with the other hot colors in the bed. So as often happens I just dumped the dahlias in an empty spot in my garden. Not exactly overjoyed with them but not willing for them to die either. NOW they are really coming into a good sturdy bloom and the flowers are a great soft orange.   Not at all like the blooms that were first on them, hard to figure out, maybe a fertilizing thing (they get none now). BUT I’m liking them and they may get to stay after all. Love the dark foliage on them.

I hope you have enjoyed this visit through the orange in my garden. I will admit this isn’t it. There are a few more orange flowers that I may share with you another time.

Name That Plant: Orange

Name That Plant: Orange

Orange.  I love orange.  Orange plants especially.  Here’s what I have in my garden of the orange persuasion.  Can you name them?  Leave your answers in the comments and I’ll give you the answers next week.

Number 1
Plant 2
Plant 3
Plant 4
Plant 5
Plant 6
Plant 7
Plant 8
Plant 9
Plant 10
Plant 11
Plant 12
Fall Veg Planting

Fall Veg Planting

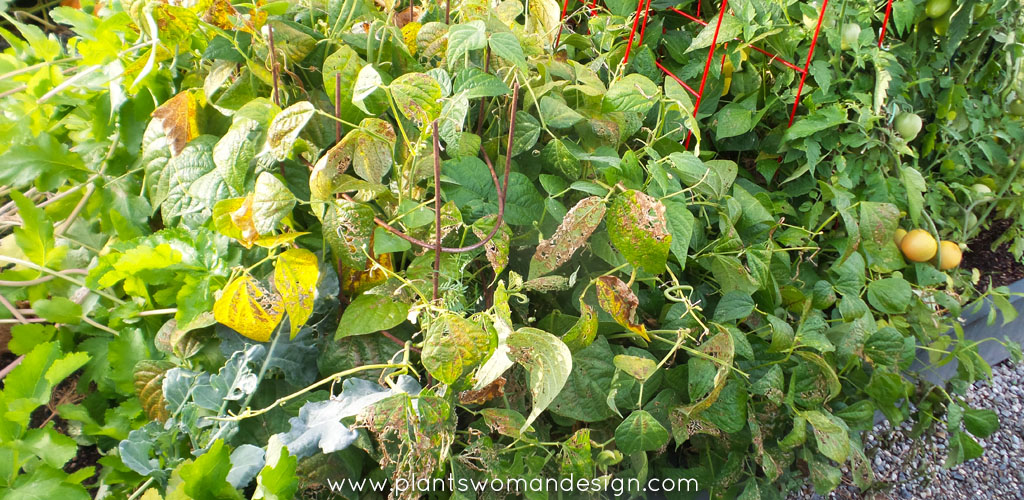
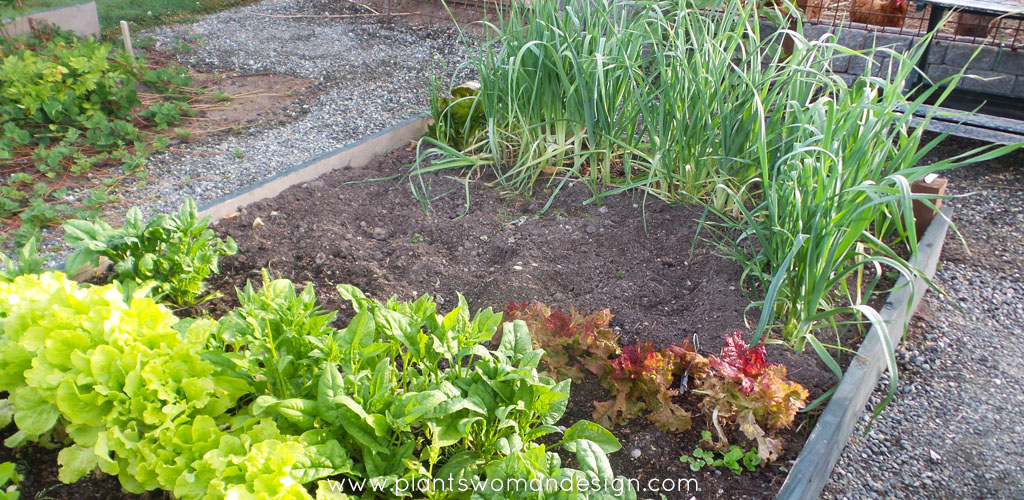
Even while the veg garden is still in full glory it is time to think about fall Vegetable planting. Looking at my garden I see I have some room in the garden where the lettuce has finished, the onions have been harvested and some beans have been pulled out. I left some of the beans in because although they have slowed in production there are still some blooms and beans still growing.

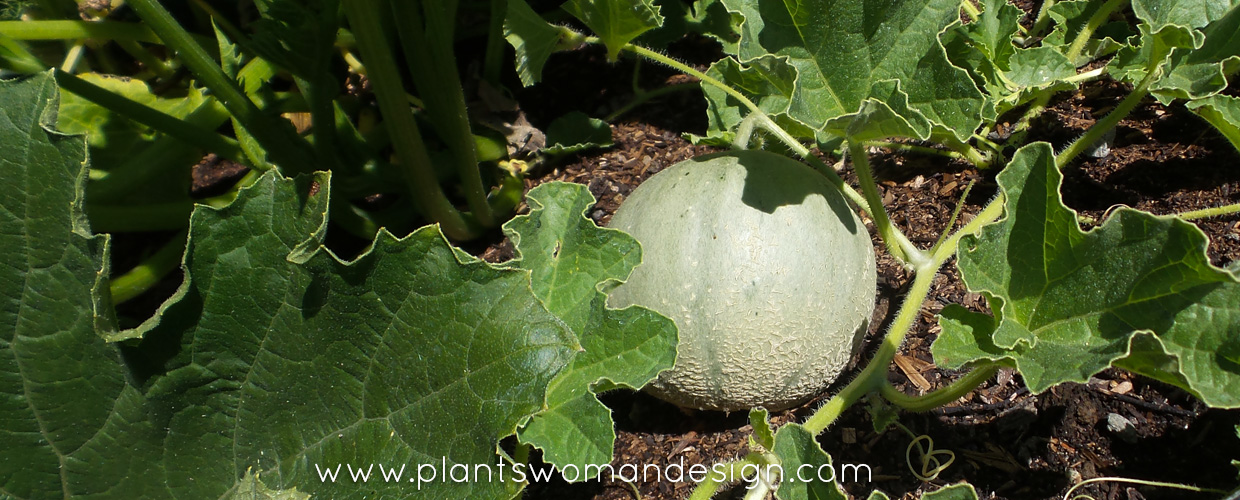
Flush from my success with the cantaloupe I decided to try cauliflower. While never having grown it before it was one of the small packages of vegetable starts available at Valley Nursery. Getting a head start shouldn’t hurt so the packet came home with me along with Onions and Broccoli. If you check out your local Nursery you will likely find winter vegetables also.   Usually Swiss chard, Brussels sprouts, cabbage and kale are also available, but I still have these growing in my garden.

vegetable garden, succession planting

I spent a little time breaking up the soil. Roots of onions and lettuce make the soil a little compacted so a good aeration and dig through was in order then it’s time to plant. Two rows of a leaf lettuce blend and one row of head lettuce blend. Blends give you a good chance to get the best germination depending on the site conditions in the fall. Two rows of roquette (arugula) were next because you must have arugula to have Asian pear salad with goat cheese and arugula. The Asian pears are beautiful right now so I will use the rest of the existing row of arugula to eat now and store pears for later to use this row.

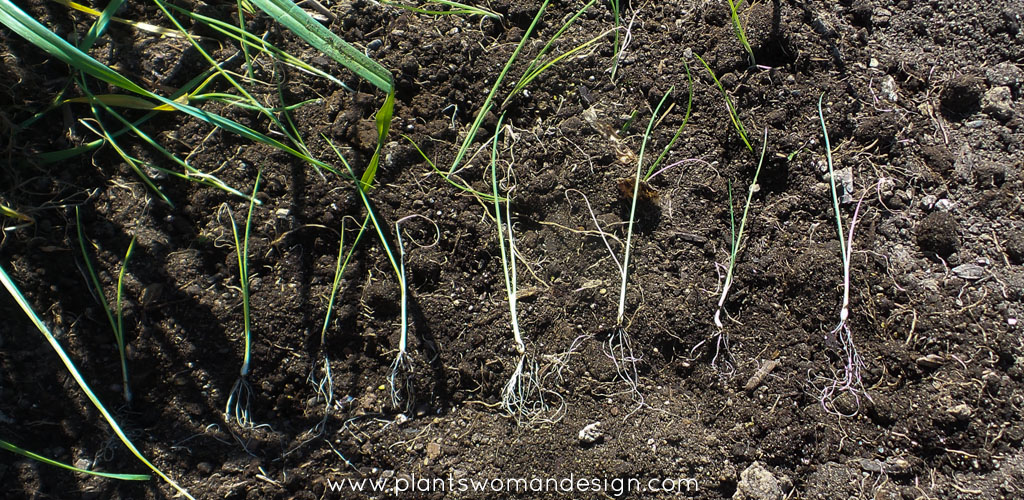
I had onion starts (evergreen bunching onions) and onion seeds (globe style mixture) to replant some of the onion bed next to the leeks.

vegetable garden, onion starts

To plant starts I make a depression that looks like a row with my finger. Then space the starts evenly down the row. Firm the soil around both sides of the start to get the seedling to stand upright. After watering them in I will check again to see if they are still standing upright. If not then they didn’t get property firmed in and you have a chance to do that again. They will need some good water as the days are still warm and sunny.   Planting starts in this way means the roots are all laying in the ‘ditch’ and you don’t have to worry about some of the roots being broken off or left out of the hole.

vegetable garden, caulliflower starts

The cauliflower starts are in a couple of places. Caution: do not plant the starts where cabbage has grown before. This is to keep them from contact with soil borne pathogens or pests that wait in the soil.

vegetable garden, brocoli starts

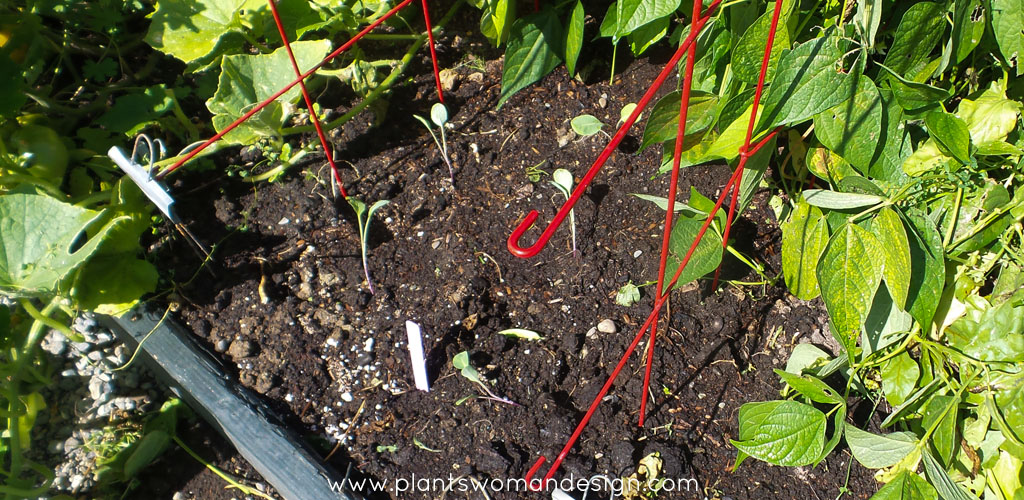
I planted new broccoli near the other broccoli. Although I’m still harvesting broccoli from the current patch I know there will be more needed later on. While over there I took out a couple of mature kale. I had planted kale seeds and they are awaiting their chance to mature under the big kale. They now have a chance next to the broccoli starts from the nursery.

After taking out the zucchini plants I put in some Pac Choy (type of Boy choy). It also likes a warm start and a cool season to mature.

Comment to tell me if and what you are growing for the fall veg season.

Happy Gardening!

Contain Your Plants

Contain Your Plants

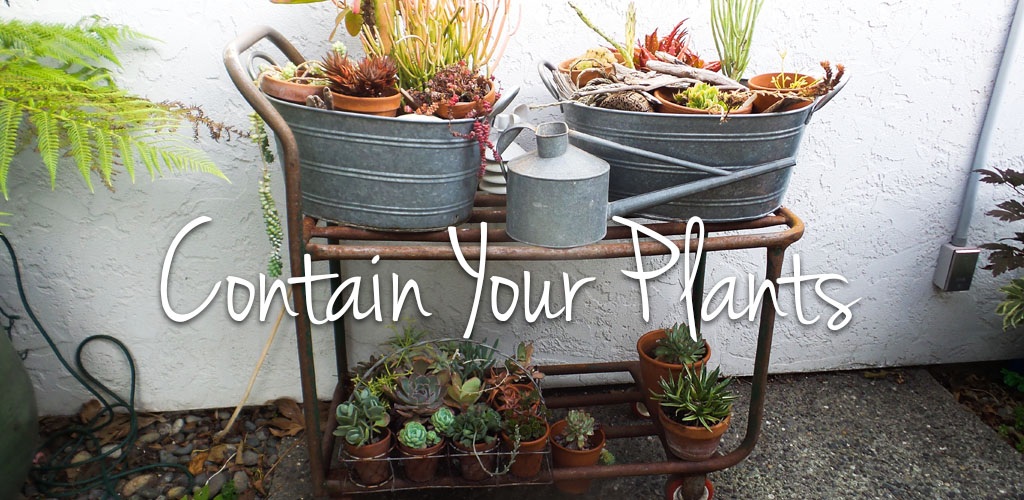
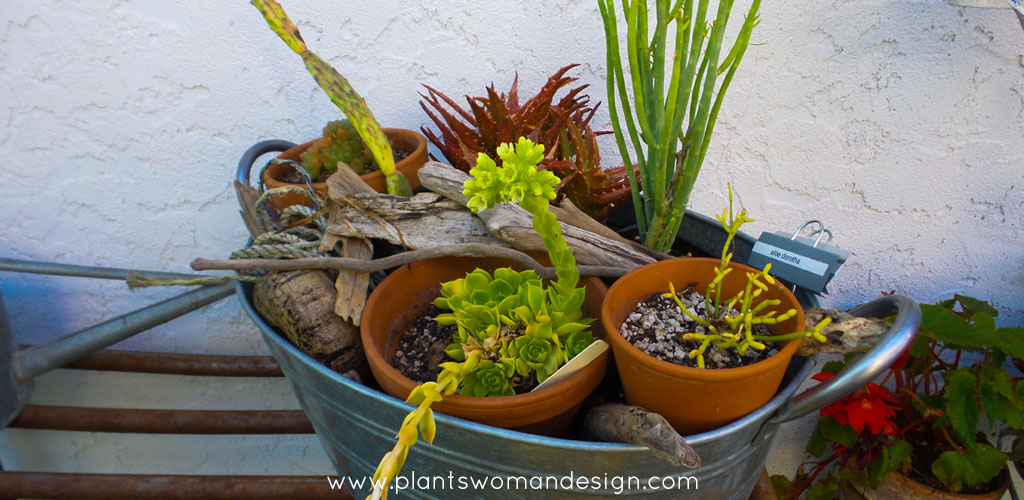
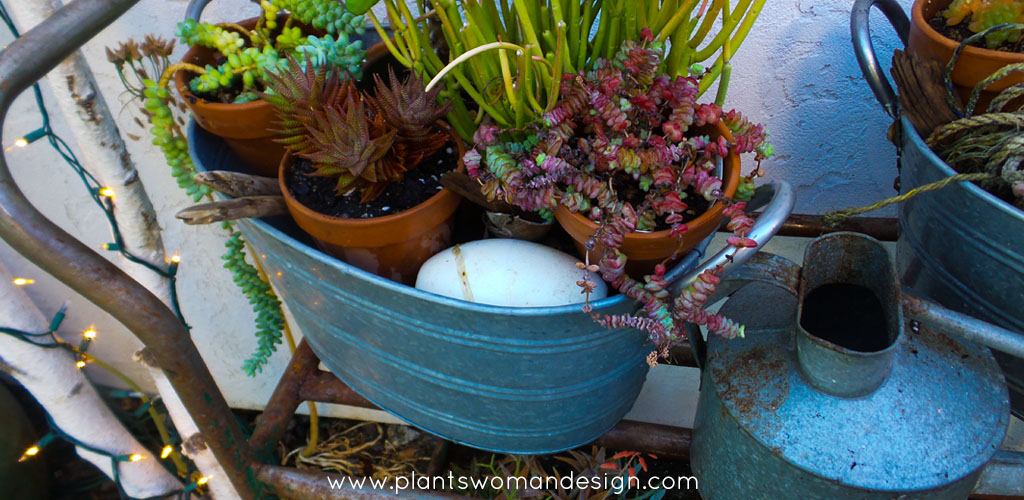
I don’t know about you but I have random collections of plants. I love succulents and I overwinter them in the greenhouse in small pots. When summer comes I’m ready to move them outside. BUT the very thought of having to water lots of small pots in odd places is daunting to say the least. So… a little pondering came up with a solution. I would use my collection as a vignette.

plantswoman design succulent container

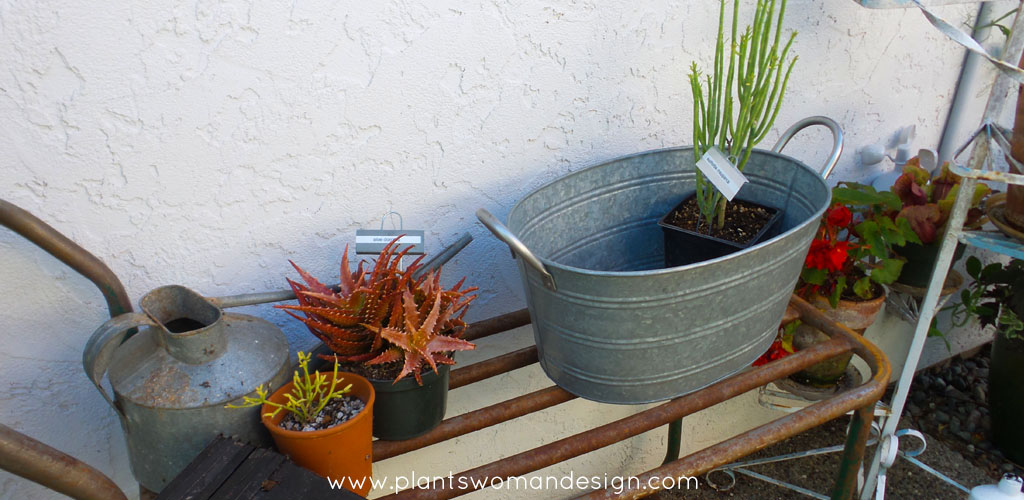
I purchased a couple of galvanized containers at a local store (TJMAXX).

plantswoman design succulent container

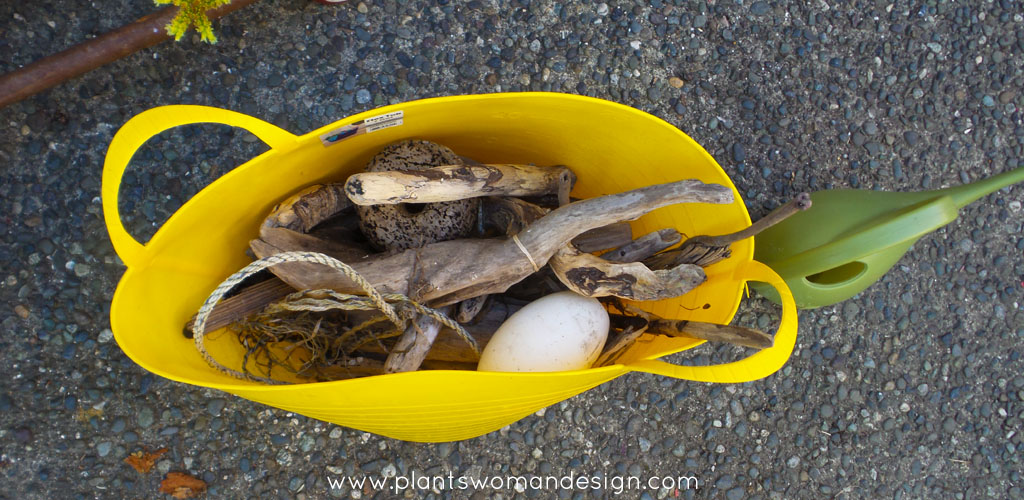
Because I live near the beach I went and collected some driftwood and bits of beach debris. Because it is close and free I used it. You can use anything that is around you. If you live near a wooded area you can use old logs, branches, rocks, pretty much anything natural to create the interest around the pots.

plantswoman design succulent container

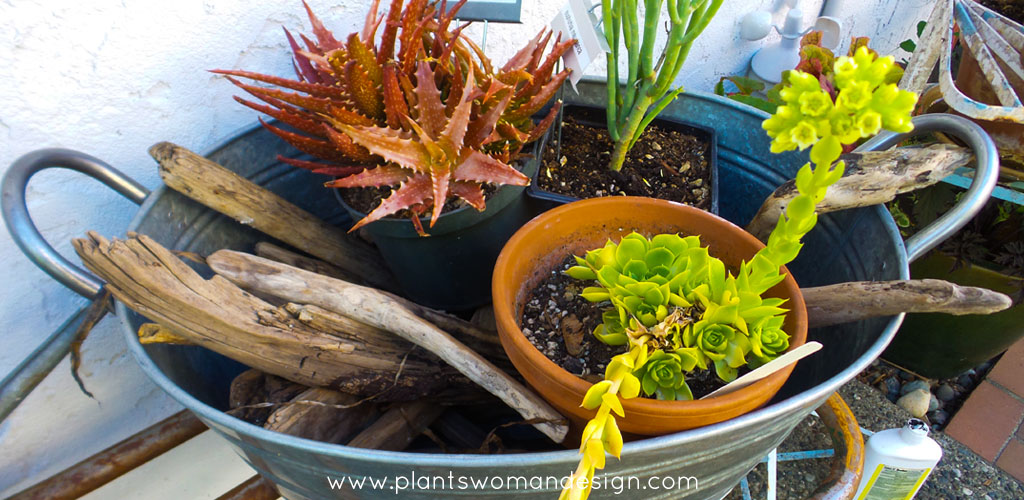
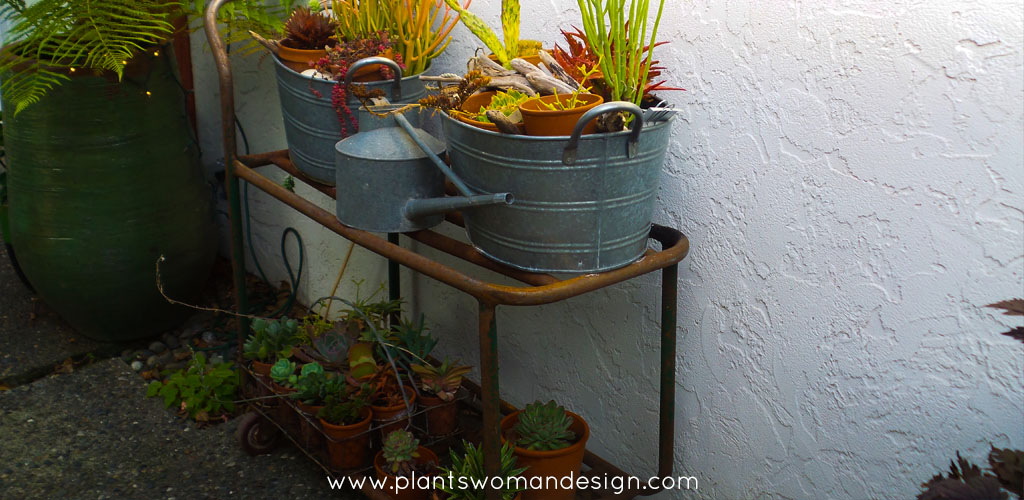
I placed driftwood and debris under and around the containers.   Using a couple of upside down plastic pots I elevated the shorter pots so they all are at approximately the same level. This creates easy watering and same type of sun exposure. The galvanized containers would hold water so I punched a small hole in them to allow excess water to drain out. If I ever wanted to reuse them and have them hold water I would just plug the hole with caulking.

plantswoman design succulent container

Finished container.

plantswoman design succulent container

Galvanized watering cans out of the greenhouse add to the display to finish it off.

plantswoman design succulent container

Bringing the containers out and elevating them gives you a chance to see the interesting things in each plant.

plantswoman design succulent container

Finished Display. Notice the old wheeled cart that the containers are sitting on? This allows me to move the plants around. When they first come out of the greenhouse they will get sun burnt if placed into direct sunlight. So, I move them from shade to part shade to more sun over a couple of weeks.

plantswoman design succulent container

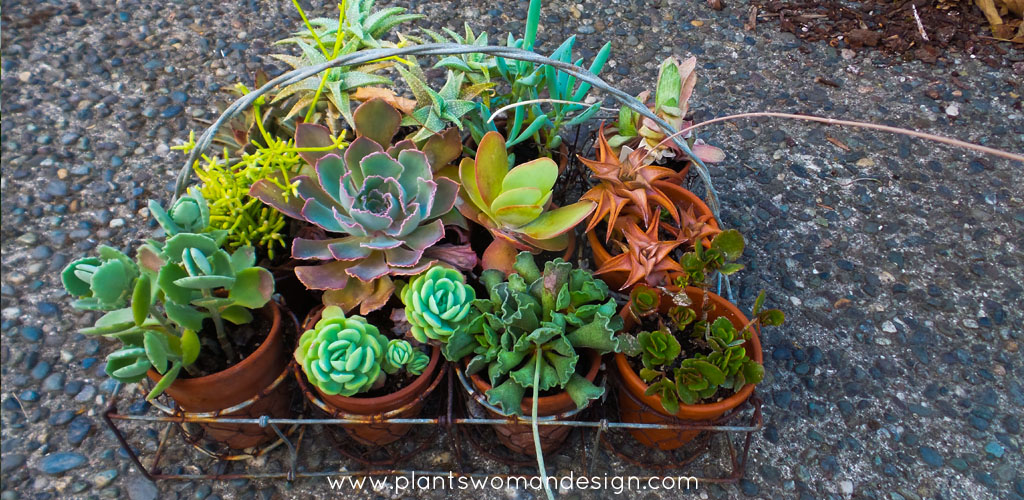
Smaller plants in an old plant pot carrier. This can be carried inside or placed on a table during a dinner then back out again. Versatility is the key here.

Join me on Facebook and share your succulent creations!

Water Rant

Water Rant

Why blog about water. Why not? It is a precious resource that is in short supply this year. Just ask the trees and plants in our landscapes and gardens.   For some reason the recent calls of ‘drought, drought, drought’ have given people an excuse to kill their plants. These are lovely plants that have been getting by for years with little or no water other than that which falls from the sky. This year our sky has dried up. The plants are still expecting a daily drink so they can continue to live. BUT well meaning people hear the word drought and, instead of making sure the very things that need it most get enough water to survive, don’t even give them a drop. Mind you in my area we do not have water restrictions, notices about lawn water or car washing. No public outcry against mindless useless waste of water. This is the first week that the City of Seattle has asked homeowners to reduce the consumption of water by 10 % as a precautionary measure.

washington drought

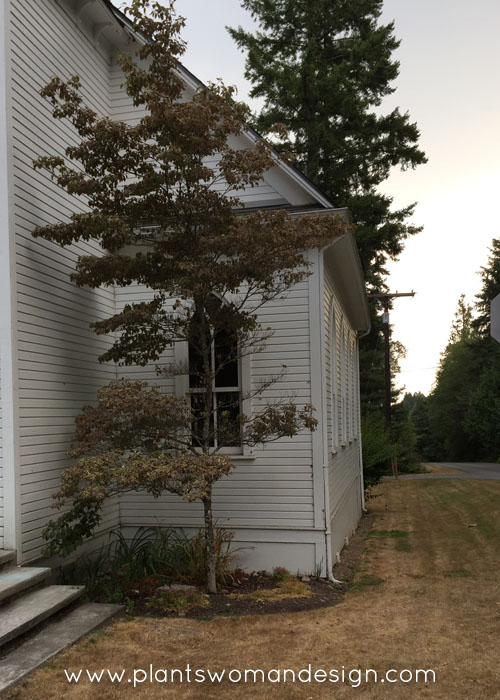
Here is a picture of a lovely dogwood growing next to the church. It is at least 20 years old and it is dying. No water.   Leaves are curling and dropping. It really doesn’t need much just about an inch a week around its drip line. The historical significance of this tree should demand its upkeep. We have many historical trees on Bainbridge Island and many are protected from development. However they too are stressed and may be dying from lack of water.

washington drought

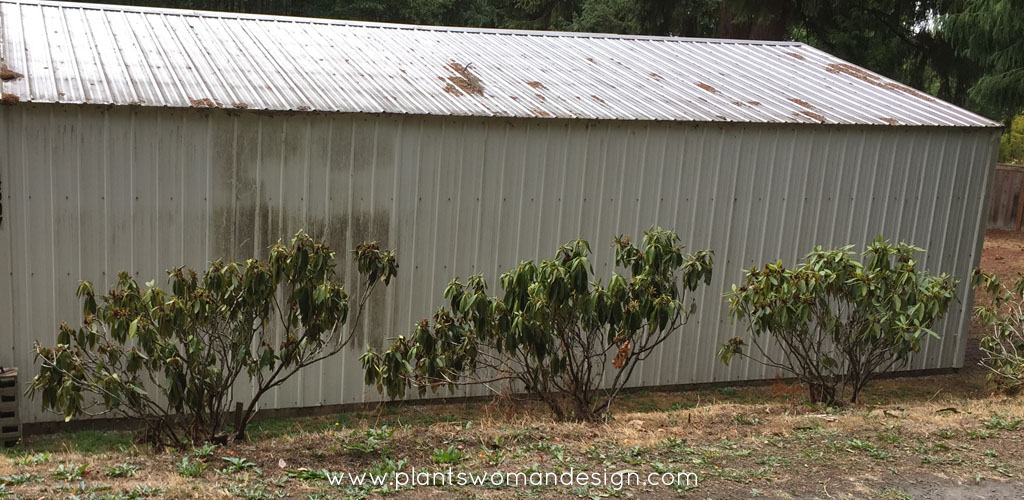
This row of rhododendrons has been planted for several years. They give off oxygen that helps the environment, they have a screening value for the house and there has been money spent on them. To replace them at this more mature size will impact the wallet more significantly than before and help to fill up the landfill. Giving these plants a small drink of water once a week will prevent the waste of these resources.

washington drought

Don’t even get me started on the parking lots were the sprinklers haven’t been turned on at all and mature trees and shrubs are all dead. New commercial construction projects with re-forestation of disturbed land are also dead. Temporary irrigation heads and hose run by all the native plants but no water is on. You can drive down the road and see mature firs and maples struggling to survive. We can’t do much about the verges of the highway but we can help plants around us live.

washington drought

Here are a few signs that the plants in your garden or area that you live in are in need of water.

  1. Premature leaf drop. No Fall is not here early simply because the leaves are falling off, it is stress. Water it.
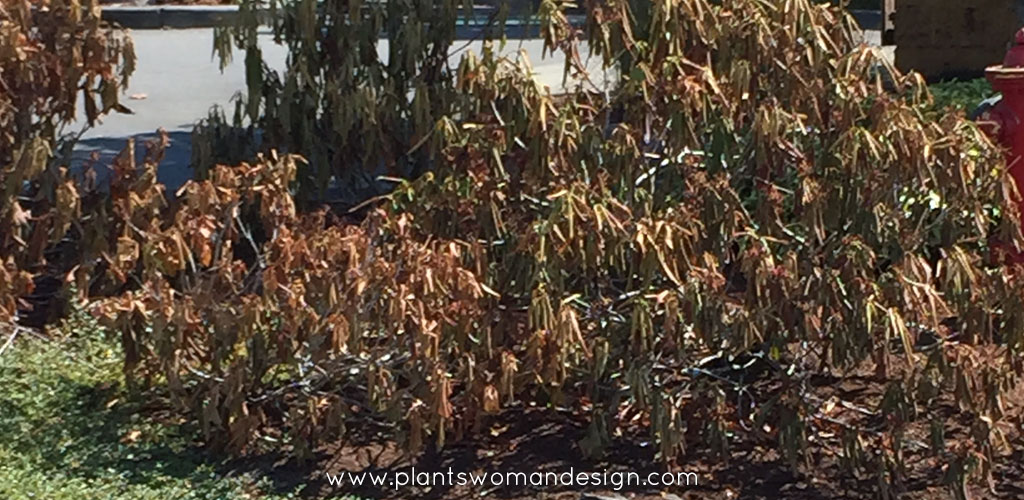
  2. Evergreens wilting. Rhododendrons, pines, pieris and other evergreens should have leaves at a natural angle. If they are downturned they need water. Water it.
  3. Brown tips of plants. Not enough water to get to the end of the branches. The tips die first and the plant shrinks its resources to the middle of the plant to help it survive. Water it.
  4.  Lots of cones or seed pods. This means that the tree could be stressed to the point of death. The method of preservation of the species for plants is that if they are stressed they will send out more seeds so the seeds can grow into new plants after the larger tree is dead. WATER IT!
  5. Other plants close by are dead. This likely means that the shrub or evergreen may look ok (not great) but will not make it through the winter because the roots are unable to be full and plump with water. Fine hair roots will dry up and go away without water and even when water comes they will have to re-grow to recover. WATER IT!!!

Okay, rant over. Let’s talk about how to water wisely so we are not wasting this precious resource.

  1. Water around the root base thoroughly at least one time a week on mature established plants. New plants (less than 2 years old) need water at least 3 times a week. You can use a soaker hose with mulch over it (mulch helps hold the water against evaporation), BUT make sure it is on long enough. The soaker hose has to be close to the plant, the water does not travel like on a sprinkler so if it is more than 1 inch away the plant will not benefit. If it is only on 1 side then only one side of the plant will have roots.

I visited a garden last week where the soaker hose ran down the center of the bed with plants at least 1 foot away and they were all dead. That was a waste of water.

  1. Mulch with organic mulch to help retain moisture.
  2. Put a small can or bowl out in your garden to measure water, 1 Inch per week during this hot dry summer. A cloudy day does not produce water from the sky, just clouds. Yes, it helps relieve the plant from relentless sun but water is still needed.
  3. Use your irrigation system for less time and less often. Change the times and amount of flow to get to the 1 inch mark. If some plants struggle individually give them a little more. They will eventually become less water greedy if weaned off the water slowly.

As I was driving home today I drove by a car lot with a lot attendant hose in hand spraying a rhododendron shrub at the edge of a bed. It was completely brown, leaves folded in death, obviously beyond the help of water. Don’t waste water on plants that look like that. We still have most of August left, all of September and October to go. Often times the warm weather continues until October and sometimes the dryness continues as well. October 2014 broke all records for being the warmest and wettest on record.

OH…. Let’s talk about that. Yes the snow pack is down but last year was the 5th wettest year on record with a crazy 48.50 inches of rain, 11 inches above normal! Seattle Public utilities held more water in the reservoirs than normal because of the lack of snow pack. I think there is still water in the hills, reservoirs are still holding water and there is still enough water for the plants and us. Let’s Use it wisely.

Boedel Garden Party 2015

Boedel Garden Party 2015

As I walked through the Bloedel Reserve Thursday night I remembered the first time I came. Fresh out of school, I worked for Junkoh Haraui at Bainbridge Gardens where I started designing. As Junkoh and I talked he said in his gruff way ‘Go to the Bloedel Reserve, you will find out what gardening on Bainbridge Island is all about’. I went.


Amazement and awe were all I could say. Pathways wandering through beautiful groves of trees, a garden where moss was celebrated not killed and the beautiful natural pond with a weeping willow and geese were only the beginning. The birch trees with white trunks standing in a sea of salal still influence my designs today. And the peaceful, more formal, long reflecting pool still makes me pause and enjoy the vision of tree branches on the water seeming to lie on the ground.   Reflected light, contained by hedging on all sides, creates a tableau that is arresting in its simplicity. The site of gravel raked into a pattern at the Japanese Garden was a first for me. The restraint in plantings and the way the individual trees are set apart and brought to focus also influences my design thoughts. I have since studied Japanese Gardens and understand and enjoy it more.

As I walked last night I wondered if I enjoy it more today or then. The newness of it, and the questions I had about what I was seeing were so numerous they overwhelmed me. I probably did not see the peacefulness or feel the calmness, as I should have, I just wanted to know more. My enthusiasm and inquisitiveness is what I really remember. WHAT was that plant!

Now after 15 years on the island, numerous trips to the Bloedel gardens, and studying the unusual plants there I know most of them. Gracious gardeners that know more than me shared their knowledge and love of the garden. Now when I walk through I do enjoy the peacefulness, calmness, and memories of people like Junkoh. I realize what a great gift Bloedel is and am amazed at a family that would and did leave such a legacy for generations to enjoy. It truly has been an inspiration to me from the beginning.

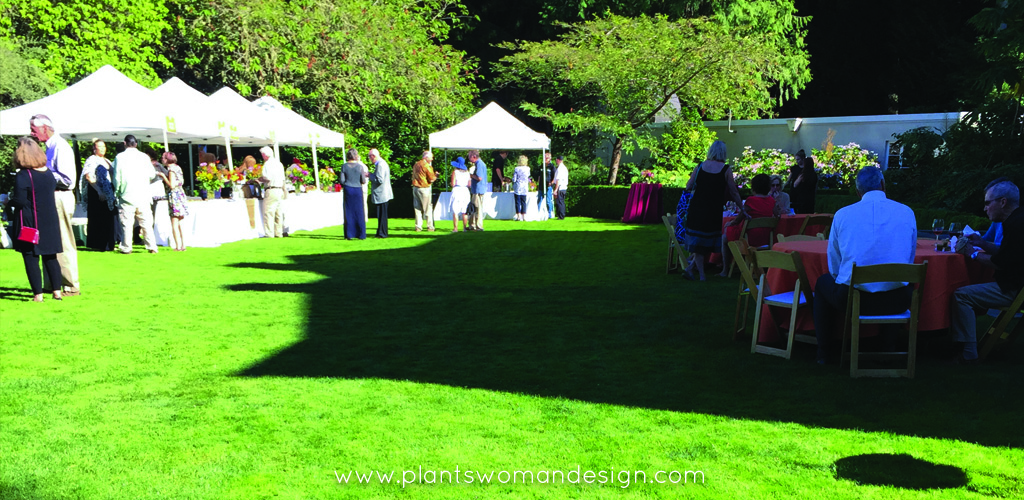
Last night I joined hundreds of people in raising money to fund important on going projects at the garden. Sponsors, wineries, and local restaurants gave of their resources to entertain and encourage the attendees. Individuals gave and purchased auction items. Enjoying the garden in that setting with like-minded people was indeed special.

If you have never been to the Bloedel Reserve Gardens you should go. No reservations are required and it is worth a special trip. If you are interested in attending next years Garden Party put it on your calendar. It is usually in August and you can sign up online to receive newsletters that will keep you posted on events. Support is always welcome but going and sharing the garden with others is the original purpose of the Bloedel family.

Summer’s Bounty

Summer’s Bounty

There is something about the fragrance, color and lushness of the garden that is unbelievable at this time of year. Harvesting vegetables from the garden and feeling the warmth of the soil has always been one of my simple joys. The summer night is still and the moon is huge and bright. Fragrant Nicotiana and jasmine scent sighs in through the bedroom window bringing with it a calm soothing sleep.

Here are my 5 favorite ways to celebrate Summer’s Bounty

summer bounty

1. Pick vegetables or fruit and make something to share. From your own garden or at a roadside u-pick garden it is a great activity for you alone or to share with kids. If you don’t have a kid available you can always borrow a neighbor’s. I know several who are available to help with harvesting, cooking and eating. Touching the earth, feeling its warmth and smelling the soil brings us a connection with our dependence on the earth. The food bank in your area is happy to have any excess food you may harvest or swapping with a neighbor for what they might have is another way to share.

home grown melon

2. Visit a Farmers market and share. It’s wonderful to visit with vendors, get good information on what varieties they grow so you can grow them next year. Seed packets are great but sometimes tasting a veg or fruit gives real taste to choices. There are wonderful sweet cantaloupes that grow in the San Juan Islands. I grew a variety from the seed rack this year but next year I will try to find out what variety they grow. Theirs must mature quicker because we were eating them in July and mine are still green.

home grown flowers

3.   Pick a bouquet of flowers from your garden and share them with a friend. Maybe with a person that lives in a condo or an elderly person who can no longer get out. Maybe with a friend who just needs to know you care. If you don’t have a lot of flowers in your garden do an arrangement of leaves and twigs. I’ve also been known to engage in ‘civic pruning’ i.e. collecting branches and flowers from roadside ditches or abandoned properties. There are endless combinations to try. You can always pick some up at the farmers market or a roadside stand too. The point is to enjoy the beauty, grow them or shop locally, and share what inspires you with others.

4. Go out into a local garden or footpath. Just getting out among the trees and growing things is exactly what will encourage you and inspire new ideas in your mind. We have lovely Bloedel Reserve here in the Pacific Northwest. It’s a stunning place to stroll, contemplate and rejuvenate. Supporting local gardens with your patronage is as important as supporting them financially or in volunteer work.

Stroll for Well-Being

Blodel Reserve offers a ‘Strolls for Well-being’ program where participants take part in planned walks and meditations with themes focusing on awareness, forgiveness, and gratitude to help people cope with life’s twists and turns.   Garden as therapy!

Conserve Washington

Go out on a hike with The Nature Conservancy.

hummingbird moth

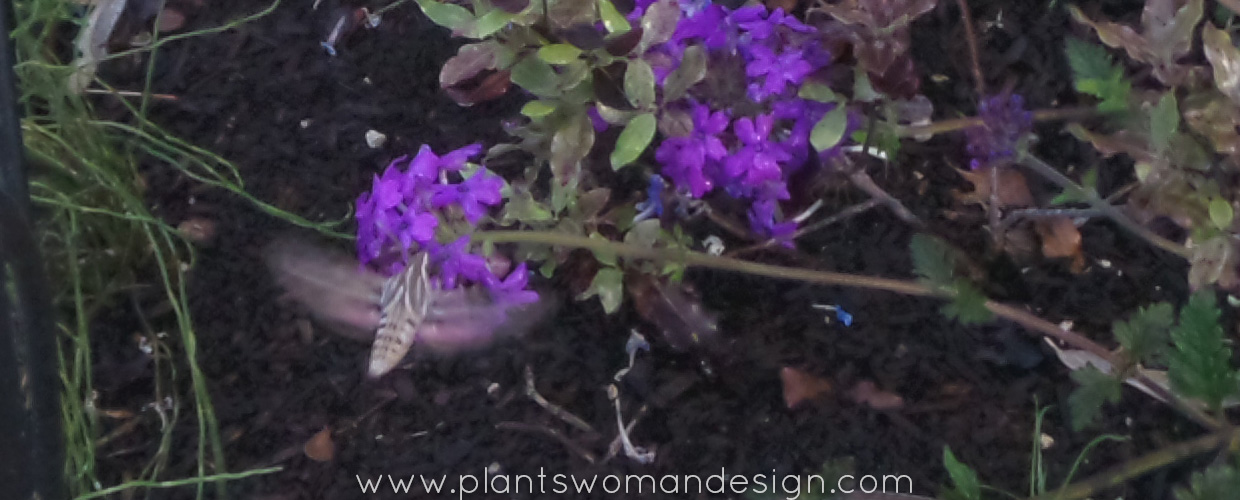
5. Sit outside in the evening. Watch the moon rise, listen to the earth falling still and quiet. See night flying insects, (wear mosquito spray – Burts bees’ makes a great one), look for bats and see the stars come out. I grow several types of flowers that only smell at night. Enjoying their fragrance and seeing the beauty of their white flowers is also a way to enjoy the bounty of nature.  A few weeks ago I met a Hummingbird Moth, check out the video below.

How do you enjoy the summer bounty in your area?