by Susan | Nov 17, 2017 | gardening, LB Tutorial: Garden Critters
Blowing, raining, storm after storm. Finally, the ground is showing signs of recovering from this summer’s drought. The fall leaves have been spectacular this year. Beautiful colors because we had a good rain followed by cold temperatures. The garden beds are a mess at my house and the thought of raking and raking makes me anxious. However, there is a new train of thought about fall clean up that is making its way to main stream. Leaf litter left lying on the ground is actually very useful. I will have to admit that sometimes the last leaf hits the ground before the rake comes out and that can be the end of November for alder leaves. Last year the sodden rainy winter we had the raking had to wait for a few dry days. Pulling off large branches from trees and uncovering plants that were buried was done but general raking, cutting back and tidying were much delayed. Even so, I observed that the beds under the leaf litter were soft, mostly weed free and soil looked amazing. This is evidence of a new school of thought, Garden Messy for Wildlife. Here are a few ideas for you…
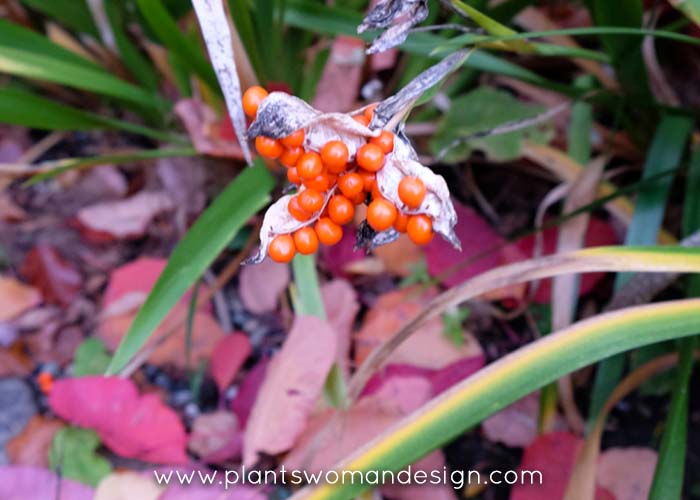
- Leave things with seeds (many things in my garden) up and not cut back until the birds and beasties have had their fill. This could mean January in some areas. Grasses, perennials, annuals, and shrubby fruits should all be left to provide winter habitat and food for birds, and other animals.
- Leaf litter left undisturbed in many areas creates habitat for nesting mice, butterfly cocoons, caterpillars, ladybugs and many more beneficial insects. Snakes, although really yucky, are very useful in the garden and the leaf litter creates an insulating layer for their little dens. Some bees nest in the ground and the leaves provide cover for them too.
- Speaking of insulation. Leaf litter will protect soil from being washed away and will insulate plants that may need protection from an extreme winter weather, including cold winds.
- I have a big area of lawn grass that I let go to seed every year. Under the apple trees the grass can grow up to 3 feet high. Just before the weather gets so bad that the grass lays down I cut it down and leave it. The seeds go back into the ground or become food for overwintering birds, mice, voles, and other inhabitants of the grassy field. (yes I’m very careful, mow on highest setting, and go slow to give ample running away room for small animals living there) I mow it again in the spring when the weather becomes about 50 degrees and the first signs of new growth start to appear. This is the ultimate lazy method for sustainable pasture and mulching. With the added advantage of not mowing weekly as the former owner did.
- Separating the fallen branches and leaving them on site in a pile will also create habitat for overwintering animals. After the weather warms in the spring (about 50) and the inhabitants have moved on or hatched out you can remove whatever hasn’t composted.
There are three areas that I do clean up right away. The area under the large maple in the front yard has so many leaves that it will actually kill the lawn underneath it. I blow them into a hollow near the stream or mulch them and add them to the compost pile. I also clean up rose leaves and pull plants from the vegetable garden. Rose leaves can keep mold and mildew close to the rose plants which will transfer back on to the new leaves in the spring. The veg garden needs to be cleaned up so pests can’t stay in the beds ready to pounce in the spring. Snails and slugs would hang out in the rotting vegetation if left in the beds. I also continue to use slug control by the kale, broccoli and leafy greens throughout the year. We never get so cold that they die completely.
Here is a link to “
Garden Messy, Pledge to be a Lazy Gardener”
It has a lot of great information about conserving habitat in the garden. You can even pledge to be the Lazy Gardener on the site. So have a seat, look outside and enjoy the lazy days in front of the fire.
by Susan | Oct 13, 2017 | LB Tutorial: Garden Critters
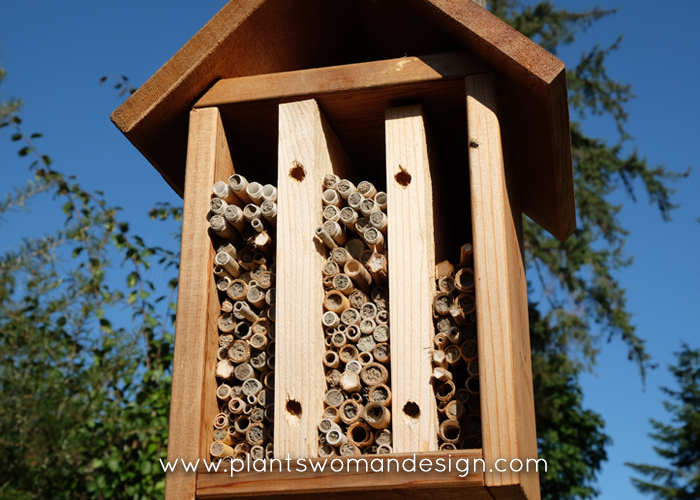
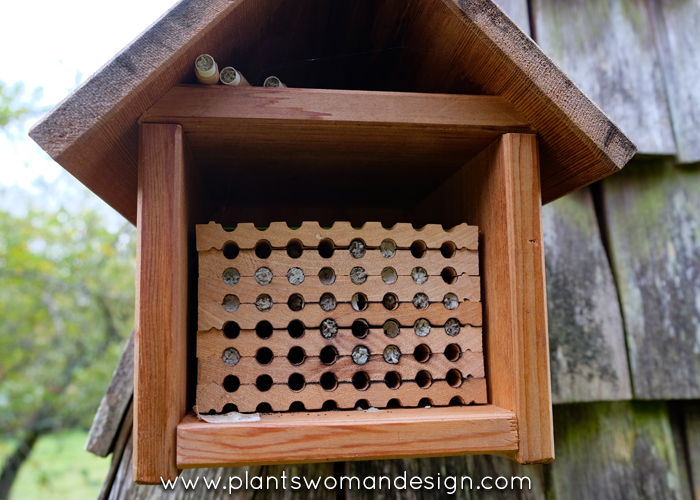
It is time once again to harvest the Mason Bees. One of my bee houses is full this year, the other one not so much. I’m wondering if birds helped themselves to the cocoons before they had a chance to hatch out.
Last year I harvested about 100 bees. I gave some to my sister as her Christmas gift and put the rest back in the garden. The location near the vegetable garden was full of bees but the one by the apple tree was mostly empty. That is not to say there was no pollination. My apple trees were amazing this year.
Here are the things I observed this year.
Mason Bees will live in the bee houses but also in the ground. There is a sandy area by one of the vegetable beds that had many bees going in and out of all season long. They had created their own little colony in the ground. Remember these are Mason Bees so they don’t sting and aren’t aggressive.
If you see yellow and black wasps these are not mason bees. Those would be not good to have in a ground nest as they do sting and are aggressive.
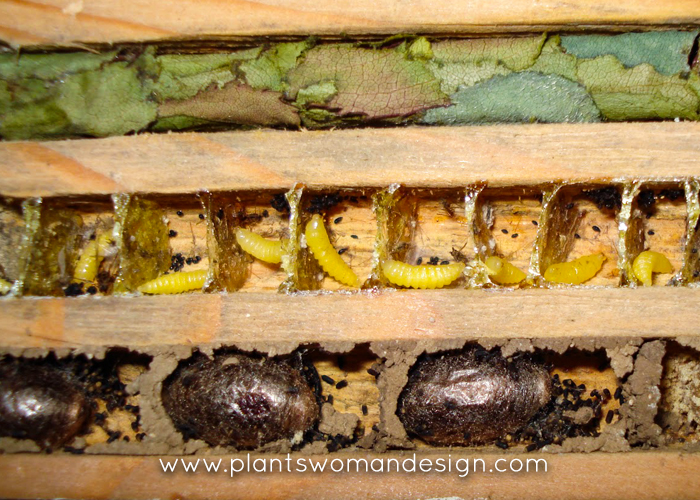
My first ever leaf cutter bees. (Megachilidae) I found bees going in the ground by the fountain pulling bits of leaves in with them. This was during July and August. Mason bees are going dormant by then and leaf cutter bees take over. You can purchase leaf cutter bees by mail order or in the nursery to help pollination continue throughout the year.
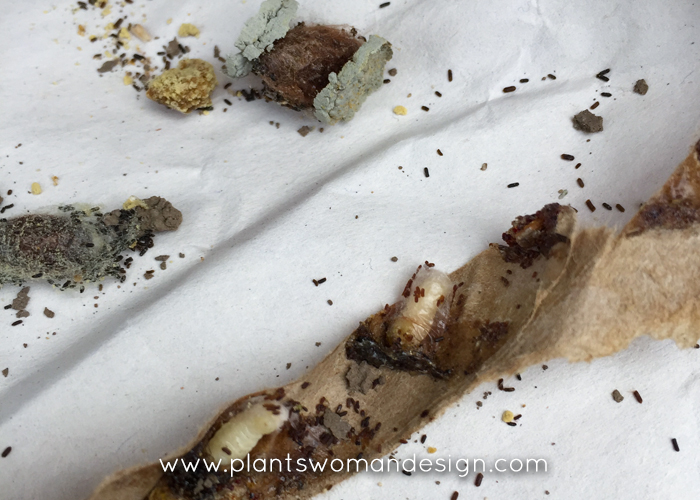
When I opened up my mason bee tubes I also found some little larvae in with them. They had pollen with them (the food for hatchlings). They are actually leaf cutter bees that have used the mason bee house for a home instead of making one out of leaves. I did not find these bees in the house last year and probably would have thought that they were not supposed to be there.
Cleaning the Cocoons:
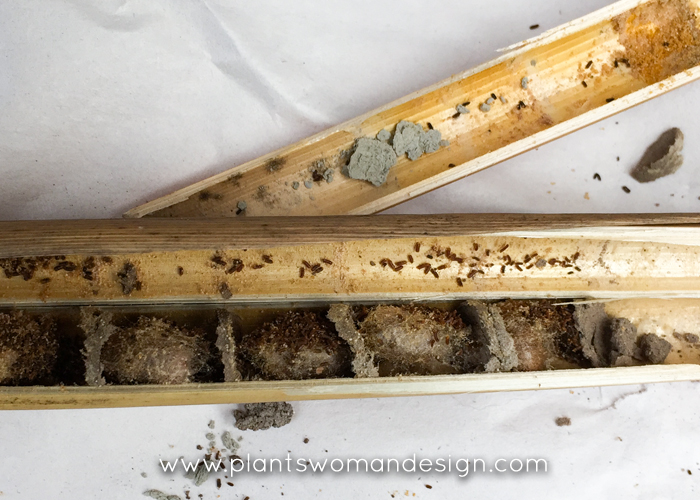
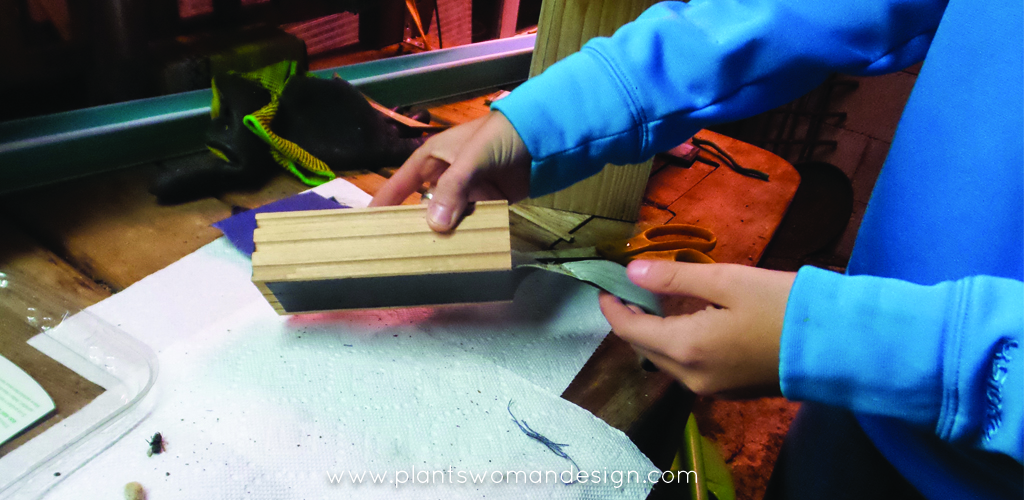
Separate the tubes either by splitting the bamboo or unwrapping the paper tube. Carefully pull the cocoons from the tube and put on paper towel.
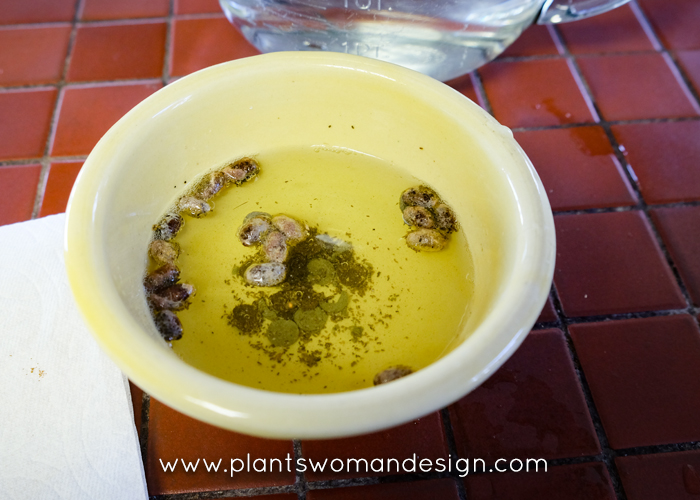
Prepare a solution of water with bleach. I use 1 tsp of bleach per 2 gallons of water.
Drop the cocoons in the water and swish around gently for several minutes. The debris will drop to the bottom and cocoons will be mostly clean. If there is a little pollen (yellow dust) on them I don’t worry about it.
Rinse twice in clean water with about 5 minutes of washing time.
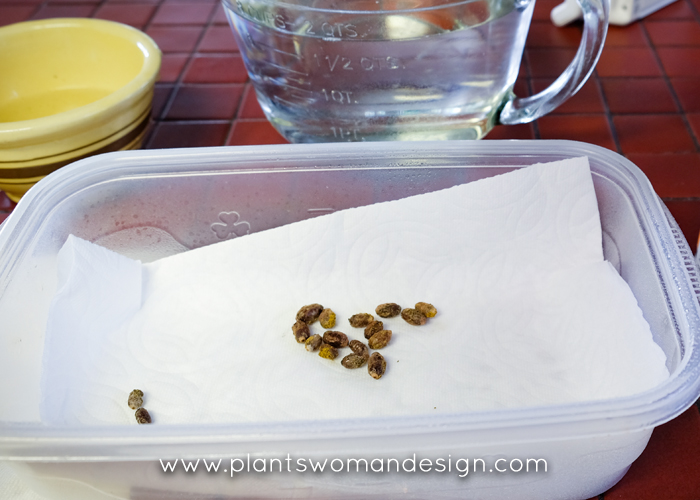
Spread on a paper towel to dry.
Pack into a plastic tray with paper towel under the babies. Mist gently with water and poke some holes in the tray for air circulation.
AS they rest in the refrigerator over the winter (or consistently cool 45 degrees) or shed outside. Mist them occasionally so they don’t dry out.
It is a privilege to share the word about bees that are so important for pollination. Remember: Native bees are 100 times more effective at pollination than honey bees. This makes a big difference in the production of the food we all eat.
Be sure to catch up on our Mason Bee journey by clicking on the blog posts below.
by Susan | Oct 21, 2016 | LB Tutorial: Garden Critters
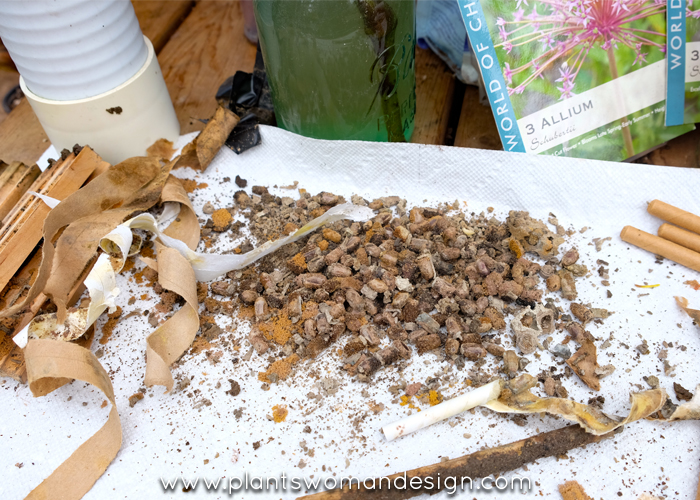
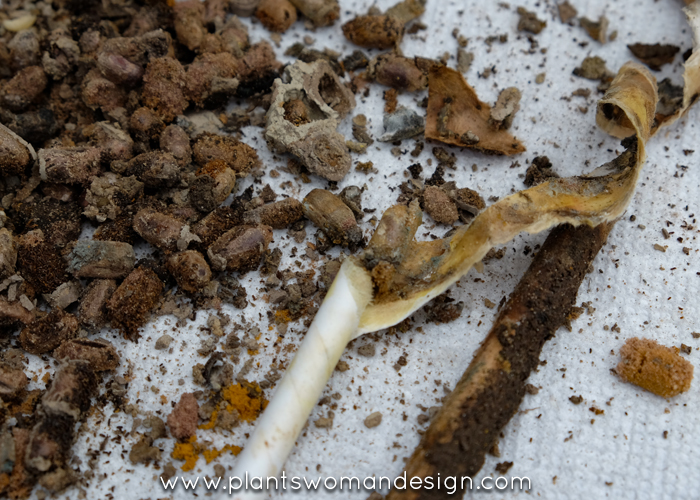
This has been a good year for my mason bees and they were fabulous in my garden. The apple trees were loaded with fruit and the veg garden did well. Now It is time to harvest the bees again this year. One of things I did different this year was to use cardboard tubes along with the wooden trays. The tubes were added next to the tray in the house. They were a little hard to get out because they were wet and swollen with rain. The little bees also went behind the nesting block and built quite a metropolis out of mud. Not having seen this before I was a little worried about the possibility of mud houses being wasps instead of bees. A quick call to Crown Bees assured me that these were industrious bees that created a little adobe home because they ran out of room in the tubes. The solution? More tubes of course. I had already tripled the number from last year!
A few little known facts about mason bees (or maybe they aren’t):
Yes, you should harvest the bees every year. Pollen mites will eat pollen then attach themselves to the bee and be reintroduced to the tubes when they come back to lay eggs. Harvesting them assures clean tubes and no mites on the cocoons.
Yes, you can have two harvests each year. When the tubes fill up in the summer you can pull them out and put in clean ones. It won’t be quite time to actually harvest them so
Crown Bees recommends hanging them outside in a
Bee Guardian Bag so they have the warmth to mature but are protected from predators.
No, don’t use drilled wood, plastic straws, or bamboo straws. These are hard to clean and harvest the bees. If you have some already there is a special technique using a paper bag that allows them to leave the nesting material and not be able to come back to it. Providing the new tubes nearby will insure that they will move into the new accommodations instead of old nesting material.
No, one size does not fit all. Crown Bees is now selling different sized tubes to encourage small native bees to nest with the other bees. They are hearing from other gardeners about the bees that are nesting in smaller holes and now provide good nesting material to encourage native bees to hang out with the ones you bought or the community that you are fostering each year.
Mason Bees: bee keeping made easy, and stingless. Everyone should get involved.
by Susan | Oct 30, 2015 | LB Tutorial: Garden Critters
Winter is just around the corner and it is time to harvest my Mason Bees. Not everybody does a harvest but for the best life expectancy constant winter temperature is important.
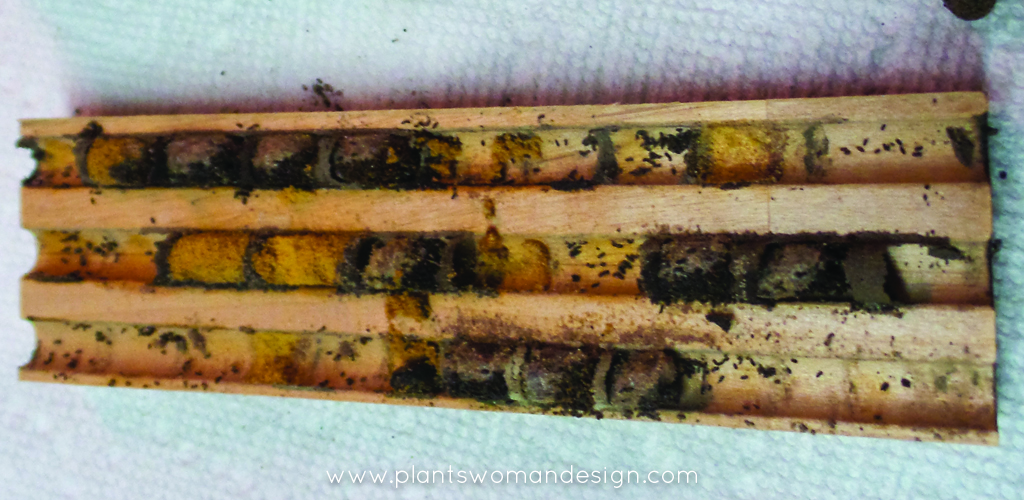
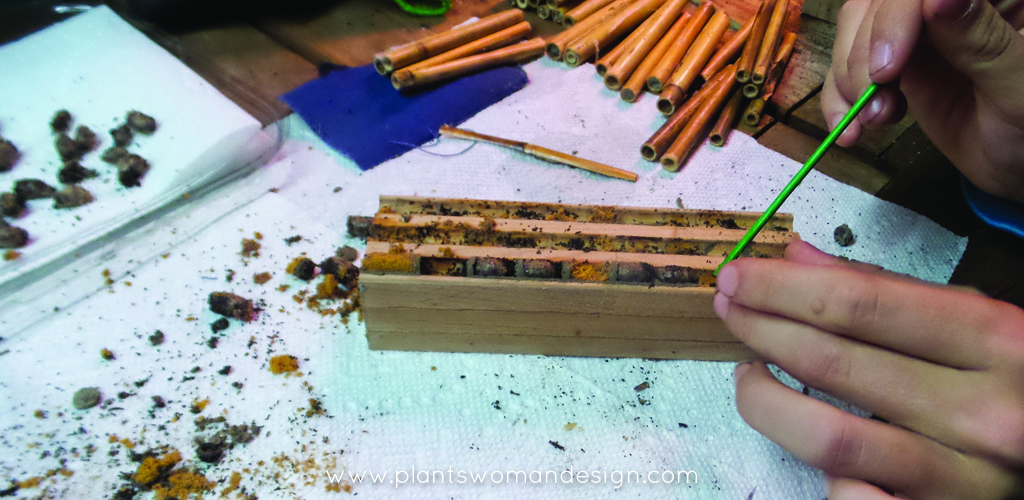
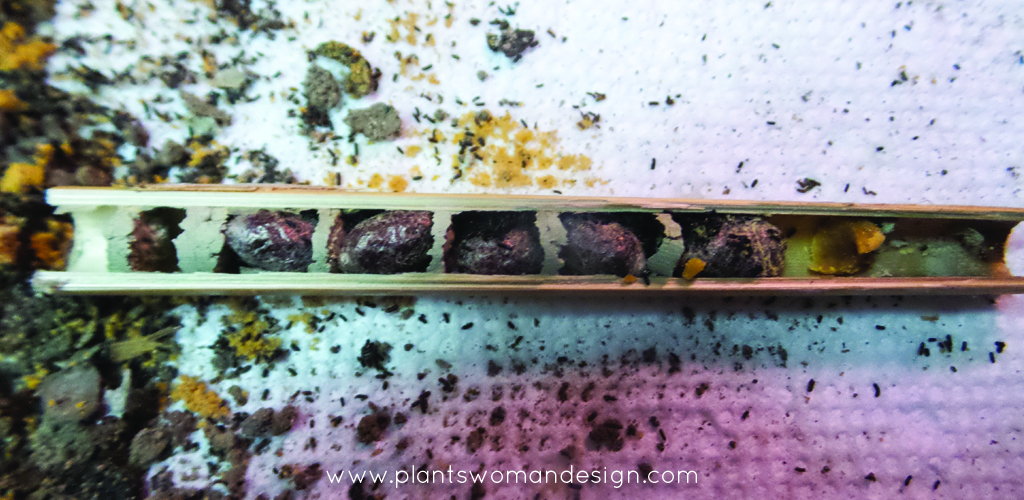
First some help with the bee removal from my Granddaughter Kayla. We took apart the block of bees and separated all the material in the tubes. There were bees, pollen, mud, and feces. We had a couple of different type of tubes. The bamboo tubes have to be separated by cutting into one end and the breaking the tube apart.
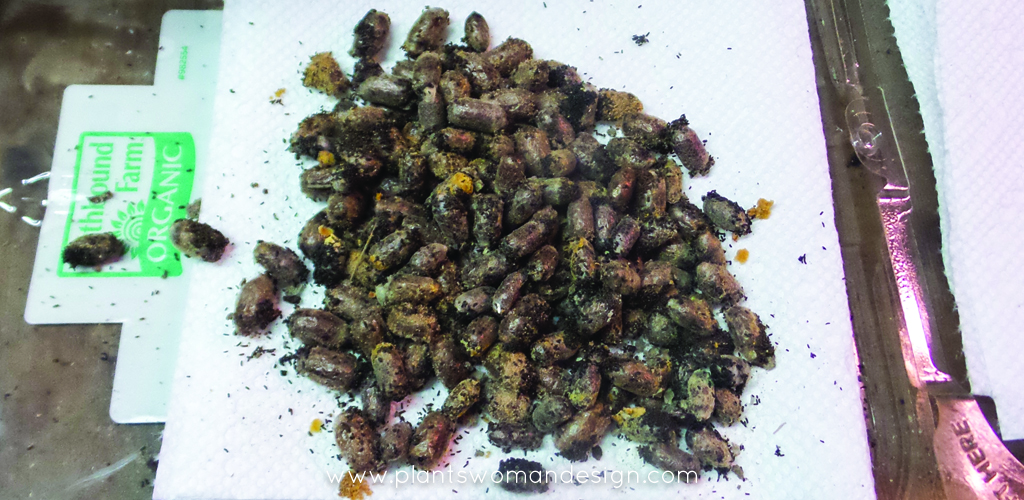
We carefully pulled out the cocoons and threw away the mud plugs and rest of the debris. There are two sizes of bees. The bigger ones are the females and the smaller ones are males. There are some empty cocoons, these can be from pests, or the bee wasn’t good at building the cocoon.
In the pictures you can see some pollen and also some big sections of orange looking pollen. I think this might be mites so I will clean the cocoons with sand to get rid of the mite debris around the cocoons. Usually the mites will not really affect the bees when they are not in the tube but better to be safe than sorry.

After they are clean I will put them in a plastic produce box with a little moist paper towel in the bottom. It will stay in the refrigerator until next spring when the weather warms and then back they will go out into the mason bee house to pollinate again.
The most interesting things are the many small cocoons that are also in the tubes. These are likely native solitary bees that made a home in the bee house too. There are over 130 different varieties of bees in the garden. These will be stored with the mason bees. There are some tubes that are permanent in the house and they will stay outside until the bees come out of hibernation and they will make their own way out.
I’m excited that I have so many more bees than I put out last spring. Quite a harvest!
by Susan | Mar 15, 2015 | LB Tutorial: Garden Critters
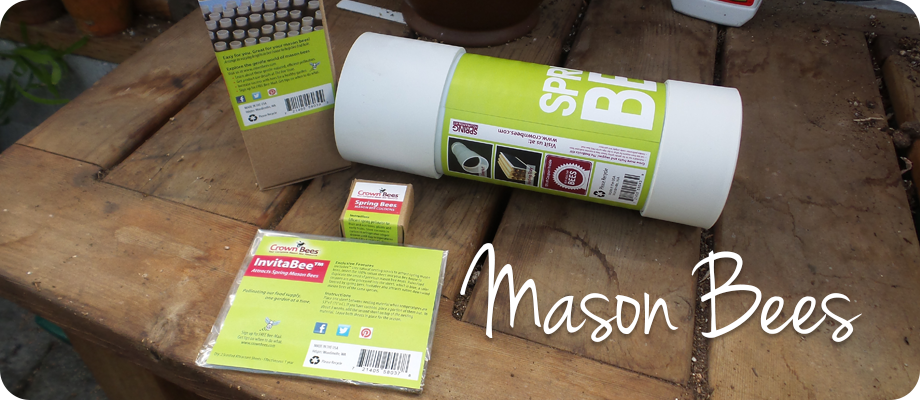
Back in February we wrote about Mason Bees and the tremendous job they do pollinating the garden. With our warm weather starting early this year I purchased my kit from my local nursery, Valley Nursery, two weeks ago. The guidelines say to wait until it is 53 degrees and warming in the daytime. It has been getting up to 58 – 59 in the daytime and yesterday was even warmer so I’m going to put my bees out.
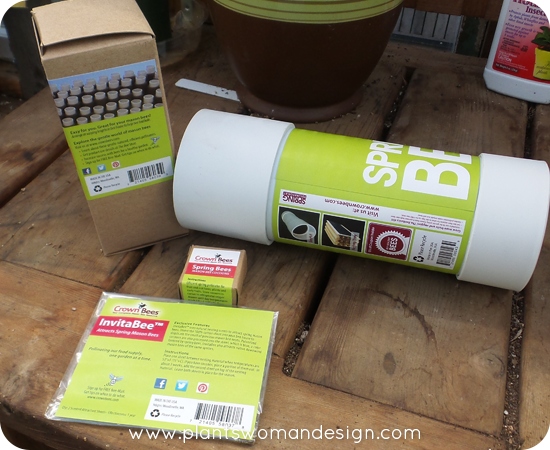 This is the Crown Bee Kit I purchased. The bees come separate so you can get more If needed. I had a hard time deciding where to put the nesting box. It needed to be where the sun would hit it early in the day to warm them, not near predators (birds mostly), and within 300 feet of a mud/water source. Wanting to see them in action I placed it on a post at eye level next to my vegetable garden plot behind the green house. Mason bees need a ready food source (something blooming) when they emerge. The espaliered fruit trees are almost ready to bloom so they will be available for early food for the bees along with the Forsythia, hellebores, and Indian plum (oemleria cerasiformis) blooming now.
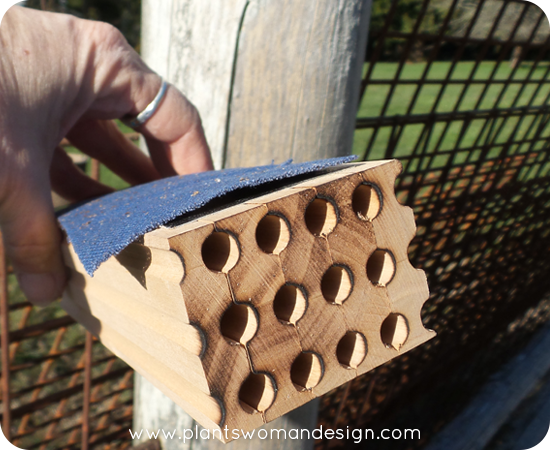 Following the directions, I placed the lid on the post and used screws to attach it. I left the top screw out a little and tightened the bottom one so there was a little slant. This helps to protect the home from rain. However, the downward slant can’t be too great or the block of nesting holes will fall out.When the tube was attached , I took off the clear plastic cover, slid the block inside and put the bee attractant, which helps the bees find their home when they first emerge, on the top.
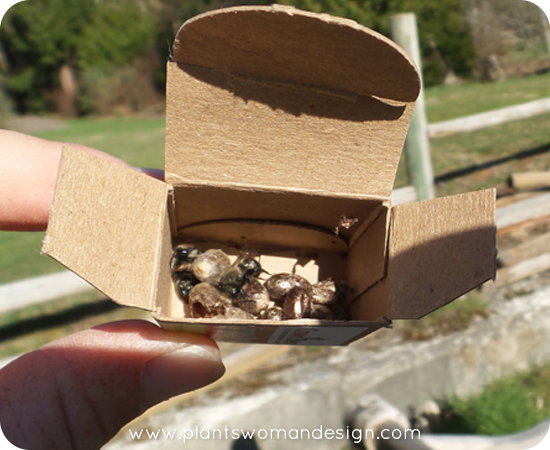 When I opened the box of bees, it was so exciting to see that a couple of the bees had already emerged from their cocoon! I could see them sleeping in there.
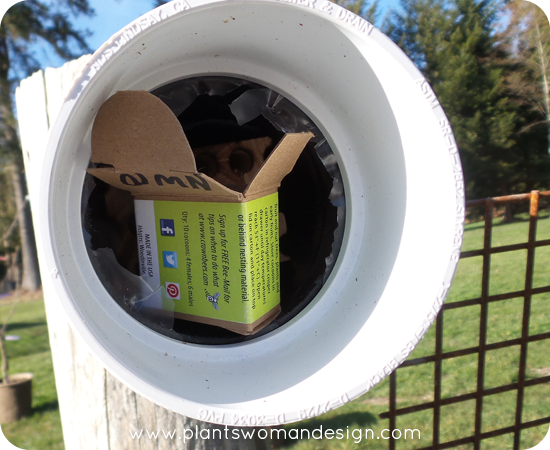 I placed the box near the opening so as they emerged they would see the nesting box. When I checked the next day I saw two bees flying around the box.
I want to build another box this weekend and try out the straws I bought. Straws are an alternative nesting material for mason bees that are disposable. When the season is over, the straws are taken apart to harvest the bee cocoons. The box I have now can be taken apart and cleaned after harvesting the new bee cocoons. The instructions recommend taking the cocoons out in the fall and storing them inside a refrigerator or cold shed until spring arrives to start the process again. Removing the cocoons and storing them protects them from predators in the winter.
Are you jumping into Mason Bees with us? We want to hear about it! Leave a comment below or follow us on Facebook.
by Susan | Feb 20, 2015 | LB Tutorial: Garden Critters
We have had some beautiful spring days….. Oh, wait a minute, it isn’t spring, it’s only February. I’ve been busy pruning my apple trees (severely) and watching the buds swell. The rest of the nation is covered in white and we are having 60 degrees and sun. No real accumulation of snow in the mountains probably means water shortages in the summer (all part of climate change I think). But I’m getting off track a little.
Mason bees, yes!
Very important pollinators of the fruit trees on my property and surrounding plants. Last fall I said I was going to get bees this spring and I am getting ready to bring them home. When I told Kristen I was getting bees this spring she thought honey bees for honey and wax. But that wasn’t what I was planning on getting. I’m getting Mason Bees. No honey, no wax just fantastic little pollinators that don’t need a lot of vigilant care.
There are a number of bees, called mason bees, that are very good at pollinating fruit trees, so much so that they are also known as orchard bees. Mason bees (members of the genus Osmia) carry pollen on their bellies rather than on their hind legs and they nest in holes. When building their nests, mason bees use clay to make partitions, or cells, for their eggs and to seal the entrance once the hole is full. This unique mud-building behavior leads to their common designation as masons.
Honeybees are very important to commercial agriculture, but native bees like the blue orchard bees are better and more efficient pollinators of native crops. There are 140 species of Osmia in North America. They are all known for visiting fruit trees, such as apples, plums, pears, almonds, and peaches along with any other flowers or veg that is nearby. The blue orchard bee or Osmia lignaria, is prized for its efficiency pollinating fruit trees and is one of the few native pollinators that is managed in agriculture.
Blue orchard bees are about the same size as a honeybee but there are a few key points that help you tell them apart. Blue orchard bees are a dark metallic blue, not striped brown and orange like the honeybee. If you pay attention to where they carry their pollen you can also easily tell apart masons and other leaf cutters from honeybees – honeybees carry round balls of pollen on their hind legs.

Osmia lignaria, the blue orchard bee. (Photo by Scott Famous, bugwood.org.)

Osmia ribifloris, the blueberry bee Photo by Jack Dykinga, bugwood.org
Masons are solitary like most native bees. This means that each one tends to its own brood, instead of having a queen and worker bees. However, they seem to like the company of others of their kind and happily build their nests next to each other. They also readily accept the hollow tubes provided by the orchard grower for this purpose. This proves to be very beneficial to the fruit tree grower because it makes it easy to manage this valuable orchard helper.
We, as home gardeners, also have the opportunity to have some orchard bees in our own gardens by placing hand-made or store-bought bee houses or bee blocks in our yards. These gentle bees rarely sting and if they do it is only in defense. The sting is hardly noticeable like a mosquito bite. Great for getting kids interested in watching pollinators.
The blue orchard bee season is early spring. Once they emerge they promptly mate, search for empty holes that are the right size and shape and go to work stocking their nests. The favorite food for their brood is fruit tree pollen plus some of their nectar. Females collect this food, bring it to their nests, and knead it into a ball, mixing it with nectar and their own saliva. Once they have a food store that is big enough, they lay an egg on top of this mass and seal-off the chamber with a little mud wall and start gathering food for the subsequent cell. They work this way until there are five to eight cells each with food and one egg. Then, they seal the entrance to the hole with a thicker mud wall. The larvae grow and, by the end of summer, metamorphose into pupae and later on into adults, which remain safe and sound inside the nest until the next spring. The new generation emerges the next spring usually in perfect timing with the blooming peach or apple trees.
A quick fact – the first brood cells that the orchard bee makes (those that are furthest back) will develop into female bees, while the ones closer to the entrance of the nest will become males. Scientists believe that bees do this for one of two reasons. Males need to emerge first so that they wait for new females during mating season – putting them closer to the entrance helps them emerge first. Bees also suffer nest predation, and the brood closer to the entrance would be predated first. I think it is interesting that females are much more important to the reproduction of a species than males are. Putting the males as a barrier increases the survival and fitness of the species.
I am picking up my bee houses this weekend and will post about building the houses when I get them finished. My bees will come in later when true spring arrives. In the meantime take a look at the Growing a Greener World episode about Dave Hunter, owner of Crown Bees in Woodinville, and his Mason Bee crusade.
(featured title photo by Thomas Boyd/The Oregonian)


