by Susan | Sep 7, 2018 | garden food, LB Tutorial: Recipes
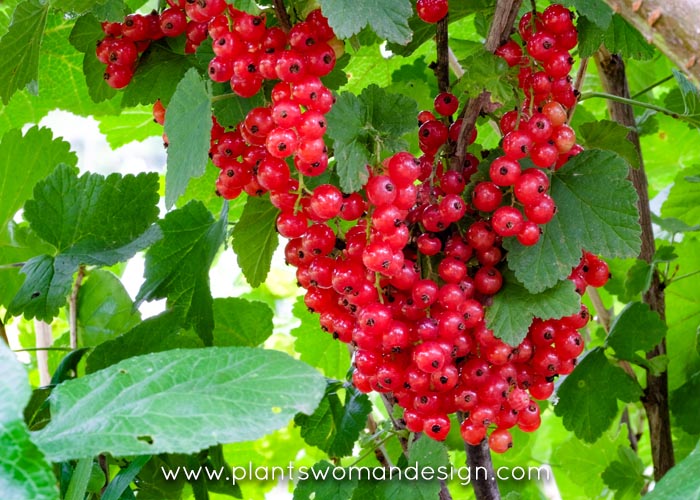
The fun part about having a food garden is that you get the chance to experiment with food. I say food garden because food can be vegetables, herbs, and fruit. There are also chickens in the same place so I guess their eggs are food too! This year was the second year for my Current Shrub. It grew a lot last year but only had a handful of berries on it. This year, due to a better irrigation system there were huge clusters of hanging, almost transparent, red berries.
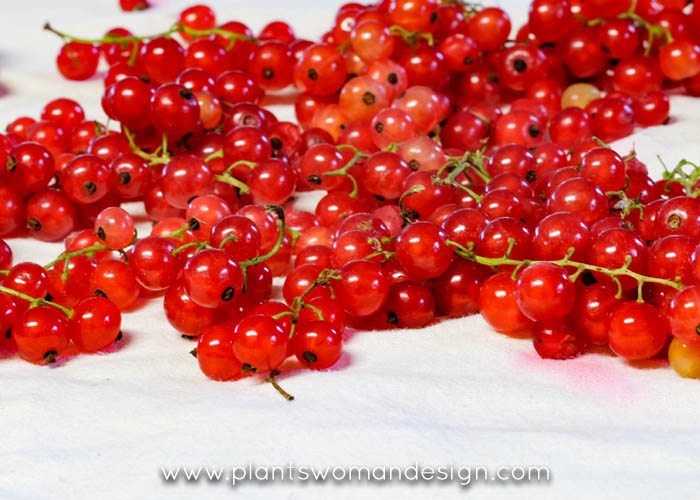
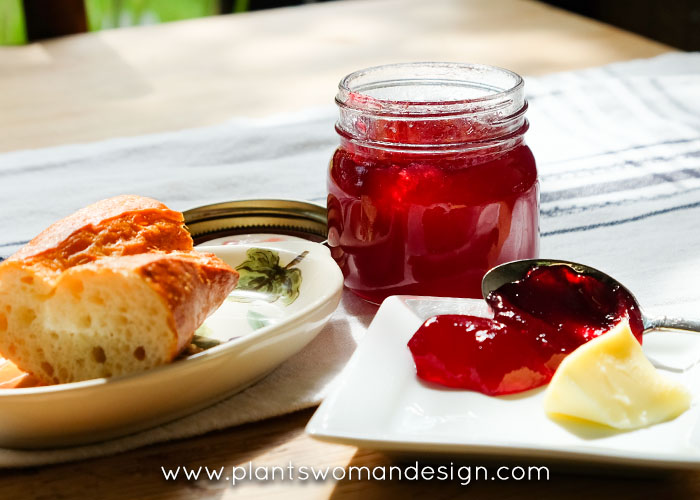
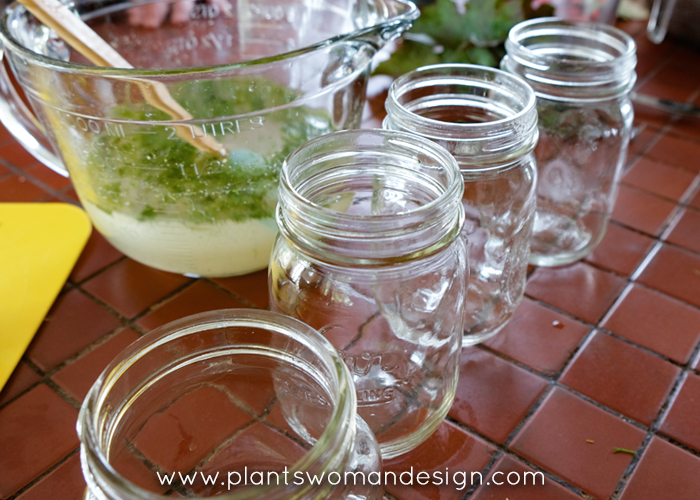
In the winter, red currant jam has many uses so this could be a good time to experiment with making my own. I searched several recipes but didn’t have a specific amount of berries that were called for. I didn’t want to buy any but to do this as if I was a true farmer that could use only what she grew. The recipe by David Lebovitz from his blog ‘Living the sweet life in Paris’ was perfect. It used what you had and measured the other ingredients by the processed fruit. I did pick some in succession because they ripen at different times. Over the course of 2 weeks I picked and stored the currants in the refrigerator until I had a good amount. Then proceeded with the jam.
The recipe can be found by going to David’s website [
https://www.davidlebovitz.com/red-currant-jam-recipe/] Here are the pictures from my kitchen.
Ready to grow your own? Check out
Rain Tree Nursery online for mail order.
Cascade Red Currant
USDA Zone 3 – 8
Grows to 4 Ft
Self Fertile
Will live in Sun or shade
Clusters of berries ripen in june and july.
Ready for another fall harvest challenge? Check out this
Guilty Pleasures post about making apple butter…
by Susan | Sep 1, 2017 | garden food
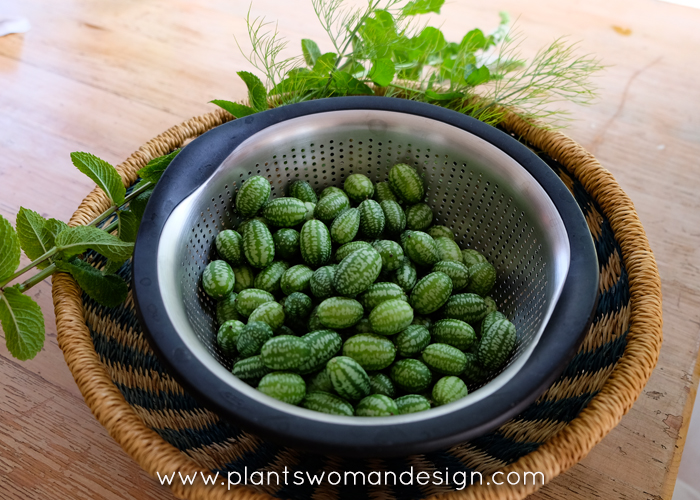
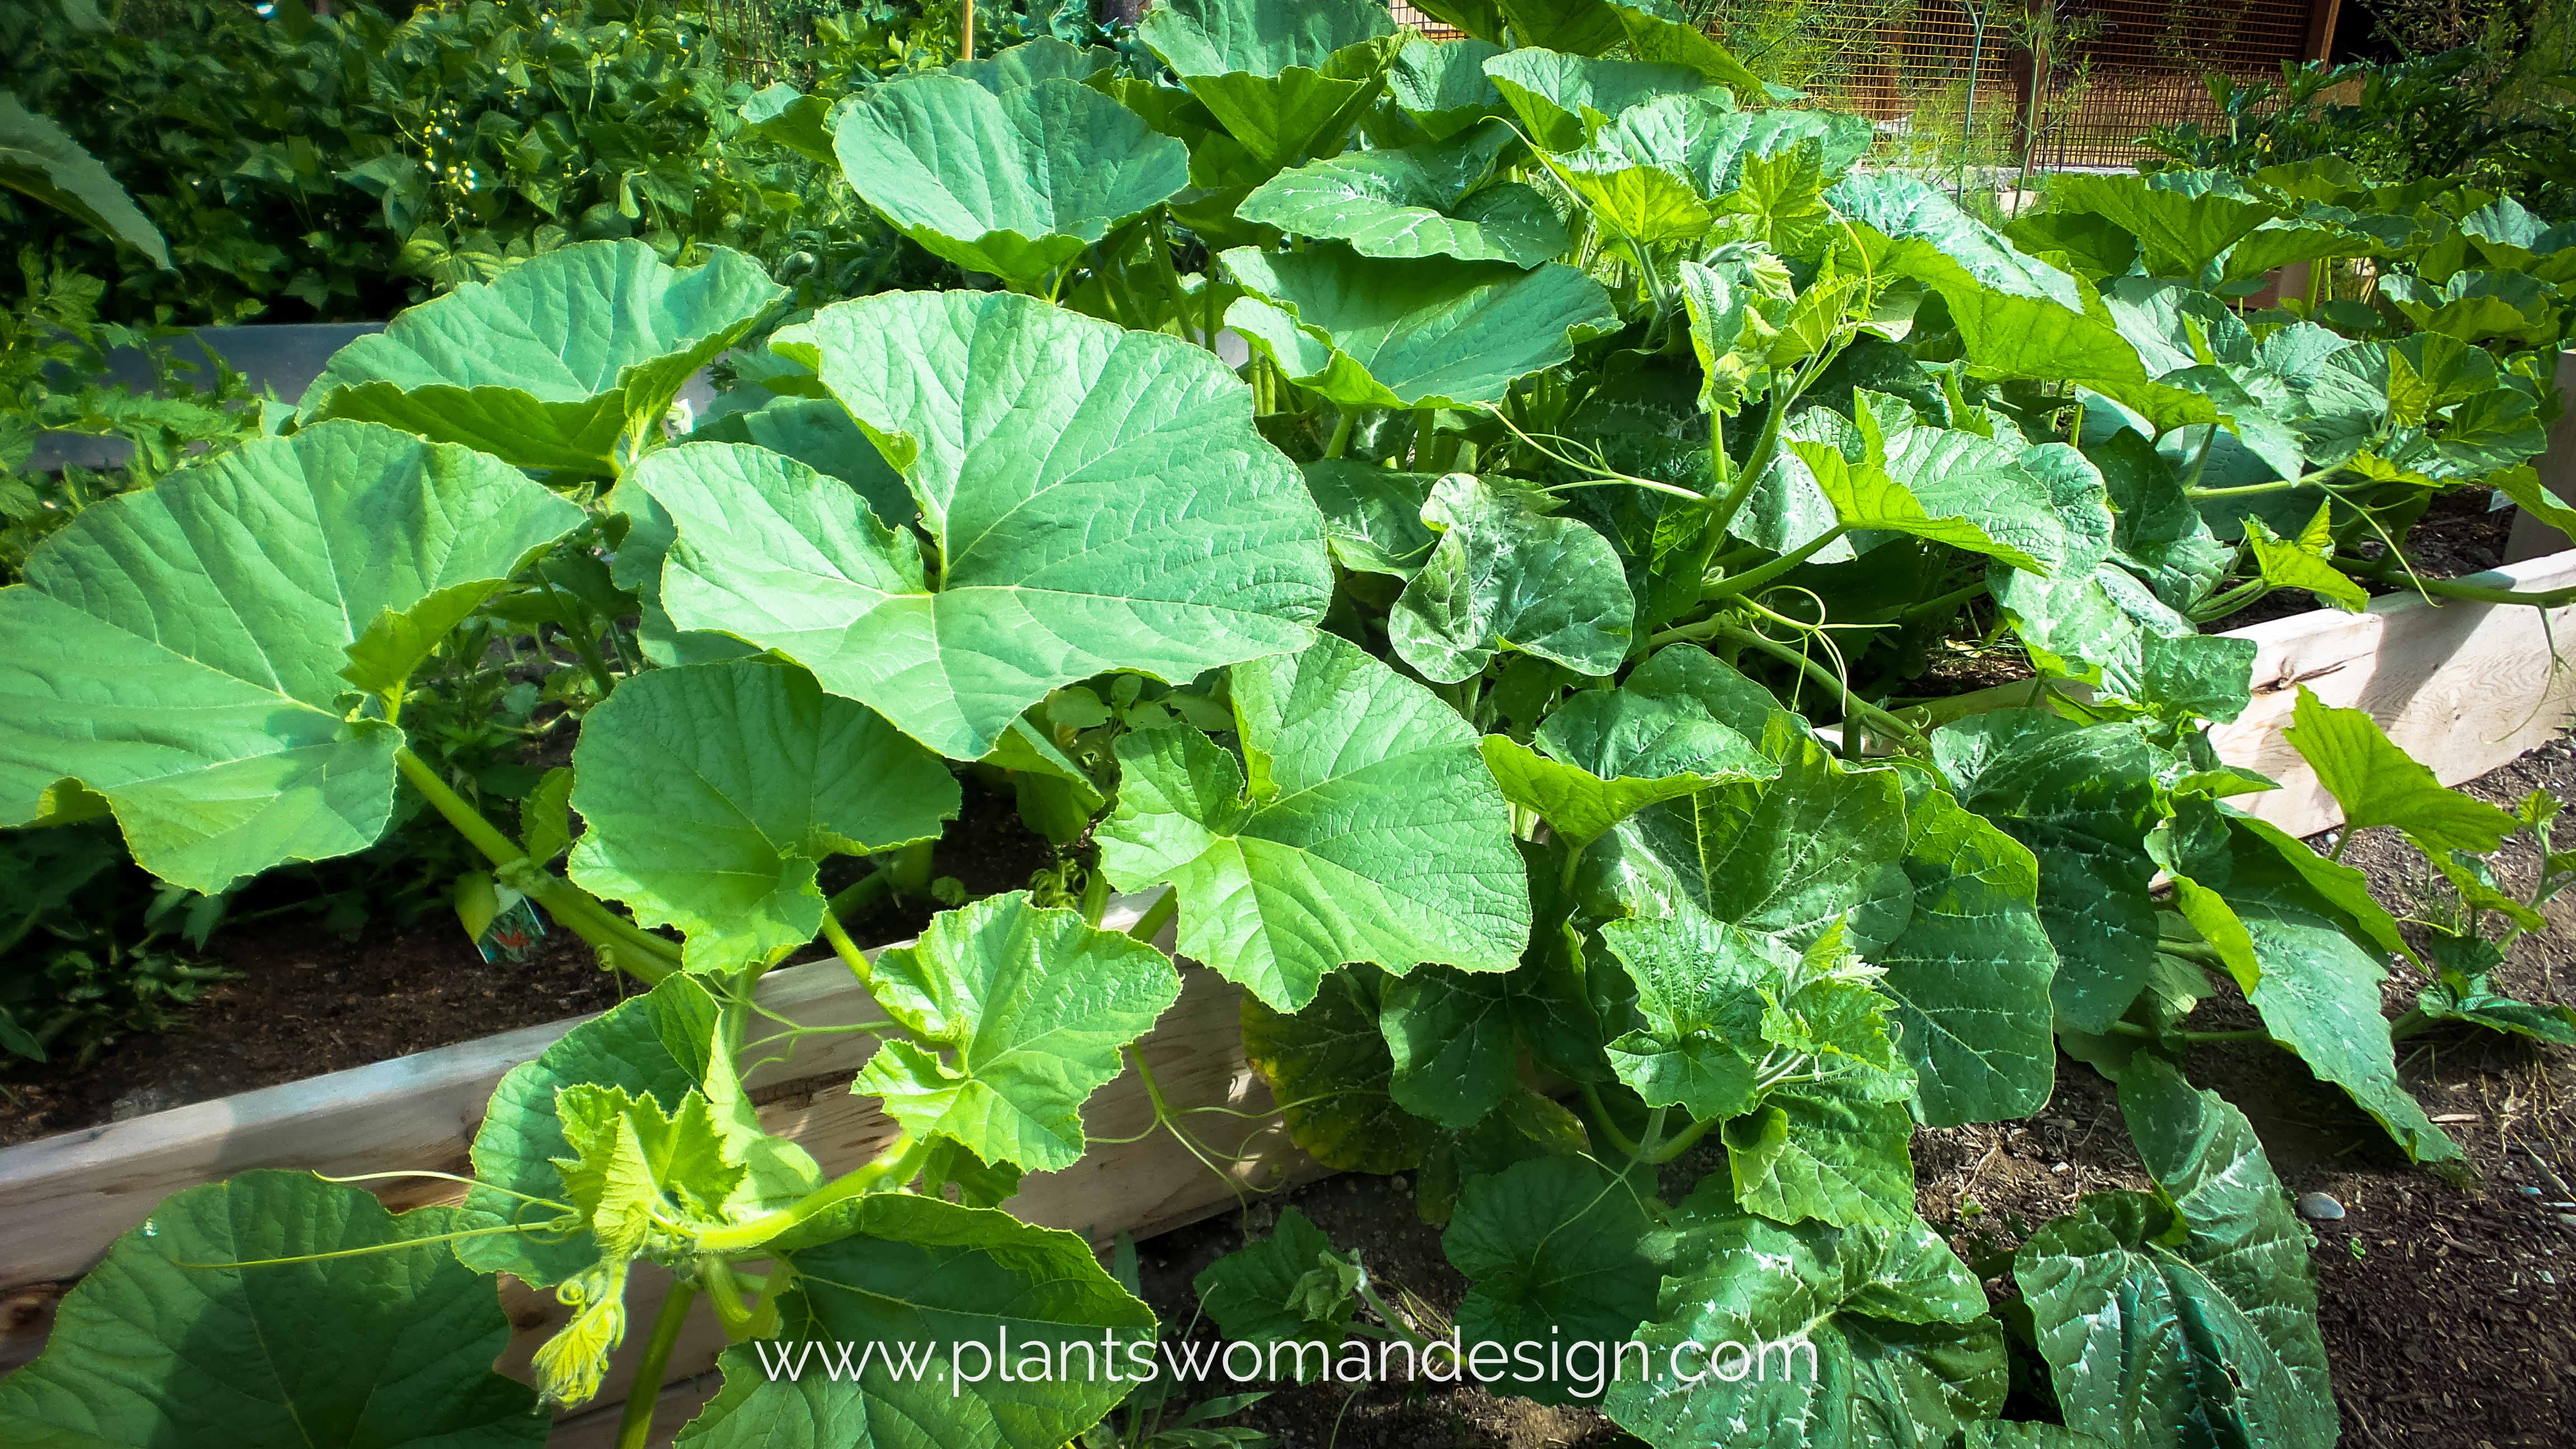
Wandering through the vegetable garden sometimes make me anxious. There is always so much to do and remember. Prune the tomatoes, check the tomatoes to see if they are ripe, pick the ripe tomatoes, find something to do with the excess tomatoes, find someone to give the extra tomatoes to. I think you get my drift. This year the harvest is coming on strong. Although a bit slower because of our cool start, now is the time I worry about how things are starting to get ripe, if they will make it before the cool weather starts, keeping things watered without splitting or molding. One of my worries however, is not the Cucamelons.
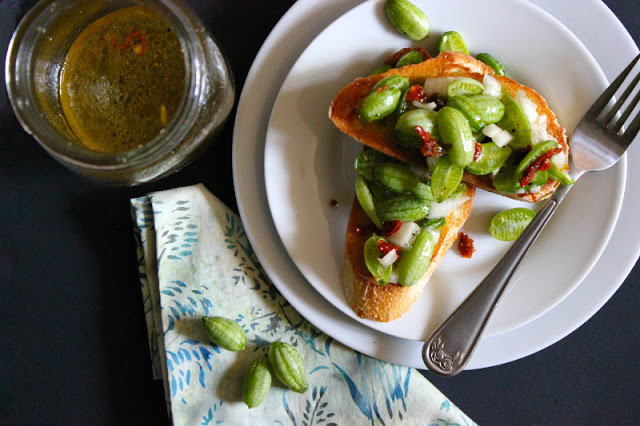
Apparently this is the new ‘hot’ exciting vegetable. The little sour Mexican Gherkin (Cucamelon) is first of all cute, then easy to grow, and finally fun to experiment with. Last year I only got about 5 on my vines. This year I have many! I think the key was giving them something to climb. One of my favorite cookbook authors,
Kristy Gardner from SheEats.com has a great recipe for Cucamelon Bruschetta. You should seriously click
HERE to get the full recipe it’s worth it.
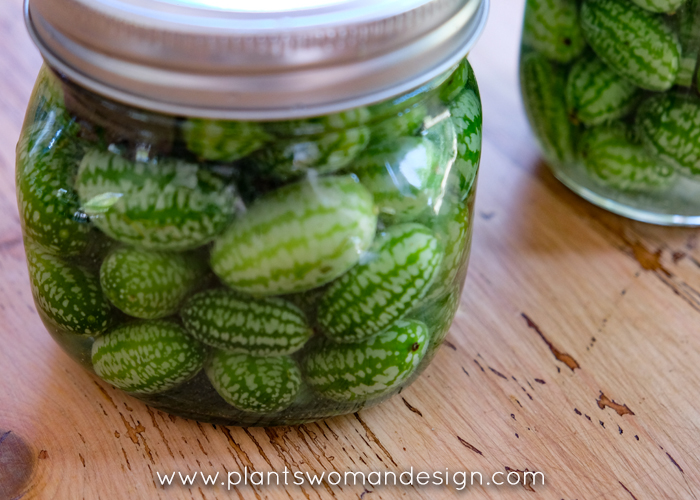
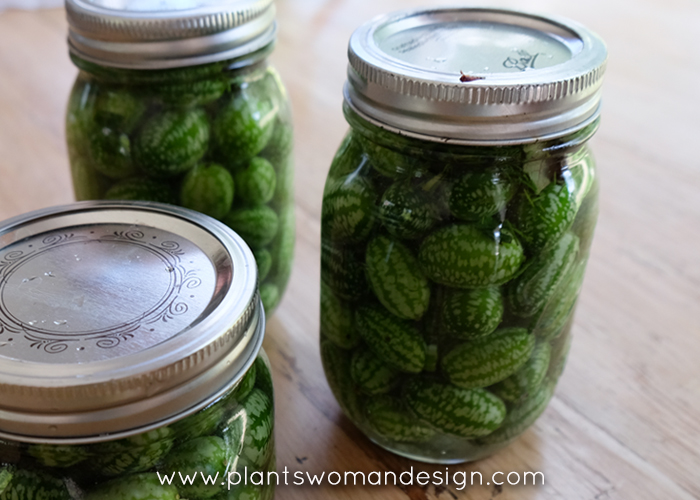
After this fun experiment I started another. This one is not so quickly gratifying as it will take two weeks before I know the result. This is my first cold pickled vegetable and I must say it looks pretty good in the jars. Hopefully will taste great too. A brilliant way to make these crisp summer fruit last well into the depths of winter, home pickling is far easier than you would ever think!
Ingredients
- 1½ cups white vinegar – distilled malt or white wine
- 1 tsp salt
- 4 tbsp raw sugar
- 1 tbsp chopped fresh dill
- 1 tbsp chopped fresh mint
- 1tsp coriander seeds
- 9 oz fresh cucamelons
- 1 fresh grape leaf or oak leaf
Instructions
Pour the vinegar into a bowl and add salt and sugar, then whisk until they have completely dissolved. Stir in the dill, mint and coriander seeds.
Wash the cucamelons in water and pour into a sterilized jar. (Run the jars through the dishwasher and dry in a warm oven set to its lowest temperature.)
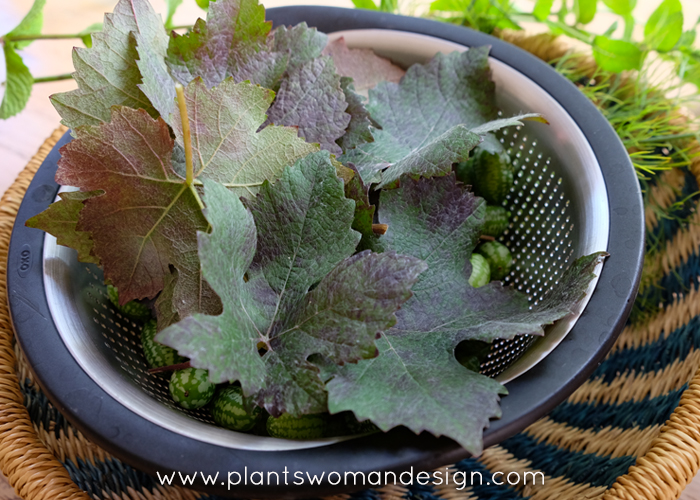
Scrunch up the grape or oak leaf and place it on top of the cucamelons. The tannins in the leaf will slowly disperse outwards and help keep the fruit crisp.
Pour the seasoned vinegar into the jar and seal tightly.
Refrigerate for 2 weeks. The cucamelons will be pickled and ready to eat. Once opened, store in the refrigerator. They will keep up to 3 months, but most likely won’t last nearly that long! Yields about 1 quart.
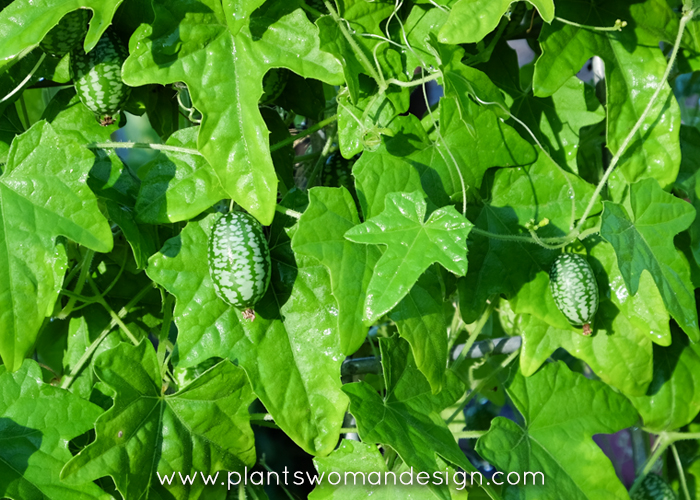
First picking the cucamelons… I picked the largest and somewhat faded. The taste test was interesting with a sharp, lime overtone on a cucumber base. Crunchy too. As you can see the vines are a little crazy and unruly. But that is ok too. They are very cute just like the fruit.
Then I rambled around my garden and grabbed some mint and dill. Then rambled to my neighbor for grape leaves. What a weird thing to have in a pickling recipe, but in it goes. Enlisting the help from my son here just today from Boston we packed the jars, dumped the brine, crushed the grape leaf, and put the caps on. They will sit in the refrigerator for 2 weeks to pickle then they can stay in the refrigerator for up to 3 months.
It is too late to try this vegetable this year but put it on your seed order for next year. There are several good recipes on line to try. They are available from
Botanical Interest Seeds.
|
Days to Emerge:
7 – 21 Days
|
|
Seed Depth:
1/4″
|
|
Seed Spacing:
3 seeds per mound
|
|
Mound Spacing:
4′
|
|
Thinning:
Not required
|
Melon Cucamelon Mouse Melon HEIRLOOM Seeds
Melothria scabra
Item #0285
90 days. Cute, grape-sized fruits look like tiny watermelons but have a cucumber flavor, often with a hint of tartness. Also called sandita or Mexican sour gherkin because the fruits turn more sour as they mature. Long vines up to 10′ produce plenty of “watermelons” to harvest from summer to fall. Plants don’t seem to be affected by insects that typically cause problems with cucumbers and melons. A terrific container or hanging basket variety!
This packet sows 10 mounds.
When to sow outside: 1 to 2 weeks after average last frost, and when soil temperature is at least 65°F.
When to start inside: 4 to 6 weeks before average last frost.
Harvesting: Pick fruits when about the size of a grape or under 1″ long for best flavor. As fruits mature, sourness increases.
(information from
www.botanicalinterests.com)
by Susan | Jul 21, 2017 | garden food, Plants I Dig
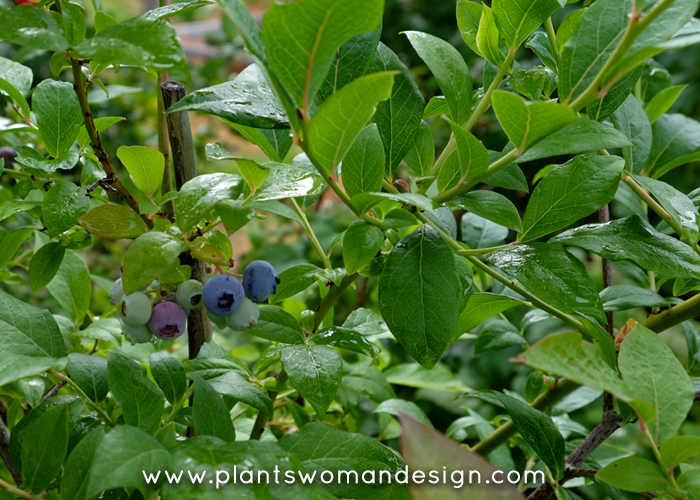
As I continue to think about design in the vegetable garden I can’t help but think about the great design opportunities with the new varieties of Blueberries. The great thing about designing with blueberries is the year-round color and growth in the garden as well as the benefit of delicious berries in July. Many of these cultivars have a low chill factor so you can grow these in even warmer places and still have great fruit.
The cultivar ‘Sunshine Blue’ was introduced in 1979 but I didn’t know anything about it until about 10 years ago when it became more available in our area. I like using the cultivar ‘Top Hat’, which is a dwarf evergreen blueberry and difficult to find, whenever I could.
Vaccinium ‘Sunshine Blue’ has a slightly pointed leaf that is a medium blue green. With its fine, delicate foliage it can be used in a mixed bed, foundation planting or edging for a more formal bed. It can be sheared if you don’t care about the fruit and takes on a lovely blush purple color in the fall. In my zone 8 garden it is mostly evergreen with good production of fruit.
Plant Description
One of the best for mild-winter areas, a low-chill selection perfect for small gardens or large patio tubs. Blue-green foliage and showy pink to white flowers provide ornamental value, followed by an abundant crop of fruit. Self fruiting, but yields best when planted with another variety. Recommended winter chill: 150 hours. Semi-evergreen.

One of my new favorites is the ‘Bountiful Blue’ Blueberry. This one has a beautiful rounded leaf with good blue color. They tend to have a coarser texture than the ‘Sunshine Blue’ but boast prolific foliage and sturdy structure. These look wonderful in a natural landscapes with many types of ornamentals. Japanese, northwest and cottage styles all benefit from these great plants.
Plant Description
An award winning variety with the bluest foliage of all! Pink-blushed flowers produce a big crop of large, sweet, juicy berries on a compact, mounded shrub. Perfect for hedging or planting in large tubs. Self-fertile, though planting another variety may yield a more prolific harvest. Needs only 150-200 winter chill hours. Semi-evergreen in mild climates.
These are also candidates for container production. I have several clients with large pots in their gardens with blueberries. ‘Pink Lemonade’ and ‘Peach Sorbet’ work particularly well for containers.
For the best fruit production give the plants good full sun and good moisture. They are happiest under irrigation. You could put them in part shade but expect lower fruit production.
Here is a video from Nicolas Statton on how to prune the evergreen varieties for fruit production. These are available from the growers at Monrovia. Have a look at that while I go make blueberry muffins.
<iframe width="560" height="315" src="https://www.youtube.com/embed/8zEeZiT5p_w" frameborder="0" allowfullscreen></iframe>
by Susan | Jul 14, 2017 | garden food, LB Tutorial: Growing Food
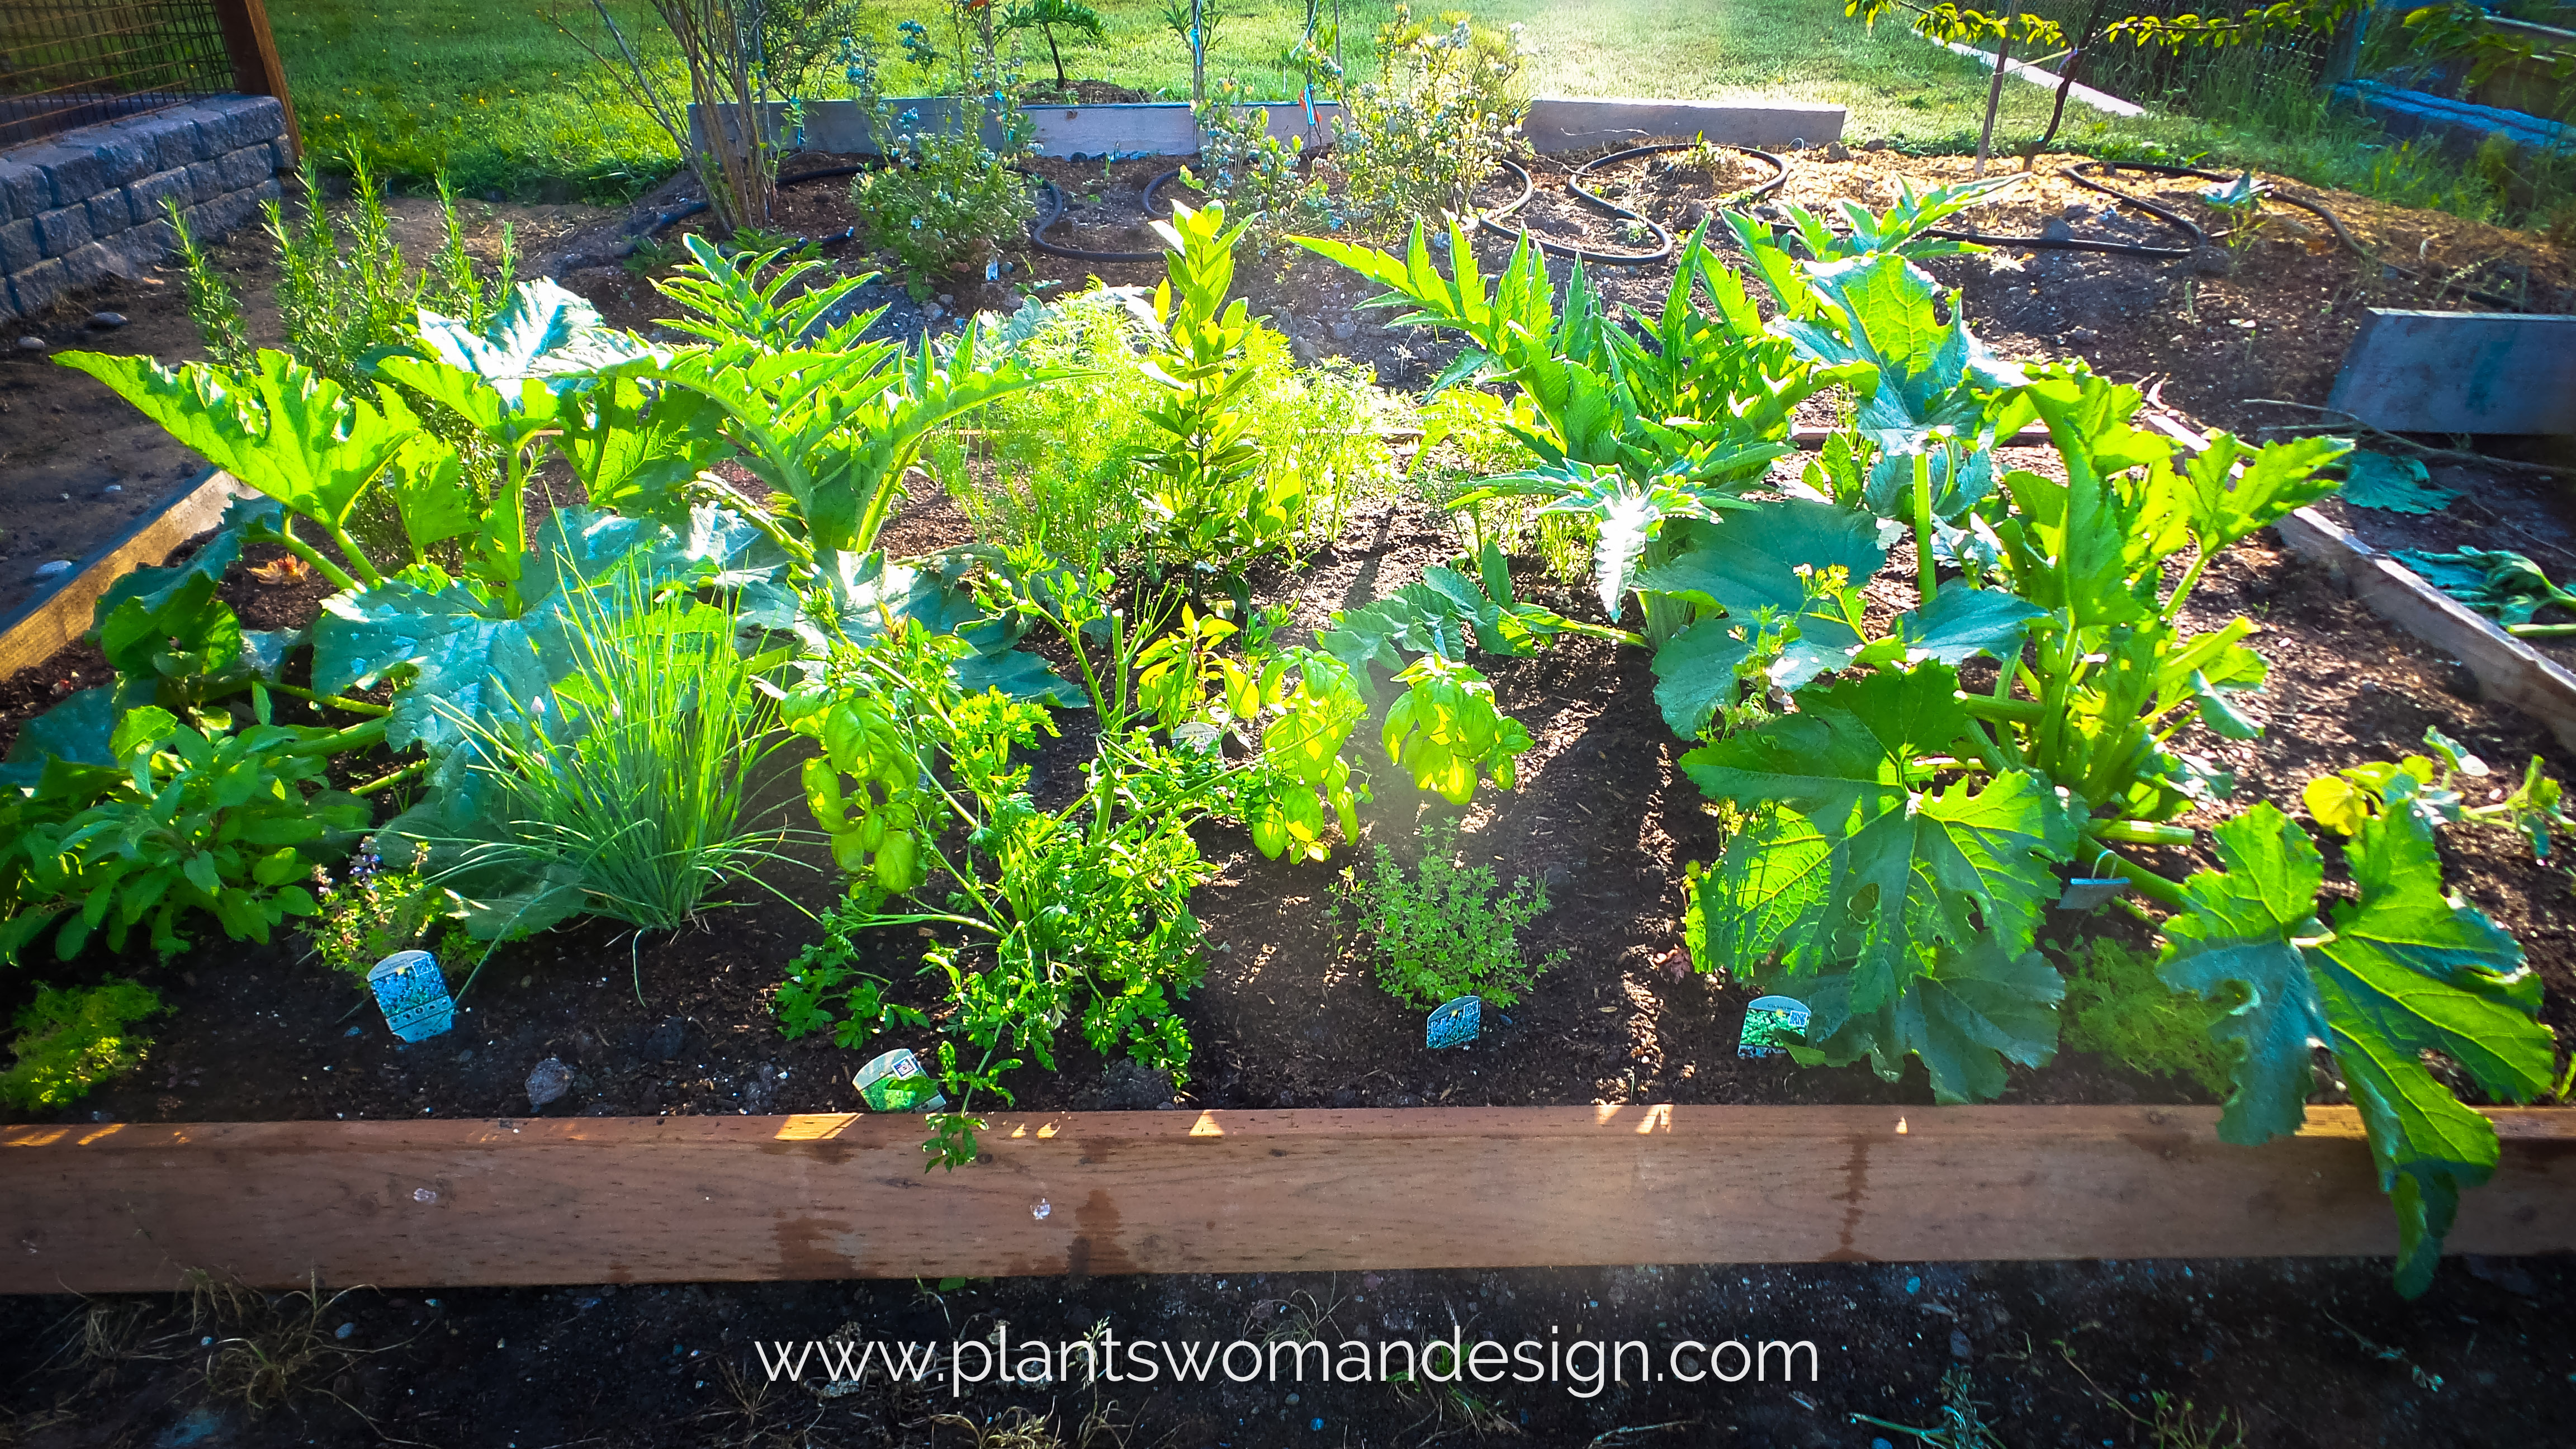
We have all seen great pictures and even visited designed vegetable gardens. Some great potager, or kitchen, gardens are famous for their beautiful symmetrical designs. My kitchen garden sports simple raised beds in a fairly linear design. I’m planning on revamping the configuration of the beds next year. I’ve found that the long beds that are wide (6 feet) are easy to plant but hard to harvest. Stepping into the bed is not optimal and sometimes there are such a tangle of plants in the middle the harvest is lost. That, however, does not keep me from planning some good color combinations in the veg garden.
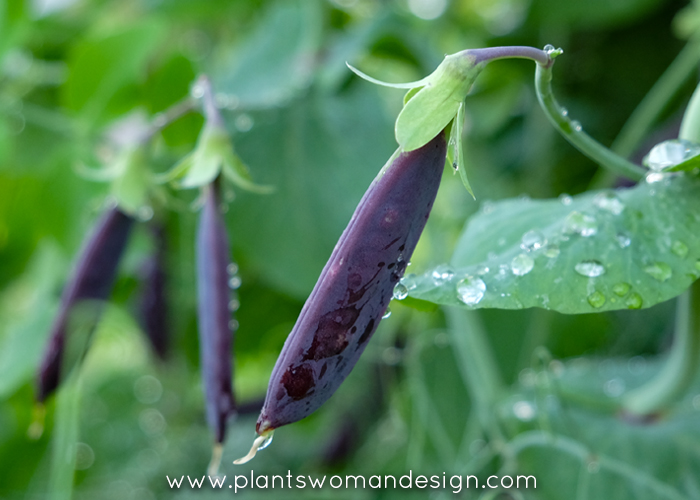
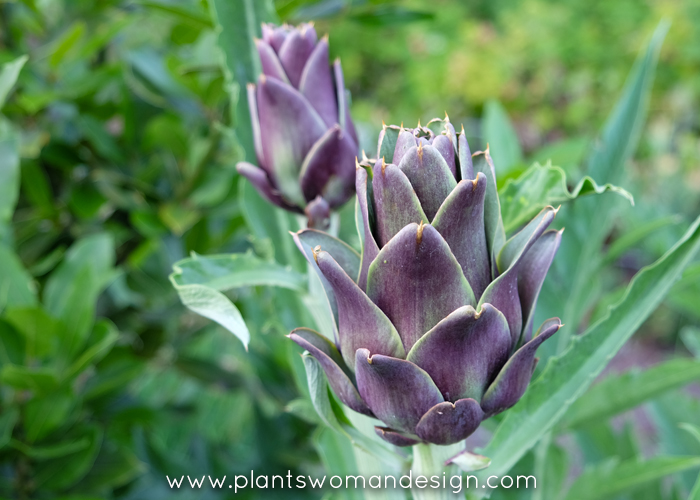
This year I experimented with purple. I already had purple artichokes from last year and they are lovely again this year. Not only do they lend great sculptural qualities but their color is amazing. A combination of purple and green that holds it color even when dried for fall decoration.
Purple peas are growing, rambling and producing the loveliest pea pods. The peas inside are green and flavor is amazing. The pods are too tough to eat but there are so many pods that the harvest is good for shelled peas. This is a tendril pea so the strange flower like tendrils were odd looking for me. I did pick some and did a quick sauté to go with halibut cheek. Pretty great!
Sugar Magnolia Tendril Peas:
70 days A marvelous innovation in sugar snap pea breeding from Dr. Alan Kapuler, the first ever purple podded sugar snap pea! We love the dusty purple blue pods that really pop in a sea of green foliage. … The flavor is perfect, not too sweet, with a great snap!
[From Territorial Seeds]
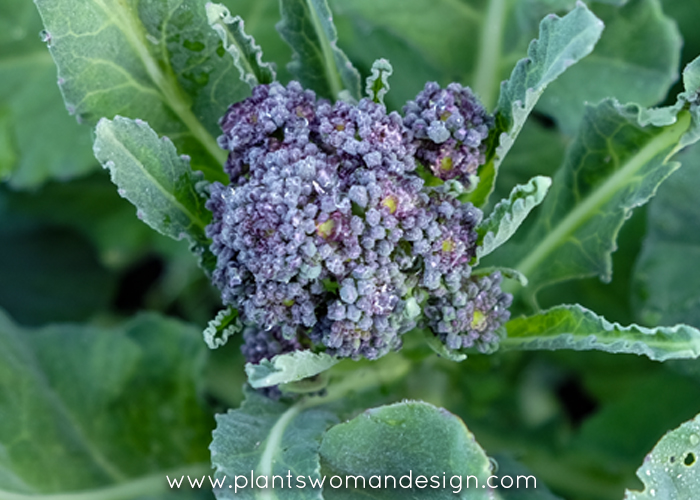
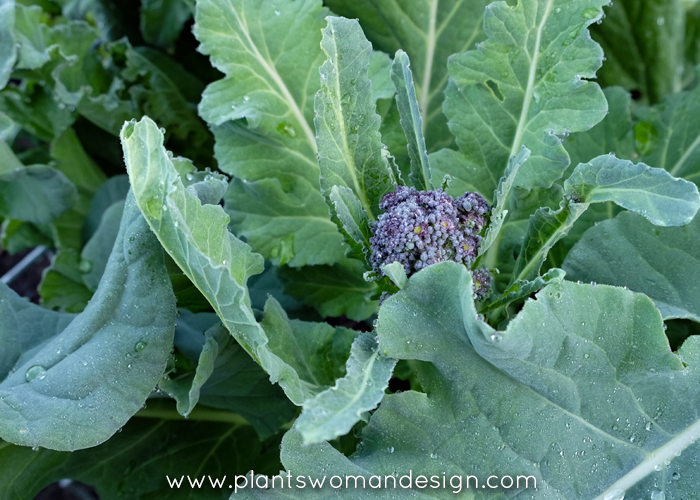
Purple broccoli is another purple plant that has a wonderful color with contrasting dusty sage green leaves. The flavor is great and it produces well. Baby leaves can be used in salad as well. My plant came from the nursery in a pack and unfortunately, they don’t list the seed variety on the plants. I have tried the purple sprouting kind before and it is best in the fall and winter. It over wintered and produced small broccoli pieces all winter.
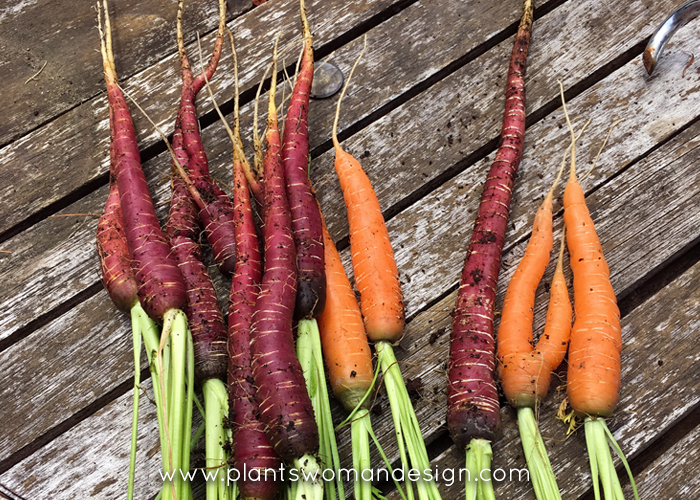
In my blog post, Easter Gift Of Plants, we planted purple carrots at my grand daughter, Kayla’s, request. They’ve done well and are great to eat, beautiful to look at in salads. (that garden is doing quite well!)
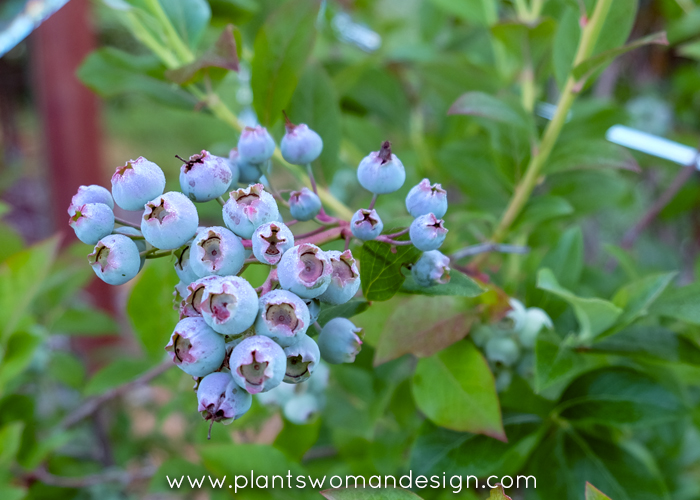
Of course, you can’t help but love the purple blue color of blueberries in the garden. The fresh lovely blush or purple/blue as it becomes deep blue is so beautiful. In the early morning with dew they become a reflection of the sky and the green leaves around them. These are an unknown variety rescued from a garden under construction. The border around the fruit beds are Vaccinium Bountiful Blue, an evergreen blueberry that produces great fruit and is beautiful all year round. Fine Gardening has this to say about it.
An award winning variety with the bluest foliage of all! Pink-blushed flowers produce a large crop of large, sweet, juicy berries on a compact, mounded shrub. Perfect for massing in the landscape or featuring in large tubs. Self fertile, though planting another variety may yield a more prolific harvest. Requires just 150-200 winter chill hours. Semi-evergreen in mild climates.
Care: Provide rich, acidic, well-drained soil. Water regularly during the growing season to maintain a deep, extensive root system. In extremely hot and arid summer areas, best with some shelter from harsh, reflected afternoon sun. Before new growth begins, prune off twiggy growth, leaving only main stems to prevent overbearing.
Read more: http://www.finegardening.com/bountiful-blue-blueberry-vaccinium-corymbosum#ixzz4mp1pdVz0
Follow us: @finegardening on Twitter | FineGardeningMagazine on Facebook
There are two more purple things in the garden that are not quite ready yet. Some seed samples from Burpee seed included a Depurple cauliflower hybrid. The plants are doing well but not ready for a picture yet. Burpee seed description.
Ravishing new purple cauliflower with buttery-sweet flavor.
Full Description
In foodie land, cauliflower is now a thing—a flavorful, delicious thing—inspiring culinary rapture, with food writers reaching for apt superlatives. ‘Depurple’, a ravishing new purple cauliflower, is a trendsetter with delectably textured, buttery-sweet, nuttily nuanced lavender-blue florets. Adds magical color and savory rich flavor served fresh, broiled, sautéed; as fritters, or in a summery cool purple soup. The distinctive color comes from anthocyanins, the antioxidants found in red wine, so purple cauliflower is more nutritious too. To retain the color, sprinkle with vinegar or lemon juice before steaming, roasting, or sautéing. A must-have selection for 2017.
80 days to maturity, sun, plant in fall or spring.
I also picked up some purple brussel sprout seeds from Territorial seeds. The Rubine Brussel Sprout seeds are in the house now. They are 4 leaves and will be ready to go out in about two weeks. 85 days. An heirloom variety not often seen in the garden. Rubine offers up a bountiful harvest of gorgeous 1-1 1/2 inch purple-red sprouts that are full of wonderfully rich old-time flavor. A striking addition to any vegetable patch and a gourmet special for your table. Grows to 24 inches and performs best when planted early.
I’ll keep you updated on progress and will take pictures of the varieties as they continue to produce. Many of the seeds are available for fall planting so it is not too late to start gardening in color!
by Susan | Aug 28, 2015 | garden food, LB Tutorial: Growing Food
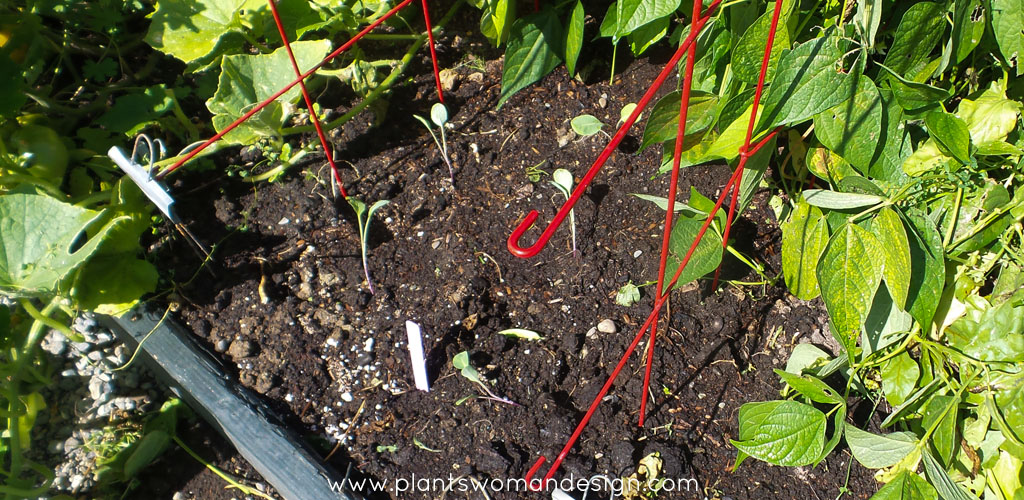
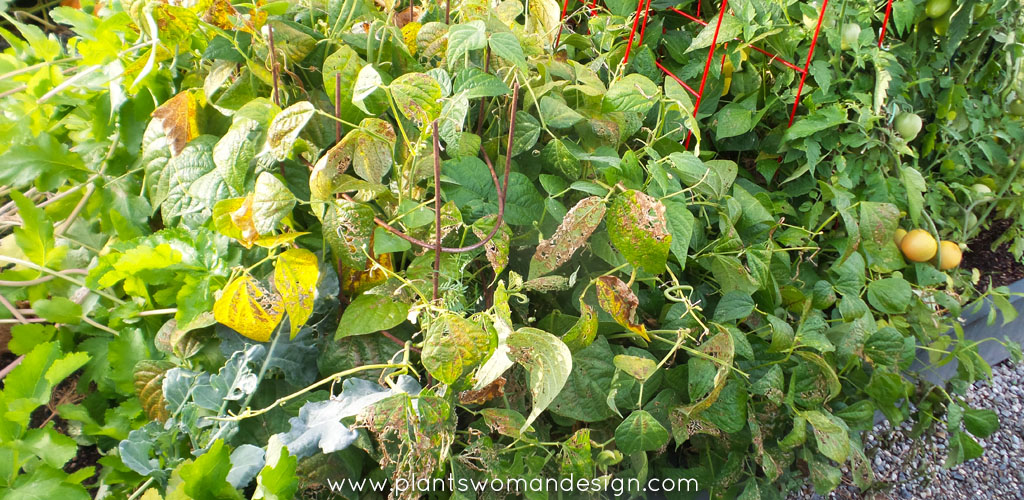
Even while the veg garden is still in full glory it is time to think about fall Vegetable planting. Looking at my garden I see I have some room in the garden where the lettuce has finished, the onions have been harvested and some beans have been pulled out. I left some of the beans in because although they have slowed in production there are still some blooms and beans still growing.
Flush from my success with the cantaloupe I decided to try cauliflower. While never having grown it before it was one of the small packages of vegetable starts available at Valley Nursery. Getting a head start shouldn’t hurt so the packet came home with me along with Onions and Broccoli. If you check out your local Nursery you will likely find winter vegetables also. Usually Swiss chard, Brussels sprouts, cabbage and kale are also available, but I still have these growing in my garden.
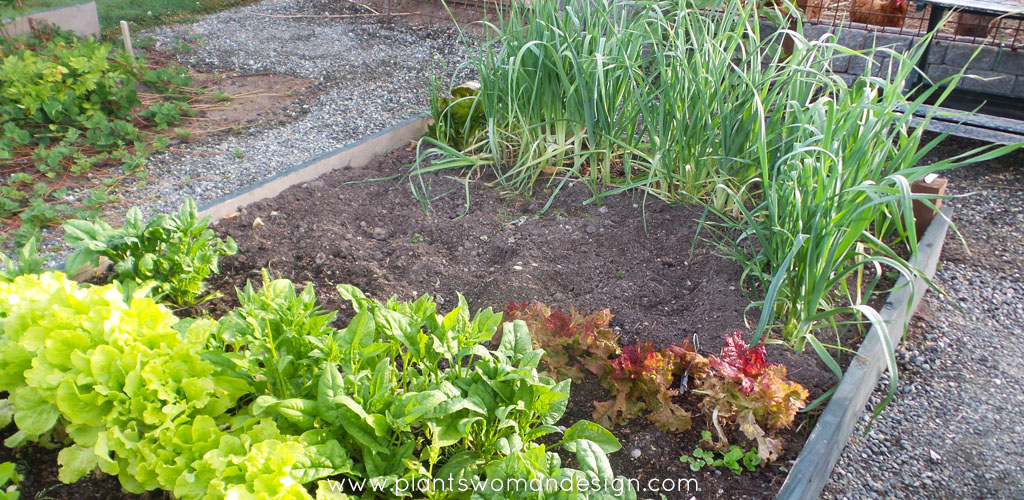
I spent a little time breaking up the soil. Roots of onions and lettuce make the soil a little compacted so a good aeration and dig through was in order then it’s time to plant. Two rows of a leaf lettuce blend and one row of head lettuce blend. Blends give you a good chance to get the best germination depending on the site conditions in the fall. Two rows of roquette (arugula) were next because you must have arugula to have Asian pear salad with goat cheese and arugula. The Asian pears are beautiful right now so I will use the rest of the existing row of arugula to eat now and store pears for later to use this row.
I had onion starts (evergreen bunching onions) and onion seeds (globe style mixture) to replant some of the onion bed next to the leeks.
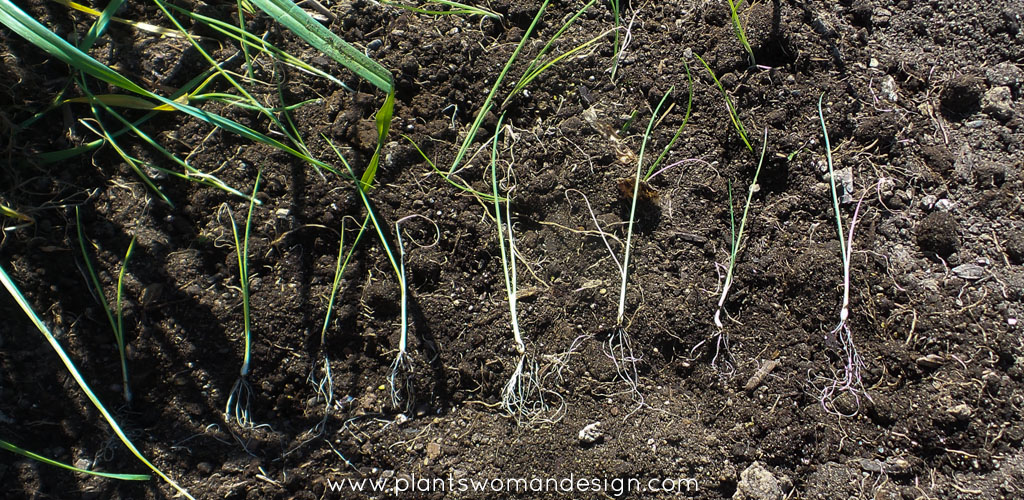
To plant starts I make a depression that looks like a row with my finger. Then space the starts evenly down the row. Firm the soil around both sides of the start to get the seedling to stand upright. After watering them in I will check again to see if they are still standing upright. If not then they didn’t get property firmed in and you have a chance to do that again. They will need some good water as the days are still warm and sunny. Planting starts in this way means the roots are all laying in the ‘ditch’ and you don’t have to worry about some of the roots being broken off or left out of the hole.
The cauliflower starts are in a couple of places. Caution: do not plant the starts where cabbage has grown before. This is to keep them from contact with soil borne pathogens or pests that wait in the soil.
I planted new broccoli near the other broccoli. Although I’m still harvesting broccoli from the current patch I know there will be more needed later on. While over there I took out a couple of mature kale. I had planted kale seeds and they are awaiting their chance to mature under the big kale. They now have a chance next to the broccoli starts from the nursery.
After taking out the zucchini plants I put in some Pac Choy (type of Boy choy). It also likes a warm start and a cool season to mature.
Comment to tell me if and what you are growing for the fall veg season.
Happy Gardening!
by Susan | Jul 10, 2015 | garden food
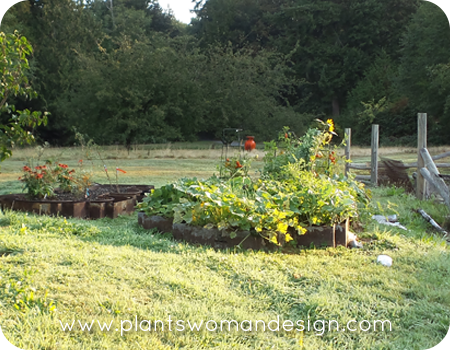
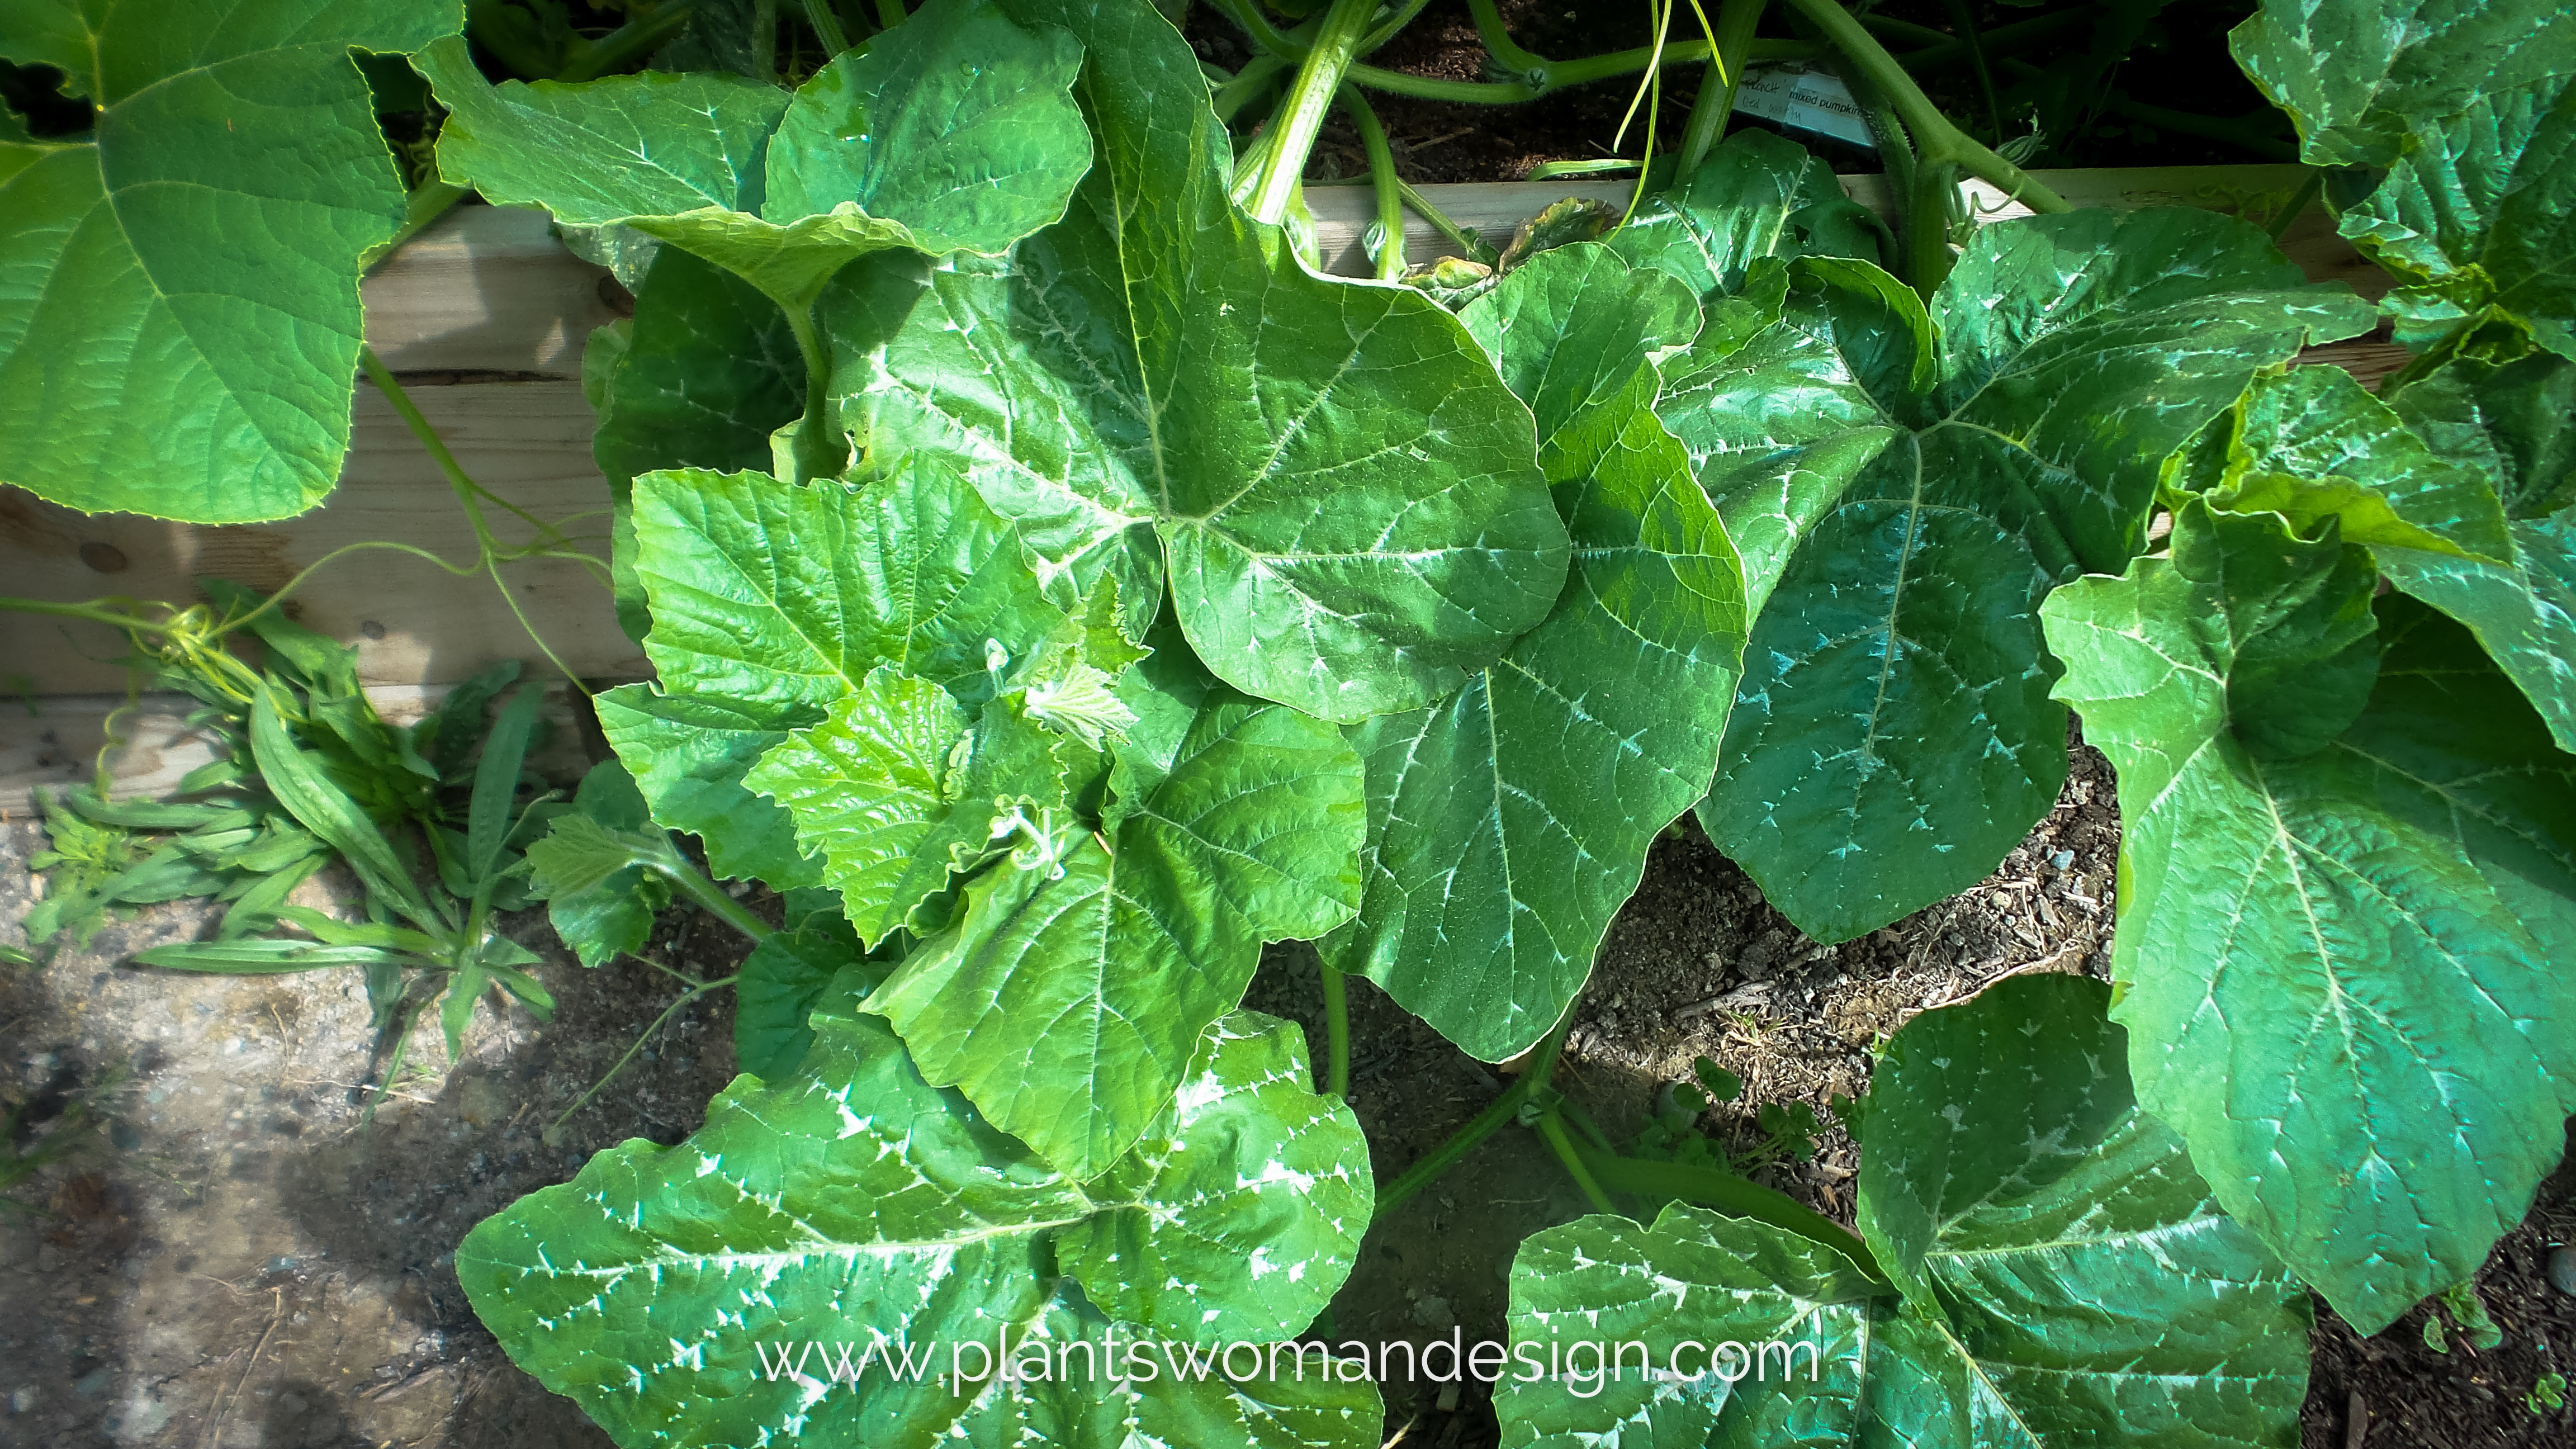
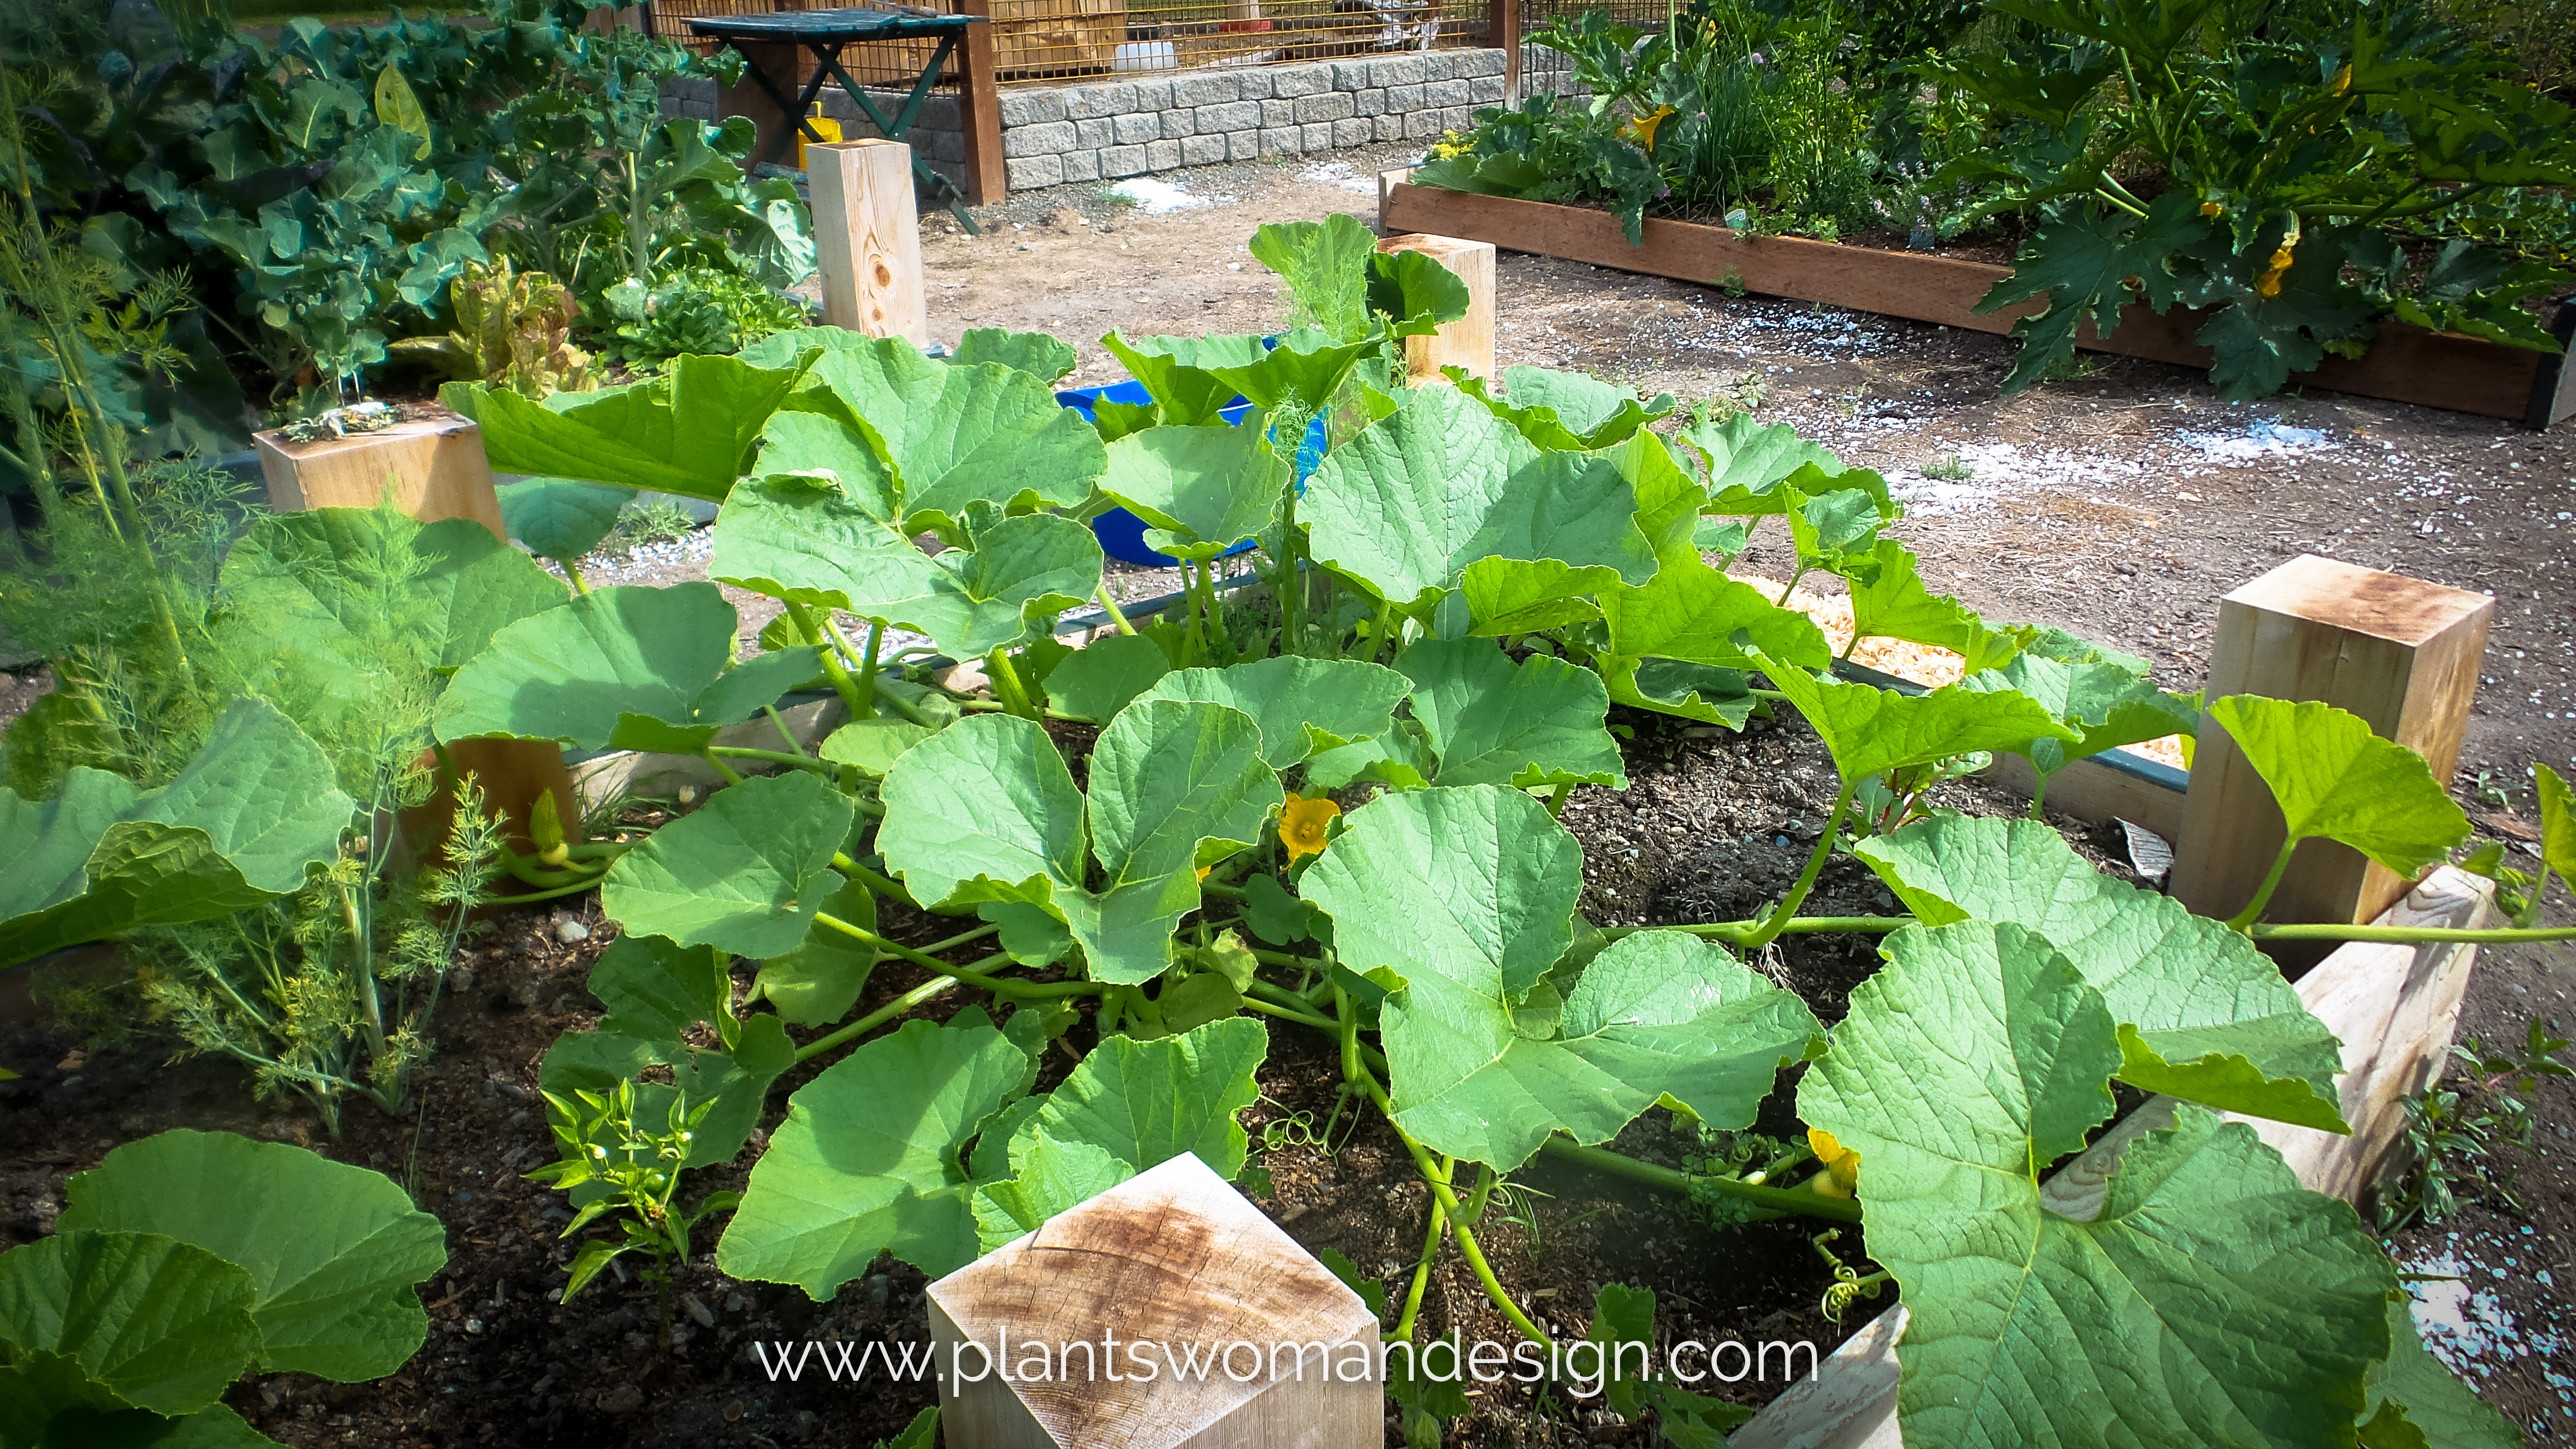
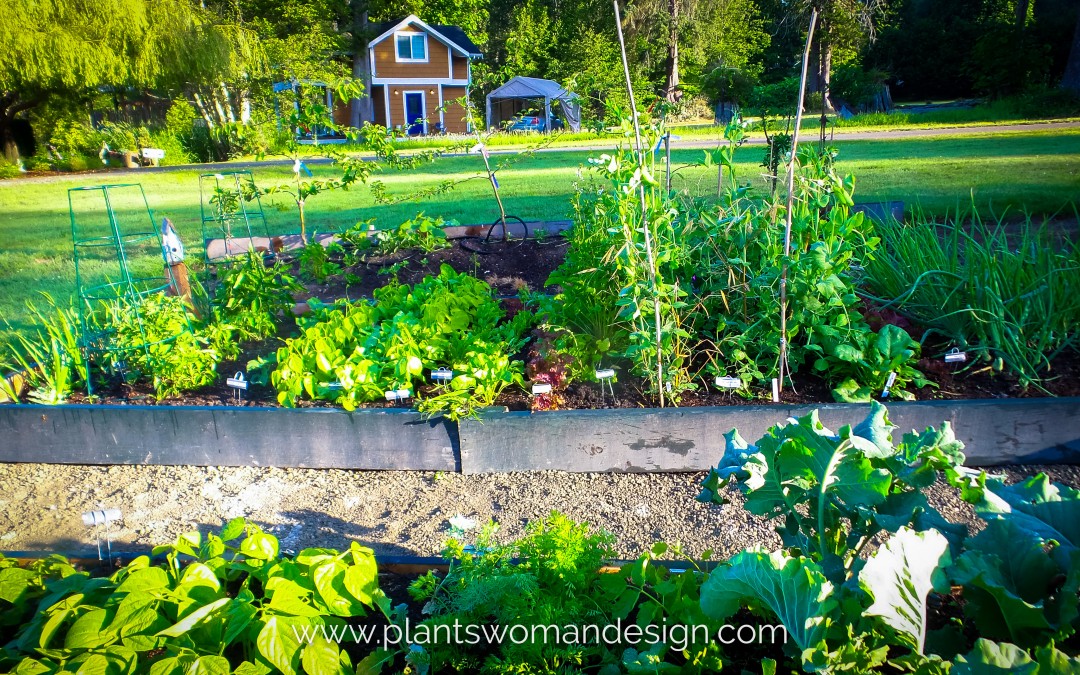
If you have been following the blog for the past year you will remember my post from last July (4th of July Garden). I had just moved into my new place the middle of June and could not imagine life without a Veg garden. So, I made one out of recycled concrete forms placed over cardboard with new soil mixture added in. These formed the basis for a fairly good garden. Beans, peas, lettuce, arugula, spinach, and tomatoes did fairly well but the pumpkins were difficult. Very little effort was required after the initial planting. Adding some compost and fertilizers helped the process.
Adding significant square footage this year was so exciting. I expanded the beds and formed them out of recycled timbers and posts. Long, deep beds (6 ft across) made for a good soil mixture. Reusing the soil from the original 4th of July garden I added mushroom compost and chicken manure from the hens. A full 5 yards of additional soil was required and tilled inside the beds. The perimeters were planted with espaliered cherry and pear trees and Columnar Apples. There are plenty of apples on the property but keeping the theme going is important to the designer in me. I love the new cultivars of Blueberry Peach sorbet, Blueberry Bountiful Blue and Raspberry Shortcake so finding them room as test plants was important. ( Kristen maybe these would be a good side bar with links to monrovias website?) Rhubarb from my old garden and some from my Mom are a nod to garden history.
Here is a visual of the garden this 4th of July. Quite a difference I think.
Part of the thrill of gardening for me is the chance to learn, improve, and nurture. It is a never-ending source of delight to try something new, to give a struggling plant a chance, and to enjoy the fruits of your labor.
What is it that keeps you excited about gardening? What are you trying that is new?
Click for more information on the new cultivars I mentioned above…
Hello and welcome! I'm Susan, owner and principal designer of Plantswoman Design. When I'm not designing for others I'm in my own garden growing and experimenting with plants. I want to inspire everyone to grow something. So, join in the conversation and then let's get outside!
PO Box 10505 Bainbridge Island, WA 98110
by Susan | Jun 19, 2015 | garden food, LB Tutorial: Recipes
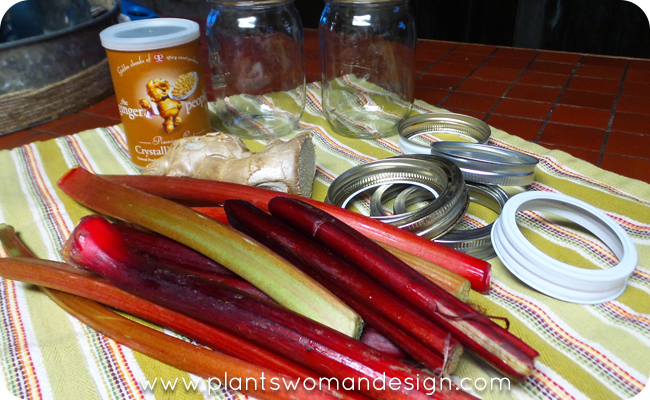
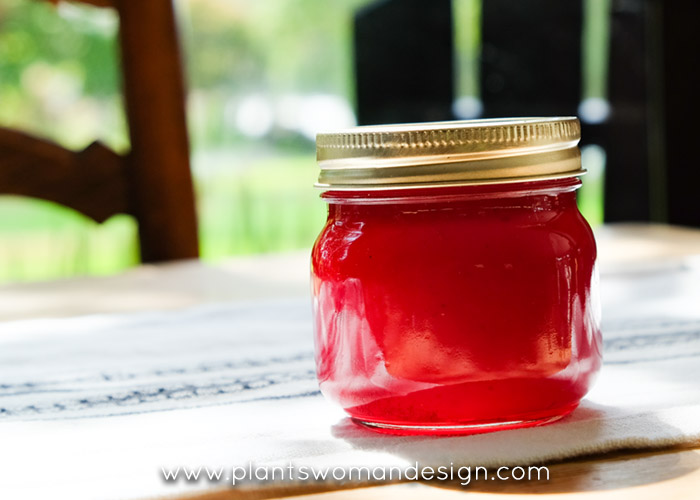
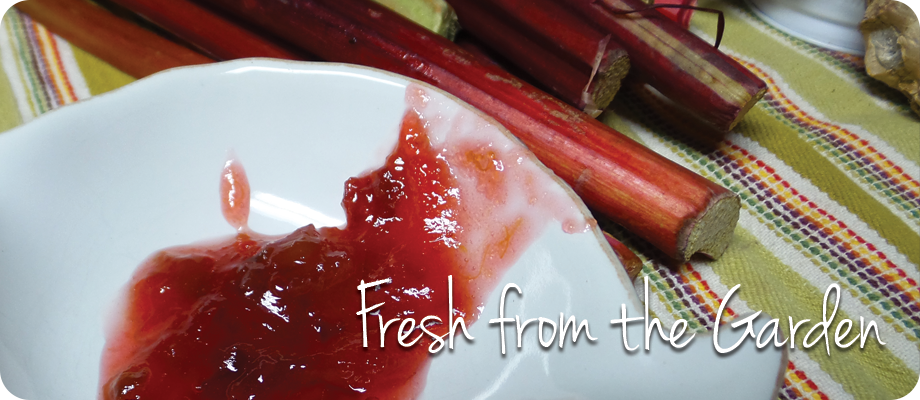
This time of year Rhubarb is at it’s peak. I love many things rhubarb and Rhubarb Ginger Jam is high on the list. This wonderful jam preserves this flavor into the fall and winter when you are craving rhubarb. It is wonderful on Ginger Scones with butter and clotted cream.
This recipe calls for forced rhubarb, which is pink not green and red. But I have used fresh picked rhubarb from my garden and it is great although not as pretty as the forced type would be.
Establishing Rhubarb can be a little tricky. Once it is established it is very tough. This year I put in two plants, one ‘cherry ripe’ and another that is just the regular variety. The regular cultivar is doing ok and the Cherry ripe looks dead. When I was at the nursery today their potted plants looked just as bad.
Make sure that the plant has a slightly solid soil with good nutrients. Add some compost and keep well watered. Beware of fast draining soil rhubarb is not a fan.
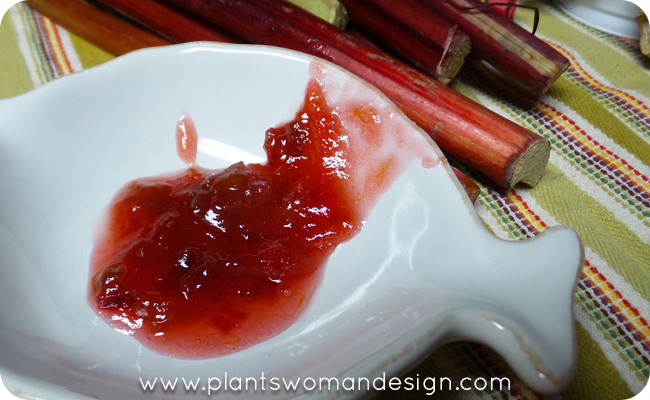
Rhubarb and Ginger Jam (adapted from Good Food magazine)
1 kg/2 lb 4 oz pink rhubarb trimmed weight
1kg/2lb 4 oz Sugar
1 box fruit pectin
Juice of 1 lemon and zest
2 oz crystallized ginger, finely chopped
4 cm piece of ginger, peeled
Wash rhubarb and slice into small pieces. Place into a large plastic bowl and add sugar, pectin, lemon, and chopped crystallized ginger. Finely grate peeled ginger directly over rhubarb.
Stir it thoroughly and cover with cling film and leave for about 2 hrs to allow the sugar to dissolve in the rhubarb juices. Stir it occasionally to encourage this process.

Pop a few small plates in the freezer. Put the mixture into a large pan, and set over a medium heat. Stir until the sugar has completely dissolved, and bring to a boil. Continue to cook at a fairly swift pace until the rhubarb is really tender and conserve has reached the setting point, about 10 -15 mins.
To test for a set drop ½ tsp of the jam onto a cold saucer, leave it for 30 secs. Then gently push it with the tip of your finger. If the jam wrinkles the setting point is reached. If not, continue to cook a couple of minutes more and test again.
Remove the pan from heat and pack into sterilized jars. Seal immediately and label with the date when cool.
Enjoy!

by Susan | May 22, 2015 | garden food, LB Tutorial: Design Challenge
There are times when I wonder if other designers get to design and plant vegetable gardens. I feel lucky that way! Recently I got to design and plant a veg garden for clients who only come in during the summer.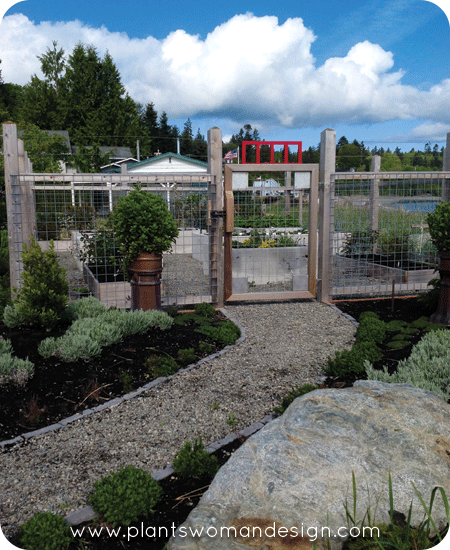 Obviously without year round residents a fence is needed. Because we aren’t sure how many deer are in the area the whole of the edibles and roses are protected. The fencing is galvanized wire and is connected to 8 x 8 cedar posts, the metal work on the gate was created by the owner. They put the fencing and gate together as a weekend DIY project.
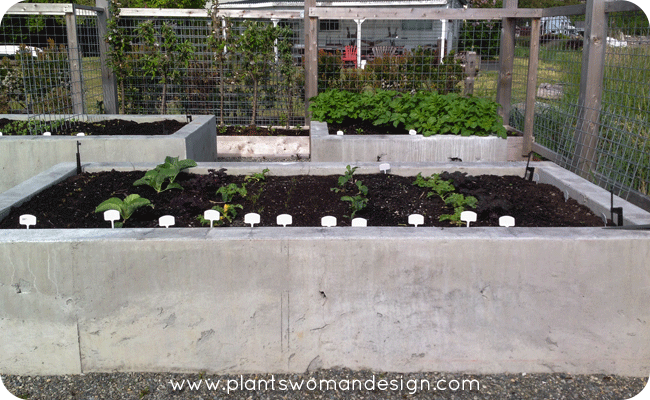 The raised beds are concrete poured into forms but not packed down to give it a rustic finish. We left the with bottom of the form open for good drainage and installed landscape fabric membrane over the native soil at the bottom of the beds to keep the beach grass out. Water is able to go through the soil and into the native soil beneath.
Drip irrigation was added with spray emitters at the corners and along the edge for good coverage. This system connected to the main irrigation system but is on a separate zone. We added a frost free hydrant for extra water when needed.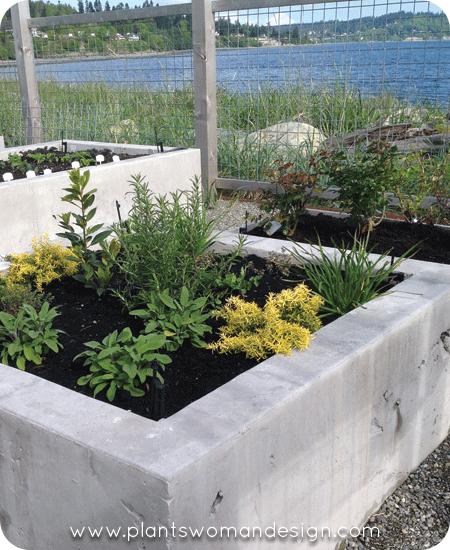 The first bed is the herb bed with a center cone of rosemary and a bay tree. Basil will be added later when it gets warmer.
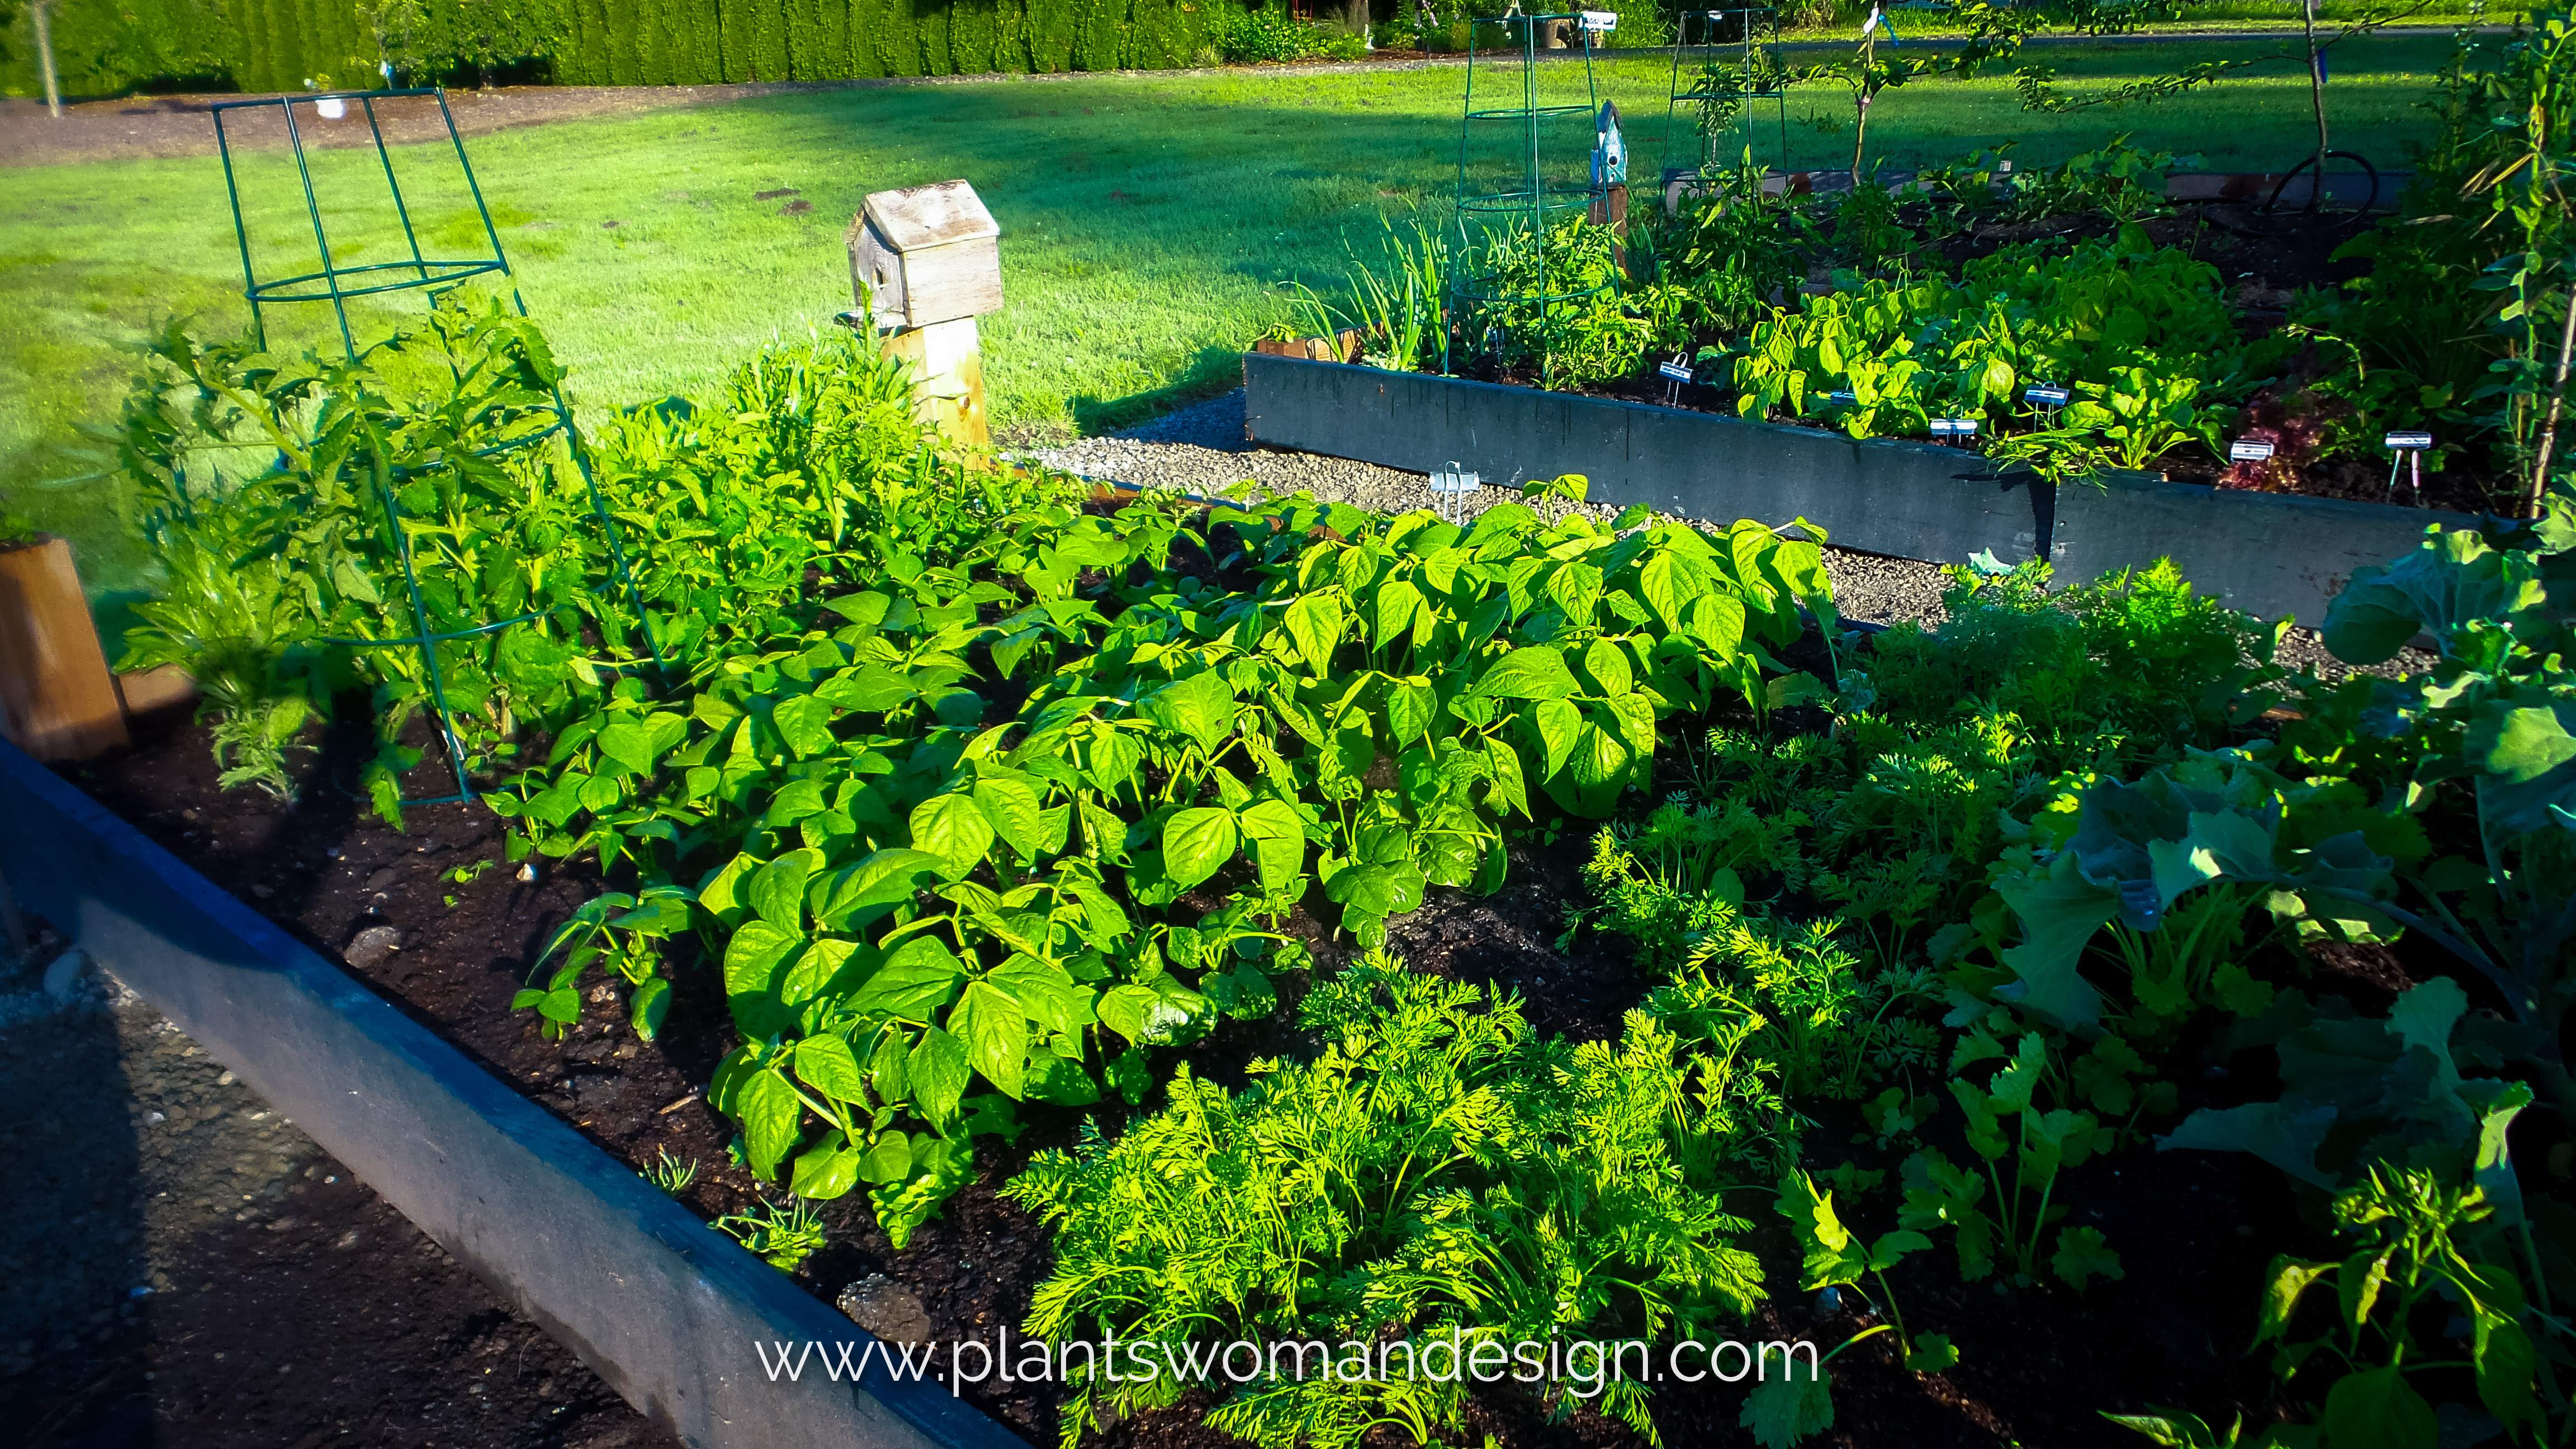
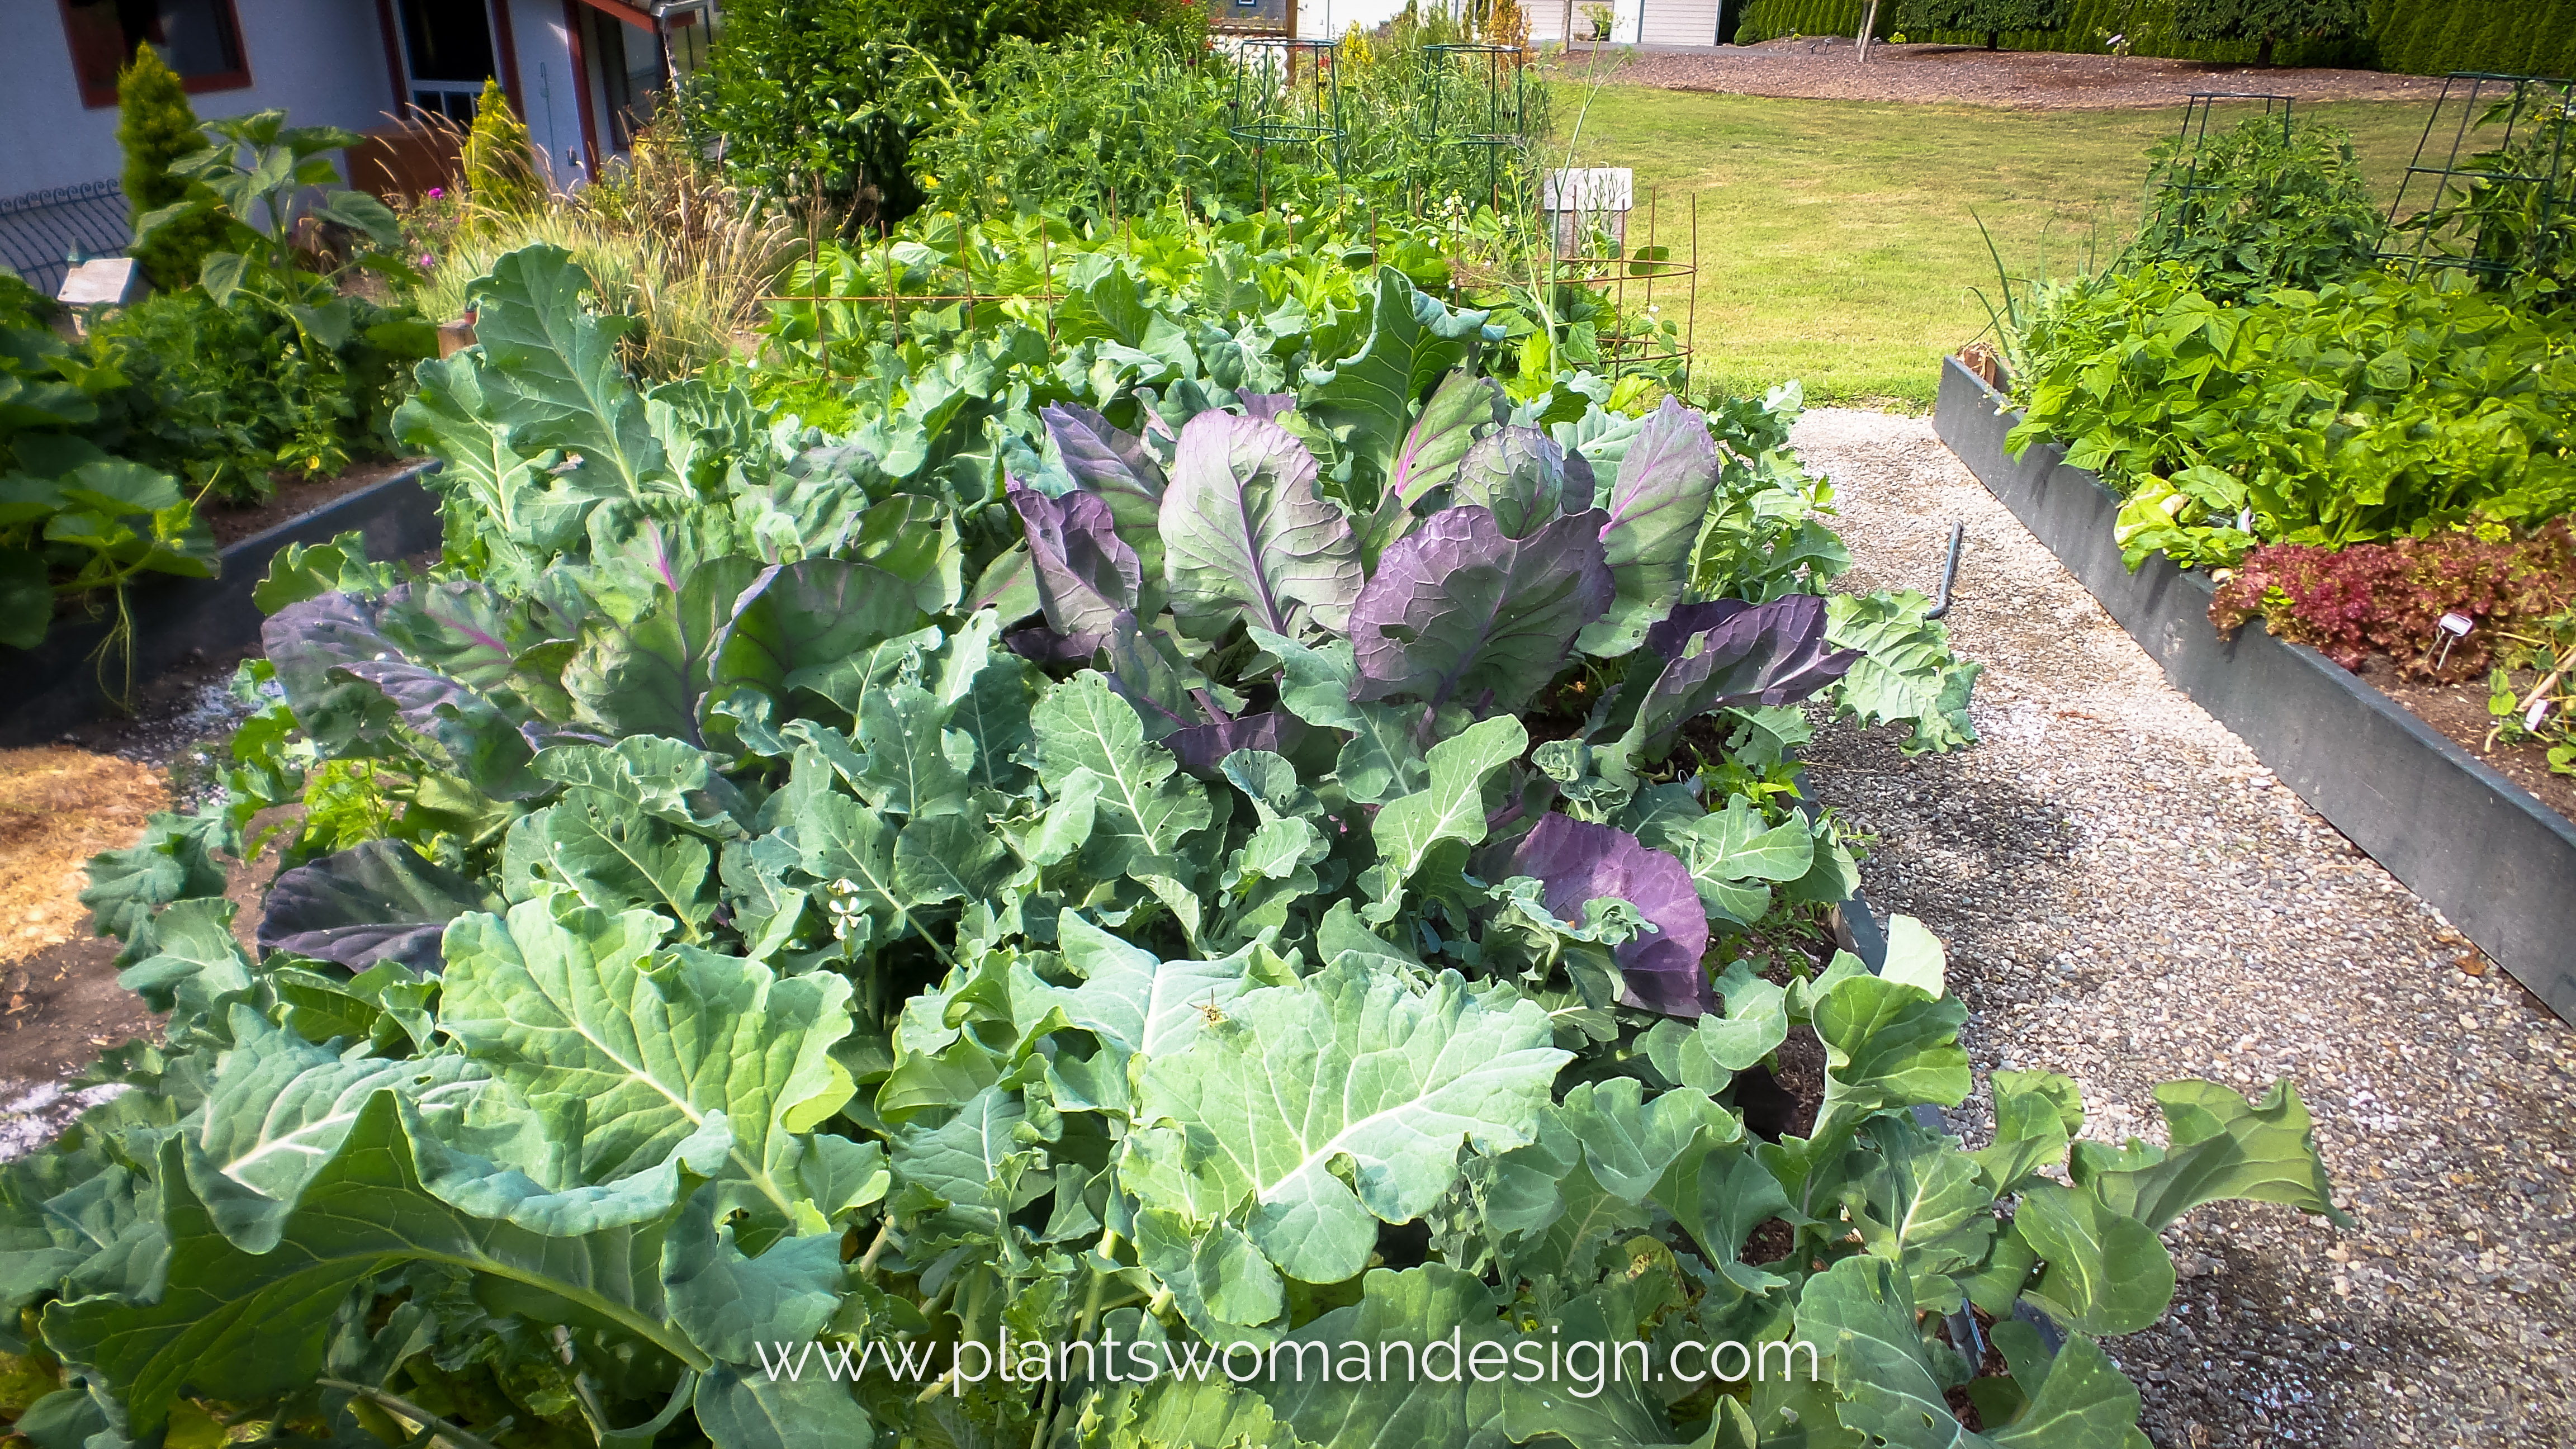
Early spring crops were put in first with some starts of kale and broccoli added along with the seeds of the same. I used different colors of kale and chard along with several colors of lettuce to make patterns in the planting. Red leafed lettuces, Radicchio, Romaine lettuce, spinach, and arugula are all planted in rows to make a pattern.
Fun purple beans, purple sprouting broccoli and watermelon radishes add some interest and more color. One bed is dedicated to exuberant potatoes both fingerling and yukon gold. Chard is tucked in there for fall color. We dig the potatoes out in the spring removing some. Here in the Pacific Northwest potaties continue to grow all year so will get too congested if left on their own.
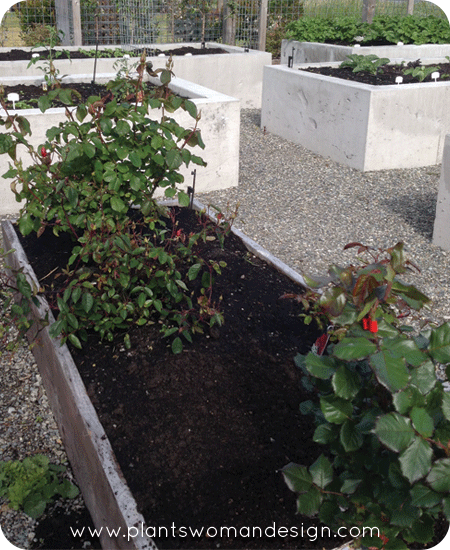 Two side beds hold a collection of roses for cutting. Two new ones we are trying this year are Chihuly and Anna’s Promise.
How many of you readers grow a vegetable garden along with the decorative ornamentals? Tell me what your favorite vegetables or herbs are!
by Susan | Nov 14, 2014 | garden food
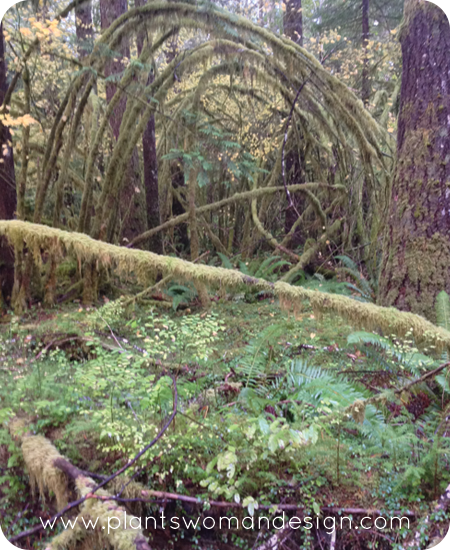
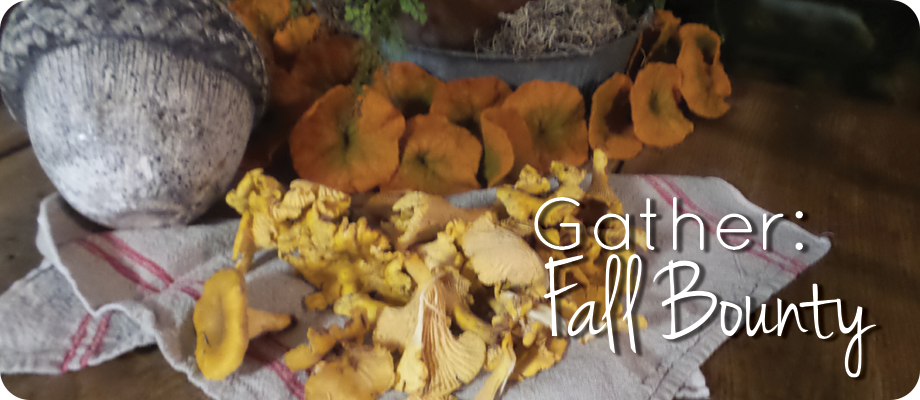
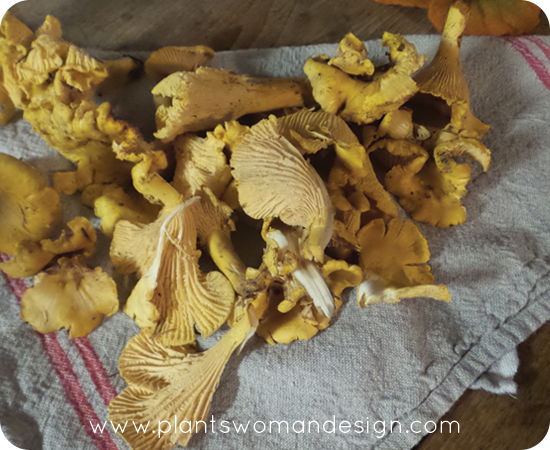
I’m so lucky to live in such a bountiful place. We have a long growing season and the woodlands have wonderful things to find and eat. My family owns property near the Olympic National Forest. This time of the year mushrooms abound amidst the moss and fallen leaves of the forest. Chanterelle mushrooms are the ones I search for. Their mild taste is delicious and the yellow coloring is unusual for mushrooms. The key is looking for them between the warm dry summer and the freezing winter weather. The ideal time is when the weather turns to warms days with cool crisp nights and ample rain. The chanterelle will start popping up over night. I love going through the woods with my Mom and Sister. We walk over logs, through small animal paths, and old logging roads. With leaves falling all around they can be very hard to see. Looking around the base of large old coniferous trees between the crevices and roots is the best place to find them.
Here is what I collected… I used these flavorful beauties in a mushroom risotto.
 Many mushrooming spots are coveted and well kept secrets. If you haven’t done it before there are a couple of places that will give a quick class so you can get up to speed on the mushroom hunting protocol. One thing my grandmother taught me was to use a mushroom knife (small blade). The mushrooms should never be pulled out of the ground. Using the knife to cut the mushrooms at the base close to the ground will preserve the area around the mushrooms which contains the spores for new mushrooms. Chanterelle sometimes grow in groups.
The Environmental Learning Center at Islandwood here on Bainbridge Island is giving classes for a small fee and then will take the students out to search on the grounds of Islandwood.
Here is a glimpse of our favorite spot.