No Results Found
The page you requested could not be found. Try refining your search, or use the navigation above to locate the post.
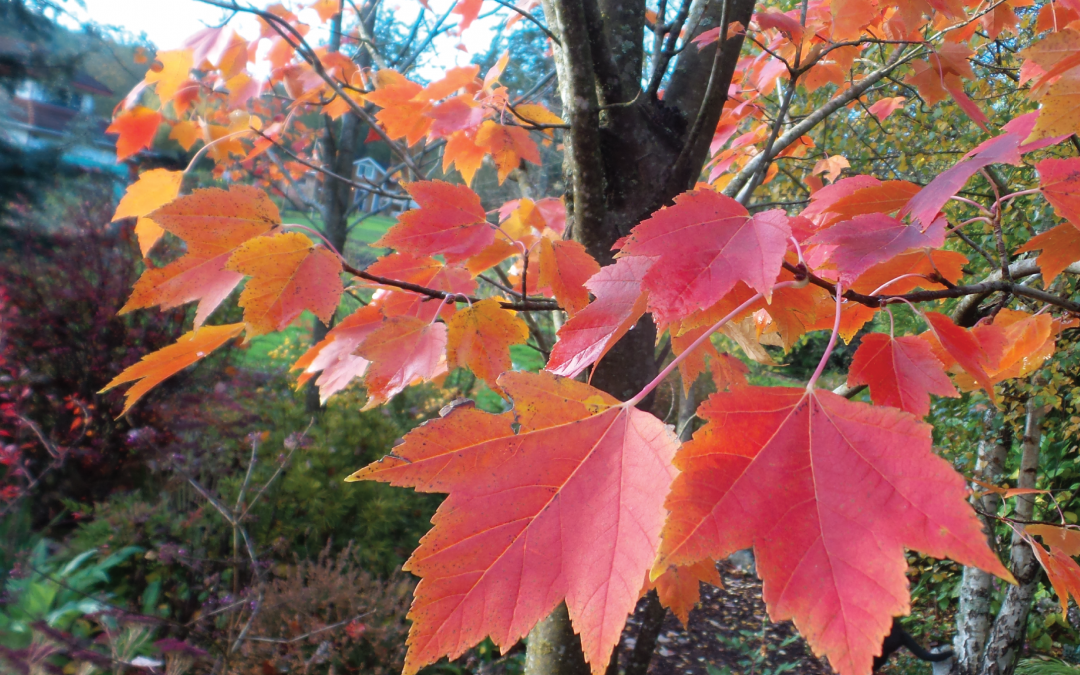
What an amazing year. I have discovered I love warm weather. Shorts, sandals, and beautiful clear nights have been abundant
this year. Transition into fall has been slow for me but now the season has wrapped me its own kind of warmth. Beautiful foliage and snow in the mountains have me dreaming of winter. This year has brought me a new appreciation of gardening. Not from the beautiful and designed but from the bounty of the earth. I watched the film ‘A Place at the Table’ and it stunned me to the core. To realize that a staggering amount of people are working and living in homes, yet still struggle to feed themselves and their families. Americans, not people in third world countries but right in our own very prosperous nation. Hungry. If you have a chance to see it do so, it will change your
outlook on the face of hunger in America.
Planting a vegetable garden every year is always high on my priority list. There is usually plenty to share and give to my friends and family but this year was different. The program ‘Plant a row for the hungry’ encouraged gardeners to help provide for the hungry in their own area. The vegetable garden this year was bountiful. I was able to donate over 150 pounds of fruit and vegetables to my local food bank. One of the most requested items at the food bank was fresh produce. They even take zucchini! I was only one gardener, think about the
food many gardeners together could donate.
Thankfulness this year is sharing the harvest, providing for strangers and encouraging others to help. Our blessings have a way of multiplying when shared.
Thank you clients, colleagues, and friends for sharing a part of yourself with me. Thank you for your continued support and encouragement. May those shared blessings continue in 2016.
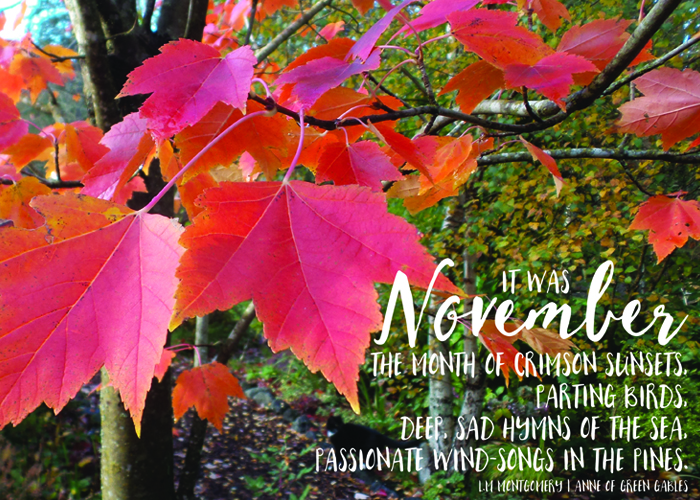
Extreme weather is starting to be the no around here! What a blustery rainy way to finish the year. It is good to see snow in the mountains and the rivers rushing through the woods. This is a time to remember, with thankfulness, the bounty of the summer and share a meal, drink or fireplace with friends.
Vegetable Garden
Still harvesting kale, leeks, beets, parsnips, carrots and lots of broccoli from the garden. I tucked some horticultural fleece around the lettuce and spinach. Even a little frost hasn’t really hurt them. Purple Brussels sprouts are very cool looking.
The rest of the garden has been cleaned up and dead plants have been added to the compost pile. A weed through of all the beds and compost on the top will help to winterize the beds. You mainly want to keep the soil working and not washing away. The layer of compost protects the soil.
Ornamental Beds
Now is the time to clear away broken branches, dead leaves, and plants that have crashed into dormancy. The most recent consensus is that most gardeners leave the seed heads in the beds until the spring. In the early spring they will need to be cut back, disposed of and mulch added to the beds. I’m a little compulsive about the beds and have a tenancy to clean up and add compost now. I like to be sure that weeds aren’t hiding under the leaves and broken stalks. Weeds are one thing that will continue to grow and spread in the winter. I always leave the grasses up for the birds and enjoy the color of the dry stalks against the low winter sun. They are simply amazing.
Planning, Planning, Planning
Take some time to look back through your notes, take a walk in the garden and compare what your garden looks like now and what you want it to look like. This is a great time to say what you loved about the garden and what you didn’t.
My neighbor is taking out trees now. She has decided that they were getting too big for the space and shading out some more desirable things. Garden editing is just one of the fun things about gardening. A chance to change things and move things now is great and a chance to plan for the changes next spring is also important.
I keep a garden journal to keep track of when and where I planted things. I make notes about varieties, when I got them, and how they are doing. Yes there are some entries that say ‘died’, ‘died again’ and ‘maybe the third time is a charm’. After 3 times I usually move on and don’t try again.
Some of the planning for next year for me consists of Northwest Flower and Garden Show in February 2016, working on a bog garden/children’s garden at my place, and expanding the fruits in the Vegetable Garden.
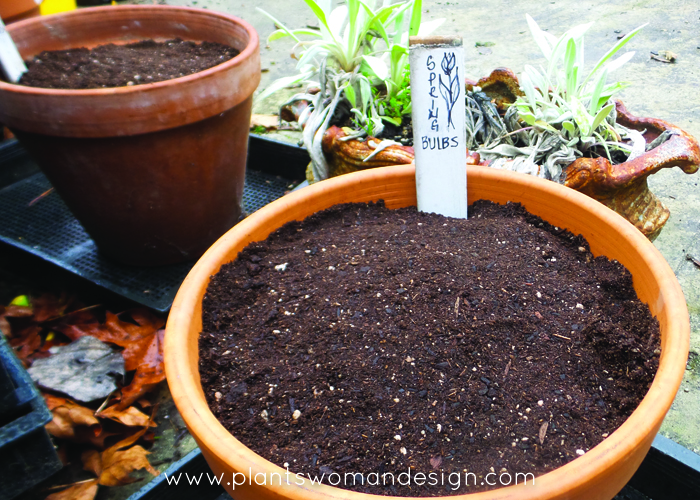
I recently went to a lecture by Helen Dillon, a great plantswoman from Ireland. She was amazing, great personality and good showcase of her garden through pictures. One of the things she showed was her method of layering bulbs. The pots that she used were medium sized metal garbage cans.
Today, using her methods, I did some containers of my own. I like to use clay pots because they go better with the rest of my garden. When they are blooming I tuck them into a garden bed that needs color or just used on their own to bring a breath of spring that lasts for several weeks.
Here are some of the bulbs we will use in our containers. You will also need some fresh potting soil, and bulb food. Choose a good color combination that you will enjoy. The important thing is to choose a late tulip, a mid season tulip or narcissus, and small crocus and iris that are both early season bloomers.
Place soil in about 1/3 of the container. Add the late season bulbs around the soil and sprinkle with bulb food.
Add a layer of soil and firm down. Add the mid season bulbs next. You can make patterns by putting them in groupings within the pot if you wish.
Add the small crocus and iris, follow with the bulb food and more soil. I usually put the shorter growing bulbs around the edge and the taller ones in the center. The yellow crocus will look great with the dark purple iris.
The container will have a succession of flowers starting with the crocus and iris, then the mid season tulips or narcissus will come up through the dying foliage and the late season tulips will follow.
Don’t worry about the bulbs being planted deep. The bulbs will come up anyway. They can be replanted after bloom in the garden for next year’s flowers.
When finished, set the pots outside where they will stay cool and get watered. Putting the containers on a plastic tray will keep them from freezing and cracking. It is best to use a freeze proof container but the air space under the pot will add an extra layer of protection.
I like to re-use and recycle things so the plant labels are pieces of wood from a broken shutter. Simply use a Sharpie to describe the planting and maybe draw a little flower to decorate. Best of all have fun doing it, and enjoy the flowers this next spring.
One of the things that I am most passionate about is plants. From the beginning I have been enamored with different species, types and hard to find cultivars. The first time I went to the Northwest Flower and Garden show in 1997 was to see the display gardens and check out new plants. Even though I didn’t have a big garden I wanted to put in something that other gardeners would not know. I once applied for a job at Heronswood so I could be close to the rarest of plants.
I regularly look for unusual plants whenever I go to a nursery, in trade and gardening magazines, and order things that look interesting online. I’m thinking that many of my you have the same interest and would love to take a peek at my favorites of the moment. So I’d like to introduce the Plants I Dig series. You can look forward to a monthly post about the plants I’m currently ‘digging’ at the moment. Here’s what I’m digging for November.
Weigelia ‘Spilled Wine’ Shrub
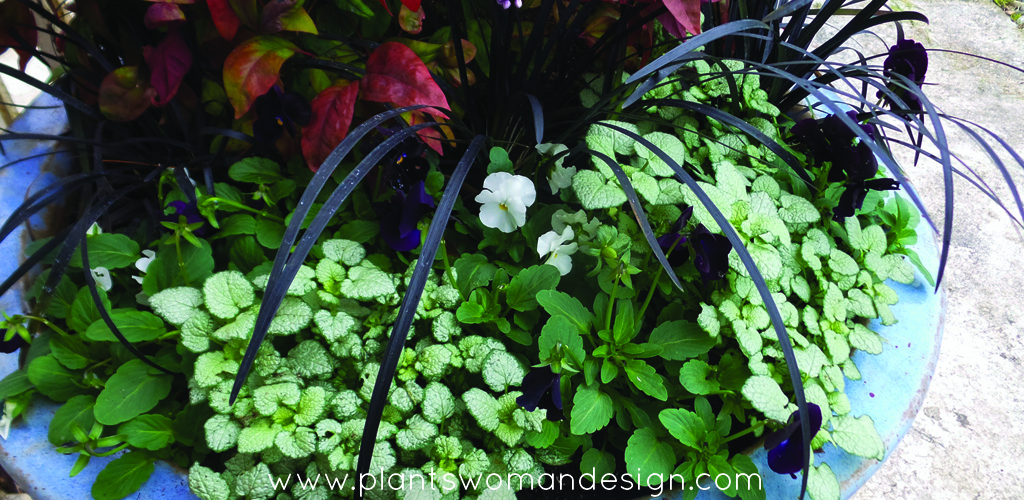
At my local nursery (Valley Nursery) I ran across a new Weigelia. This charming little dwarf, ‘Spilled Wine’ (she’s the one with the dark leaves in the back) has the blackest of leaves that stay dark throughout the season without turning red or green. Previous dark leafed Weigelias had a problem with fading throughout the season. The size is perfect for blending with front of the border plants and the accent of the dark leaves creates drama for other plants.
Plant in sun or shade, deciduous with red/dark pink flowers in the late spring, early summer. Zone 4-8 and deer resistant to boot.
Try paring it with Lamium White Nancy, Black mondo grass, white heather Alicia, and a sprinkle of black sorbet violias.
Albuca ‘ Frizzle Sizzle’ Bulb
Another gem I discovered at Ravenna Gardens in Seattle is Albuca ‘Frizzle Sizzle’. It has spikes of fragrant orchid-like chartreuse flowers. The foliage looks like onions but twisted in to tight curls. It is one of the plants that is summer dormant so it comes into full flower in the fall. It is not happy in the cold so tuck it under cover and bring it in when it is ready to bloom.
It likes full sun to part sun, in a warm spot. Zone 8 – 10. It is a bulb but would appreciate a greenhouse in the winter.
Mine has a spot on the counter right now so I can enjoy its vanilla scent. The soil needs to dry out a little between watering.
Polyspora longicarpa ‘MonSaPaRby’ Fullmoon Polyspora
The Fullmoon Polyspora a beautiful Dan Hinkley introduction with Camilla like flowers and shiny new red leaves. The original seed was collected by Dan Hinkley in China. Related to Stewartia, and Camilla it blooms late winter to early spring. This is a perfect evergreen shrub to use as an accent or in hedging. Zone 7 in sun or part shade with few pests.
One thing I like to do is to keep new plants close to me so I can observe them. Sometimes I put them into a container with other seasonal plants or sometimes by the door to my office so I can go by them and touch them. If they have a scent I can enjoy it, if they change colors I get to observe that too. Experimenting with color combinations and cultural placement can be done and easily changed on a whim. It’s good to plan where they go before you buy but we’ve all purchased something on a whim and then struggled to place it. Keeping it out of the ground for a bit will help you decide where it goes. You can even add it in the garden without taking it out of the pot if you really aren’t sure.
What interesting plants are on your ‘Dig List’ right now?
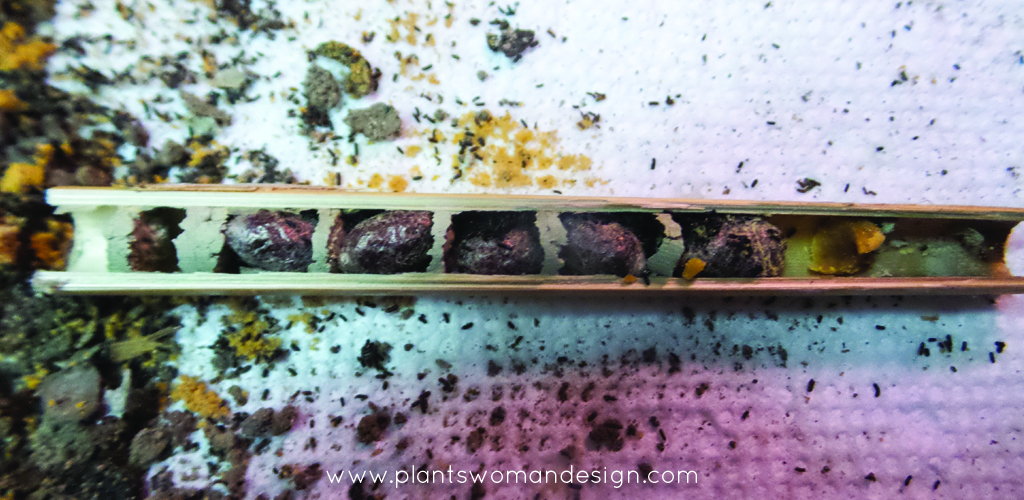
Winter is just around the corner and it is time to harvest my Mason Bees. Not everybody does a harvest but for the best life expectancy constant winter temperature is important.
First some help with the bee removal from my Granddaughter Kayla. We took apart the block of bees and separated all the material in the tubes. There were bees, pollen, mud, and feces. We had a couple of different type of tubes. The bamboo tubes have to be separated by cutting into one end and the breaking the tube apart.
We carefully pulled out the cocoons and threw away the mud plugs and rest of the debris. There are two sizes of bees. The bigger ones are the females and the smaller ones are males. There are some empty cocoons, these can be from pests, or the bee wasn’t good at building the cocoon.
In the pictures you can see some pollen and also some big sections of orange looking pollen. I think this might be mites so I will clean the cocoons with sand to get rid of the mite debris around the cocoons. Usually the mites will not really affect the bees when they are not in the tube but better to be safe than sorry.
After they are clean I will put them in a plastic produce box with a little moist paper towel in the bottom. It will stay in the refrigerator until next spring when the weather warms and then back they will go out into the mason bee house to pollinate again.
The most interesting things are the many small cocoons that are also in the tubes. These are likely native solitary bees that made a home in the bee house too. There are over 130 different varieties of bees in the garden. These will be stored with the mason bees. There are some tubes that are permanent in the house and they will stay outside until the bees come out of hibernation and they will make their own way out.
I’m excited that I have so many more bees than I put out last spring. Quite a harvest!
The page you requested could not be found. Try refining your search, or use the navigation above to locate the post.
The page you requested could not be found. Try refining your search, or use the navigation above to locate the post.
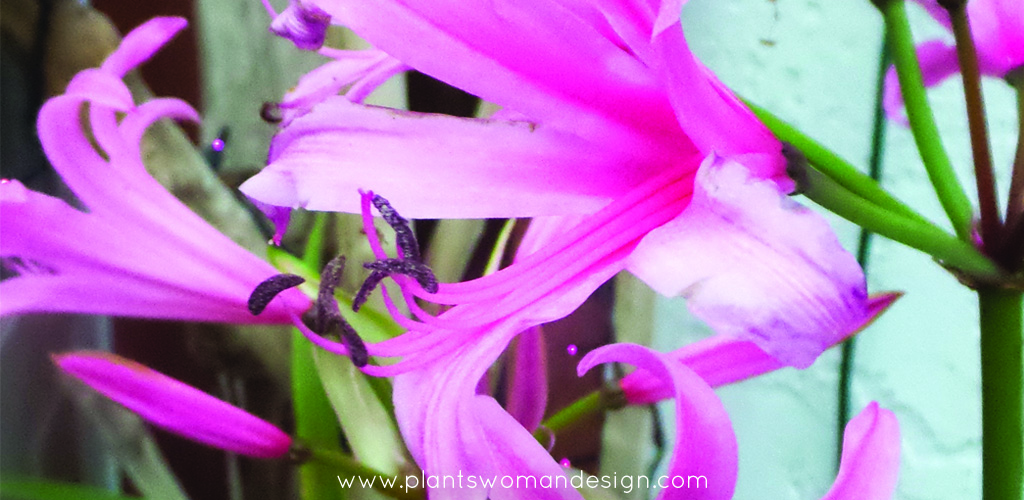
Naked Ladies…
Sometimes common names are a little risqué, right? Naked Ladies is the common name of the Nerine, so called because they bloom without leaf. It is always good to be sure that you have the right plant and get the botanical name.
I love Nerine bulbs. I first read about them in 1997 in a Garden Design Magazine from the UK and wrote about them last year in my fall bulb post. I’ve seen them planted by people long gone and growing in unexpected places. They are so surprising at this time of year. Everything is red, gold, and orange, but then an unexpected blast of pink dancing through the autumn blaze.
Many of them are not very hardy in our area because they originally come from South Africa.
The nerine bowdenii is the hardiest and easiest one to find. I found some fabulous fat bulbs blooming at Ravenna Gardens last week. I also have some in the garden that I got online last winter. They are still small and are just starting to put out one bloom. Looking at the size of the bulbs I can see the ones in my garden need to put on a lot more girth before they are as fabulous as the ones I found at Ravenna Gardens.
Here’s a little history for you… Nerine bowdenii is one of the stars of the fall garden. Natives of southern Africa there are 24 species. Growers have been busy hybridizing these lovely bulbs and have produced umpteen cultivars. Two names come readily to mind. The first to be introduced was Nerine sarniensis – the Guernsey Lily – and was described in 1635 by a French physician, Jacob Cornut. The story of its introduction to Guernsey is not clearly known. It was thought that the bulbs had come from Japan, but Nerine sarniensis is native to the cliffs of Table Mountain and was loaded on to a Dutch East India Company vessel which called for fresh supplies at Capetown. This vessel is rumored to have grounded on Guernsey and the bulb was given to the Jurat, John de Sausmarez in gratitude for hospitality before 1655. Linnaeus named it Amaryllis sarniensis in his Species Plantarum in 1753, but it was subsequently named Nerine, (after the sea nymph), by William Herbert (1778-1847), in 1820. Nerine sarniensis comes from the summer-dry region of South Africa and flowers as the leaves are developing.
Nerine bowdenii on the other hand comes from the summer rainfall area of Eastern Cape Province and the Drakensburg mountains, where in grows in moist soil at the foot of cliffs. It is named for the British surveyor, Athelstan Hall Cornish- Bowden (1871-1942) who sent bulbs to Britain in 1899. It was described by William Watson (1858-1925) in 1904 and featured in Curtis’s Botanical Magazine tab. 8117 in 1907. It flowers, after the leaves have withered, in October and November and is quite hardy, gradually building up into large clusters of bulbs. Nerine bowdenii is a bulbous, herbaceous plant with flower spikes to about 18” (50cm). The flower color is bright pink with recurved tepals. The flowers are long lasting and floriferous.
There is a Nerine and Amaryllid Society with members around the world. In our area one of the coolest places to get them is close to us – the Pacific Bulb Society. The trick is that they don’t sell the bulbs you have to become a member to join the bulb exchange. It’s great to join a society like this to promote exchange and preservation of bulbs and plants. I have also purchased my Nerine bulbs from Amazon. They came all the way from Africa and it was exciting to have a package from far away show up at your door with plants.
Cultivation: Nerine bowdenii is perfectly hardy in zone 7 with good drainage. The bulbs should be left undisturbed to bulk-up. Flowering is enhanced by the bulbs over-crowding. The bulbs of Nerine bowdenii need summer moisture where as those of Nerine sarniensis should be allowed to dry-off during the summer. The bulbs should be half-buried with the long “neck” above ground. Planting against a wall in a good loam is ideal.
Propagation: Division of the bulbs is by far the easiest method of increase. Seeds, which are readily produced, should be sown immediately on ripening and just pressed into a seed pan. Flowering will take 5 years and the outcome might produce new flower colors.
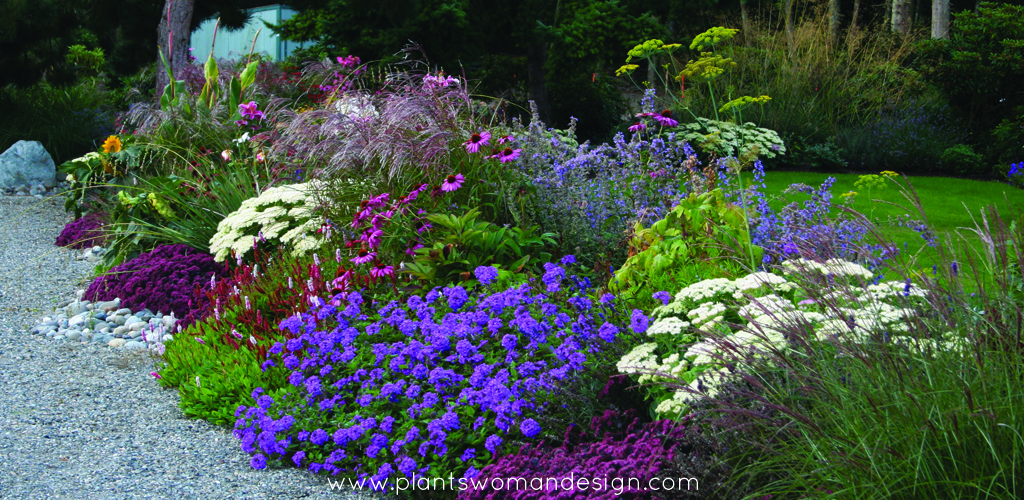
Designing a garden can be tricky and every project is different. There is simply no cookie cutter approach to garden design. Each client comes with different needs, tastes, and property. What to know a secret? One of the hardest things to design is a blank slate. No kidding, it really is difficult. Having pre-existing features to work around often steers the design. For example, if the house is already built you can’t really move it to optimize the sun. Or, if there is a big slope with a drain field in it you can’t really change it.
Often I get to be in on the beginning of a project, before the house is even sited. While it is energizing and fun it is challenging as well. One of the hardest things to get right is scale because the scale garden should match the scale of the house. If the lot is covered with trees they affect the way the house is positioned, and often some must be removed to optimize sun. Here in the Pacific Northwest we always want more sun. Gray days tend to make homes dark so windows that face south are important. Tree planting, including height considerations, is very important. Shade on the west side is good and filtered sun on the east is also good.
Here are a couple of things to think about as you plan your garden.
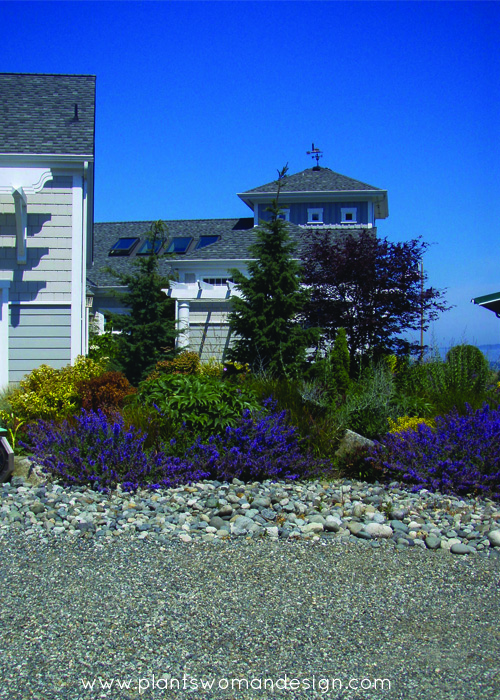
If a large house sits on a small lot (as is often the case now days) it is good to use taller thin trees and sweeps of the same types of plants to make it feel more grounded. The role of the landscape is to help the house blend in with the land around it.
Once scale is established planning what plants and hardscape to use is easier to determine. Think big, cozy, nestled, blended, integrated. These are all good descriptive words to get your brain thinking scale. Here are a few more ideas on how to incorporate appropriate scale…
I’m not a big seed saving person but I can’t really resist seeds when they are lying right in front of you. If you have never tried saving seeds before here is a little introductory tutorial for you. Veg seeds are easy to work with and usually very successful for home gardeners.
Before I start I realize that many people don’t see the need to save seeds. Lots of gardeners think that the $3.00 or so for a packet of seeds is not a big deal in the grand scheme of things and are happy to support the seed companies. When I think about the history of gardening the seed companies were the last ones on the scene. Historically gardeners always set aside a section of their garden to save seeds for the next year. The way many plants were shared throughout the globe was by seeds. Seed trading was a valuable monetary contribution to small communities and villages in exotic places. Precious peony seeds were traded and sold for extravagant amounts. Even now the trade of snowdrops seedlings and seeds is a crazy horticultural frenzy in the UK.
The other thing to think about is the ability to have a variety of veg that does really well in your garden with all its exposure and water variables. A spinach plant comes to mind. It was so great in my garden, didn’t bolt, lasted a long time with out the leaves getting too big. Now I’m kicking myself that I didn’t save the seeds since I can no longer find them. It was not popular enough to continue to produce large amounts in a big seed company.
If you are a person that is worried about the climate change, end of the world, and GMO variables in our food supply then seed saving doesn’t need to be explained.
Most plants want to produce seed. It’s a survival thing. Herb seeds are particularly easy to grow. There are perennial herbs and annual herbs. The perennial ones can be counted on year after year but the annuals like basil and dill need to be planted each year.
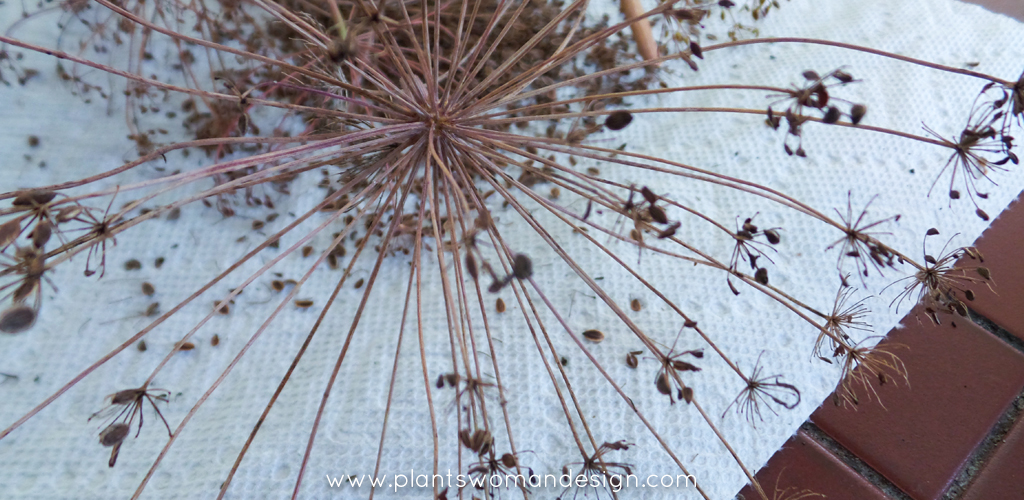
Here is a picture of the dill florets with seed attached. They spill everywhere and are not hard to collect inside. Sometimes if they are very dry I cut them into a large paper bag so I don’t lose most of the seeds on the way in the house. I place them on a paper towel so they are easy to see.
The key with most seed saving is making sure that the seeds are totally dry before you put them into storage. I like to keep them on a towel in a west-facing windowsill for at least two weeks.
Basil harvest is a little different. The remaining plants are brought in and leaves are picked and dried separately from the seeds. See my great little wire bakery rack for drying herbs. It works well and is decorative for sitting around my kitchen for a week or so.
The Seeds are taken off and spread out. If they are already dry then they can be separated right away. If they are on the green side they need to be dried out until you can separate the husk from the seed.
Here is a picture of the seeds and husks.
Again to the paper towel these go, and another spot on the windowsill is secured.
I have friends that lay all the onions, and other dryable vegs in the garage and open the garage during the day and close it at night so the sun helps with the drying and the closed door keeps it from getting moist again at night. Herbs can be done this way if you are in a fairly wind free area during the drying process.
Bean seeds are also easy to keep. This pile of beans is from the ground and dried on the plants. If you forget to pick them they will dry up and are ready to be saved when you take out the plants for fall.
Beautiful seeds again collected and labeled. The Romano beans are all in rows together so it is easy to pick out the seeds. The other groups of seeds are three different varieties. Haricot vert, Nickel Fillet, and Baby fillet beans. It is fun to see all the varieties together and be able to pick out which ones were which. You can leave all of them in the packet together or separate them. They all grow about the same size and have the same maturity date. They may cross-pollinate and you could have a variety in your garden that is new.
Bean seeds need to be dried out as well so when you put them into packets they will not mold. Some of the beans are more dried than other when you are pulling them out of the shells. After they are dried they should be close to the same size. The moisture will come out of the bigger seeds and they will shrink.
Simple packets are available by checking out our ‘Leaving a Legacy’ post from last year. Blank seed packets are available on Amazon. They can make great gifts too.
What seeds are you saving this year?
Sometimes you just have to love a plant for an unusual characteristic. Fuzzy plants are that way for me. Something about a hairy leaf is interesting and intriguing. There are even plants with fuzzy flowers. That is just crazy when you think about it. J
Fuzzy leaves and flowers are a response to several survival factors. Fuzzy leaves will keep them from being eaten by most insects. Grazing deer and rabbits will usually leave them alone as well. In the desert the special hairy leaves will help keep moisture in and protect against drought and sunburn.
Fuzzy flowers provide more surface area for nectar to be available for pollinators. Many plants that live in dry climates have fuzzy flowers to protect against losing moisture. Certain species have more fuzzy flowers than others like the many varieties of salvia. Here are a few of my favorites right now…
This Russian Sage – Pervoskia Atriplicifolia here has a long spike of flowers with fuzz all up and down the spike and small blue flowers bloom out of purple, hair covered calyx. It’s out of this world!
One of my new favorite plants is this Stachys ‘Bella Grigio’. It was a must have plant two years ago and I couldn’t find it anywhere. This year I was able to get some from the grower and have really enjoyed it. It has great structure and really puts on growth the first year. The hardiness is a little iffy some say but I’m willing to try leaving it outside this year.
Fremontedendron ‘Ken Taylor’ has orange flowers instead of the yellow flowers of the species. The common name is the Flannel bush, which describes the leaves extremely well. The leaves are also fragrant which was a surprise to me.
Verbascum is an old garden plant that once you have it you can never get rid of it. Lovely where it can get big and tall, not so great near the edge of a walk. This volunteers all over my garden and I pull it out where ever it’s unwanted.
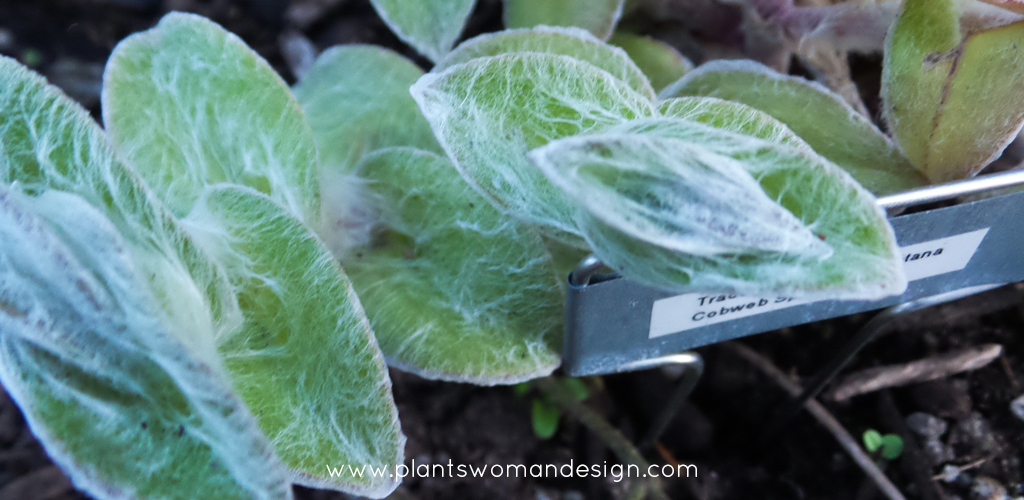
An unusual variety of spiderwort is this little fuzzy Tradescantia ‘Cob Web’. The leaves are fantastic, even if the blooms are a little on the small side. The soft velvet leaves are so amazing you just get caught up in the web.
Very unlike the common Kalanchoe, which is a over offered plant at the grocery store, Kalanchoe ‘Fang’ is more my style. The amazing hairy or fuzzy leaves are gray with brown. Bumpy and spiky textures also come into play on the leaves creating so much interest that it is hard to imagine what would happen if it flowered. It does but mine has not yet. I let it spend the winter in the greenhouse just in case it gets below 25 degrees.
Leonitis leonurus or Lions Tail is a great name for this fuzzy flower. The stem is square with tiered whorls of multiple flowers. Long blooming throughout the summer it really does make you think of lions.
I’ll leave you with a great picture of a mini-lion, the cat Louie. He loves this plant and spends time hitting at the stem and making the flowers wave back and for. Many plants have many uses, many shapes and sizes. What’s not to love about fuzzy plants?