by Susan | Jun 12, 2015 | LB Tutorial: Design Challenge
Not surprising I suppose, most people in Washington State don’t have to worry about too much sun. Most lots are shady with many native trees which usually provides a place with enough shade to have a shade garden. As Robert Jones recently said ‘Shade plants are the more interesting plants’. I love shade plants but on my little piece of earth there is a lot of sun. Most of the property receives full sun all day except by the upper pond. That area receives the hot afternoon sun. Many good shade plants cannot take that type of exposure. The wonderful ariseamas, trilliums, hellebores, epimediums, paris, michela, camillia, solomans seal… You get what I mean, these cool shade plants will not be happy there.
The solution? Plant trees!
This means I actually get to plant some wonderful trees I’ve wanted to grow including some trees of my plant sale adventures like the Magnolia Wilsonii, Magnolia laevifolia, and Aesculus Hisp. ‘laciniata’. Of course there are some trees that have been removed from other gardens that were not good enough after delivery or just weirdly shaped that also get a place in my garden. There is a Japanese maple that was delivered from a grower that looked so bad I couldn’t put it in a client’s garden. I’ve had it for a while and it still doesn’t look good. In it went anyway. A black tulip magnolia with ½ a root ball, I’m not sure will make it. A dogwood that refused to bloom at a customer’s that I replaced with a more prolific bloomer. A red horse Chestnut that I purchased but never had a place for before, and a new cultivar of Cornus called ‘mandarin Jewel’ with orange fruit in the fall.
“before” – plant storage area
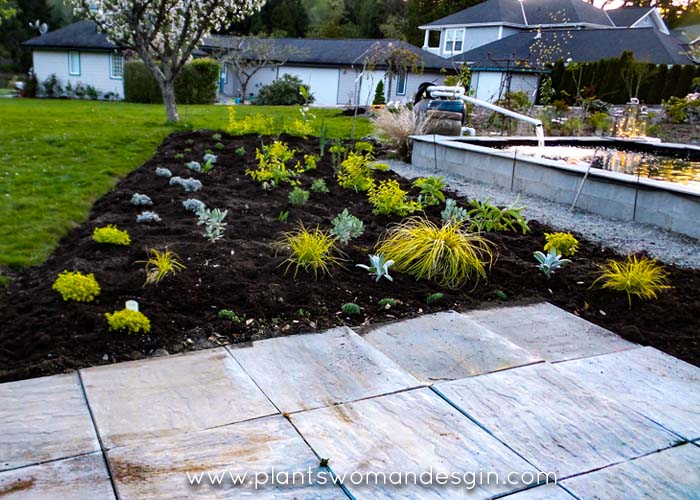
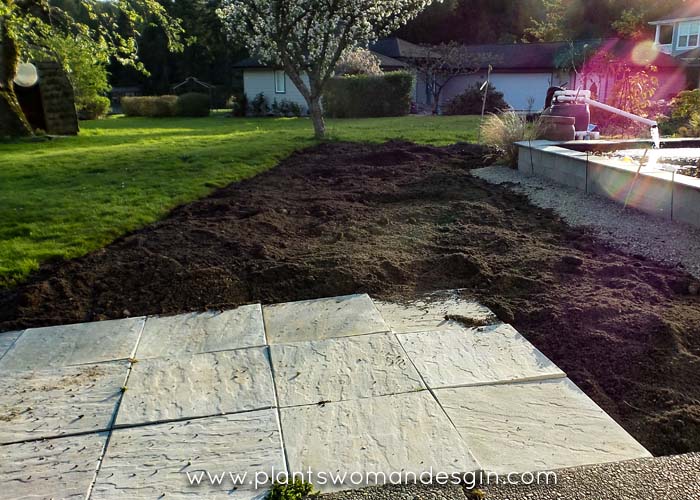
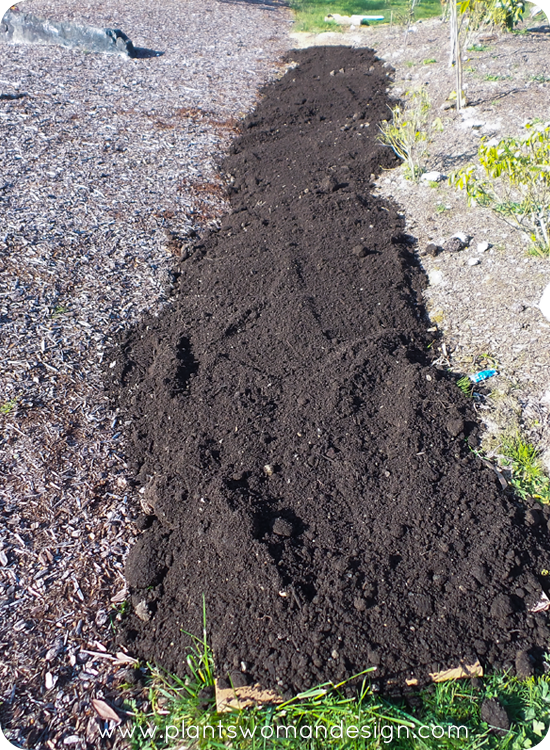
Now for the plan: I have been placing plants along the edge of the pond in partial shade since I moved in. Plants I saved from my old house and new things I’ve collected. The edge of the pond has gravel around it with lots of black plastic. To create the bed I removed the gravel and black plastic. Then, mixing new soil and compost together, I built up the bed and planted.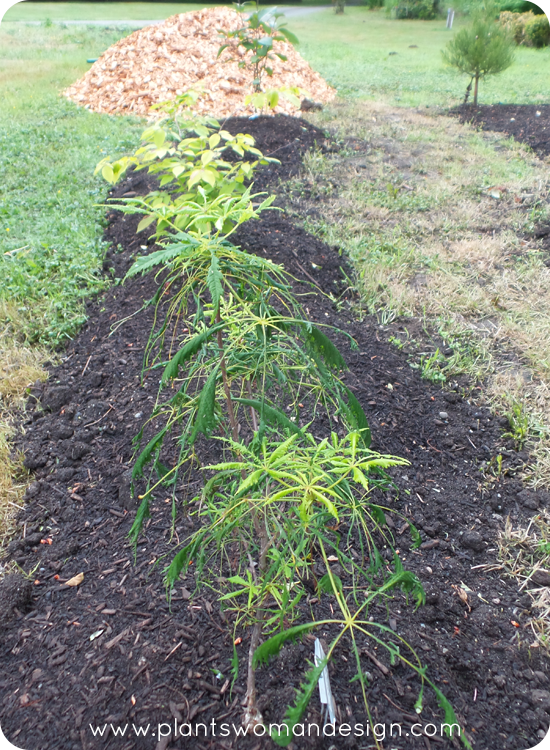 I want the trees to provide shade but I also needed to create a place to walk next to the shade plants. Placing the trees close together would obliterate the view of the plants so I placed them about 20 – 25 feet away from the shade plants. This will be a path after removing the grass there and putting down a good layer of wood chips. I hope to contact a wood-cutter to give me some of the chips left over from clean up.
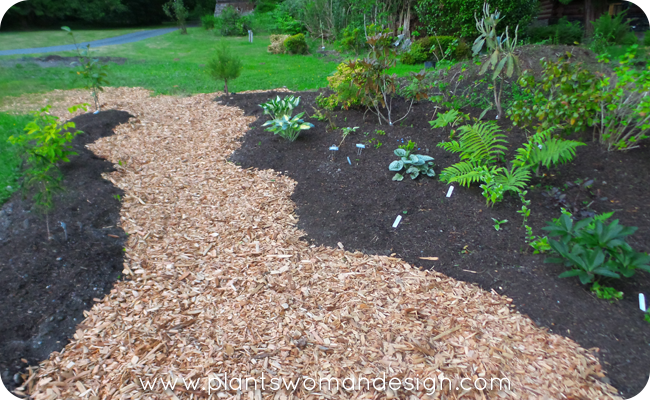
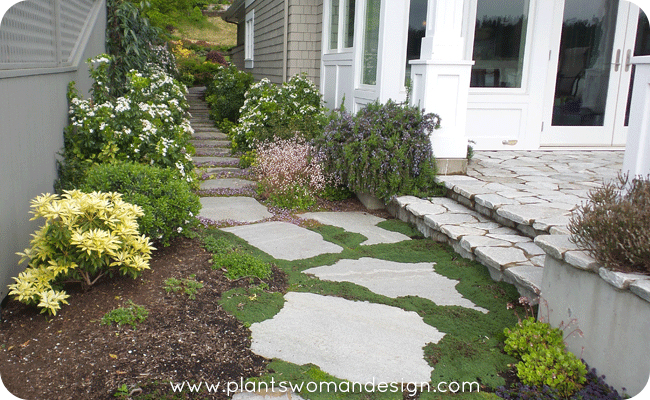
“after” – fully planted bed with walk
Cedar Play chips is the best material to use for the pathway. You can use other types of chips but the flat play chips make a good walking surface. The garden beds were weeded before the compost when down and the play chips in the center.
You can now see the pathway better and the indent of the beds. I’ll keep you posted as it grows in.

by Susan | May 22, 2015 | garden food, LB Tutorial: Design Challenge
There are times when I wonder if other designers get to design and plant vegetable gardens. I feel lucky that way! Recently I got to design and plant a veg garden for clients who only come in during the summer.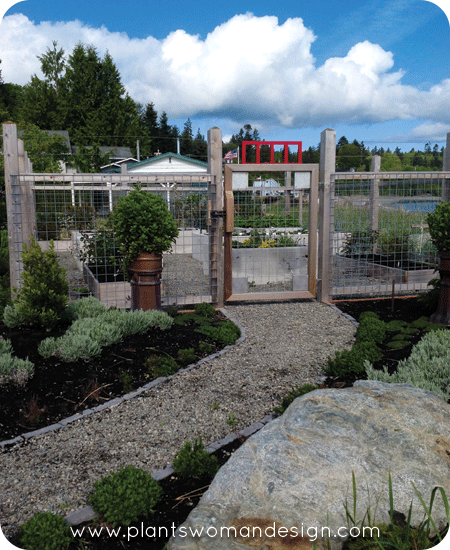 Obviously without year round residents a fence is needed. Because we aren’t sure how many deer are in the area the whole of the edibles and roses are protected. The fencing is galvanized wire and is connected to 8 x 8 cedar posts, the metal work on the gate was created by the owner. They put the fencing and gate together as a weekend DIY project.
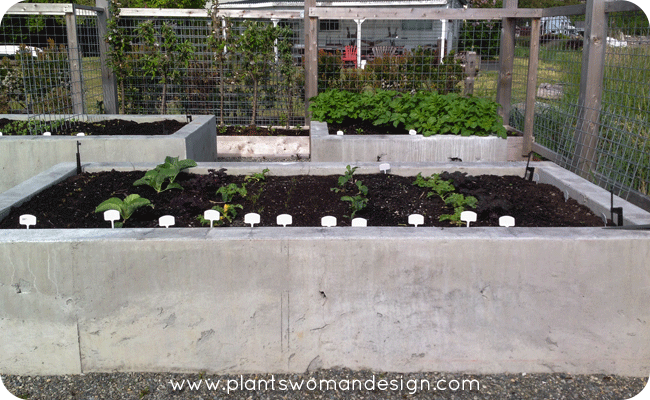 The raised beds are concrete poured into forms but not packed down to give it a rustic finish. We left the with bottom of the form open for good drainage and installed landscape fabric membrane over the native soil at the bottom of the beds to keep the beach grass out. Water is able to go through the soil and into the native soil beneath.
Drip irrigation was added with spray emitters at the corners and along the edge for good coverage. This system connected to the main irrigation system but is on a separate zone. We added a frost free hydrant for extra water when needed.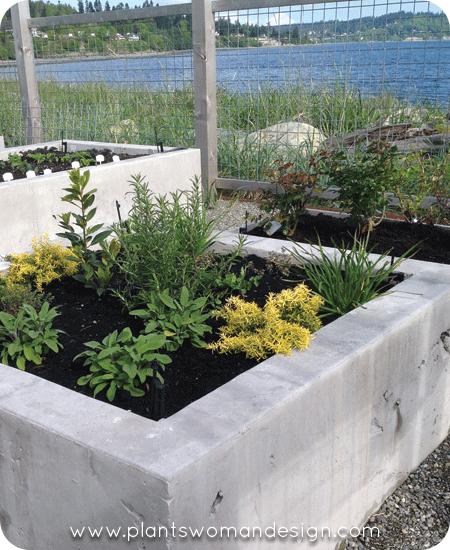 The first bed is the herb bed with a center cone of rosemary and a bay tree. Basil will be added later when it gets warmer.
Early spring crops were put in first with some starts of kale and broccoli added along with the seeds of the same. I used different colors of kale and chard along with several colors of lettuce to make patterns in the planting. Red leafed lettuces, Radicchio, Romaine lettuce, spinach, and arugula are all planted in rows to make a pattern.
Fun purple beans, purple sprouting broccoli and watermelon radishes add some interest and more color. One bed is dedicated to exuberant potatoes both fingerling and yukon gold. Chard is tucked in there for fall color. We dig the potatoes out in the spring removing some. Here in the Pacific Northwest potaties continue to grow all year so will get too congested if left on their own.
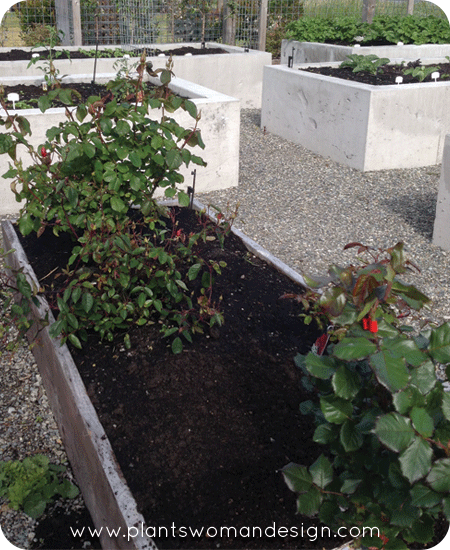 Two side beds hold a collection of roses for cutting. Two new ones we are trying this year are Chihuly and Anna’s Promise.
How many of you readers grow a vegetable garden along with the decorative ornamentals? Tell me what your favorite vegetables or herbs are!
by Susan | May 15, 2015 | LB Tutorial: Design Challenge, Plantswoman Design
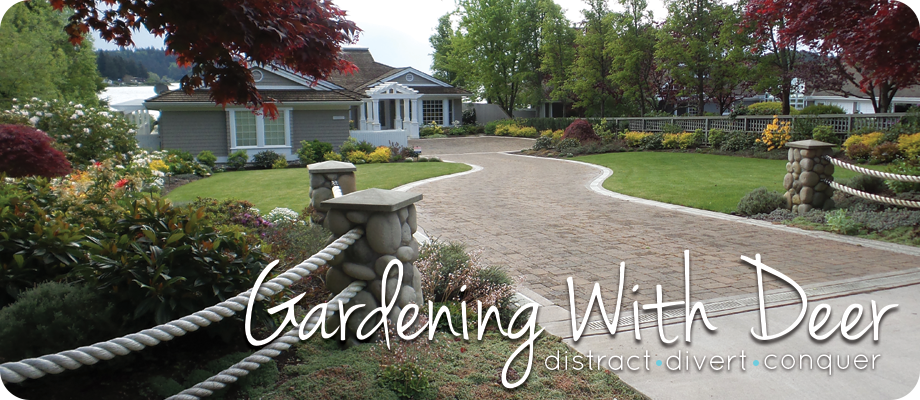
Many times clients ask me to design a deer proof garden. On Bainbridge Island there are many deer. They are so rough looking that they look like much loved stuffed animals. You may have heard the old adage that there is no such thing as a deer proof garden. And that can seem true as deer will eat anything if they are hungry enough. All you can really do is plan and experiment to see what works for your area. Sometimes deer at one end of the island will eat different things than the deer at the other end. I’ve seen them leave the hosta to be eaten by slugs (maybe they don’t like slugs either) and eat tender fern and rhododendron leaves. While at other places anything that looks like a hosta is eaten to the ground.
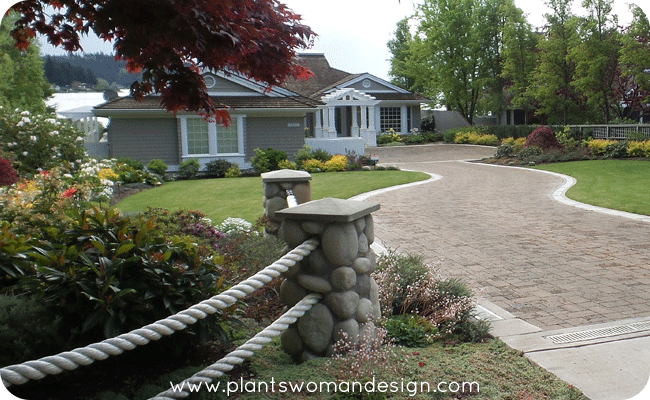 This is a beautiful coastal garden in the Point White area of Bainbridge Island. The clients are not here in the winter but come back in the late spring to the blooms I’ve planned for them.
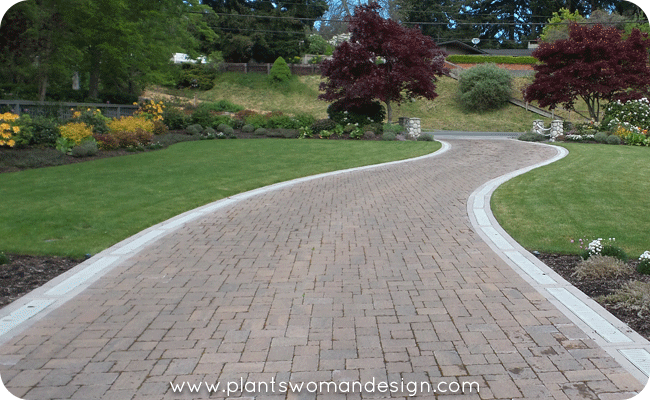 The paver driveway is good for the moist site and any excess water is directed down the edge drains. A combination of grasses, heathers, sedums are on raised berms to keep their feet from getting too wet.
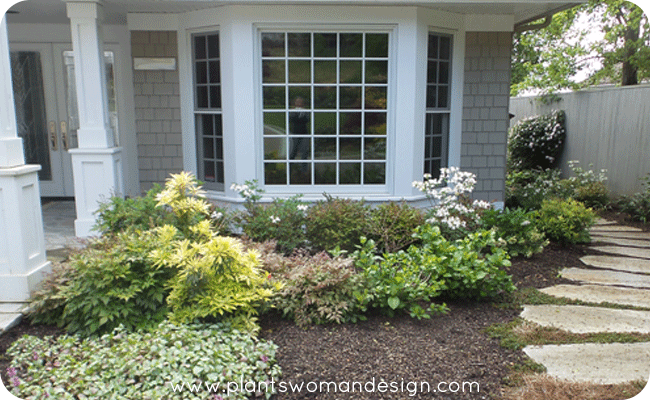 The owners requested evergreens and good blooms, they also love hydrangea (aka deer candy). We tucked these in close to the front door so they can be enjoyed and are less likely to be eaten. One thing the deer have eaten are the blooms off the Bergenia. The leaves are fine but the blooms are gone. Who knew?
Here is my go to plant check list:
- Plants with fuzzy leaves like yak hybrid rhododendrons.
- Plants with strong fragrance like lavender, Sarcoccoca, and herbs
- Grasses (sedges really) with edges on the leaves.
 Design Tips:
Plant ‘must haves’ like hydrangeas close to the house, by a tight side yard, near a patio or screen fencing. Deer like some hydrangeas better than others. Oakleaf will be eaten as soon as there is a leaf showing while paniculatas are often left alone.
Plant Roses on trellises so they bloom above the reach of deer.
Repetition is your friend. Planting something like heather, pine, or Hebe and repeating it gives a great look with less worry about feeding it to the deer.
Put out a couple of sacrificial plants to see what the deer might be eating in your area. You will soon know what their favorite food is. You can always bring it back to the greenhouse, holding area or give it away if you can’t place it.
Plant ‘deer candy’ surrounded by other plants deer don’t like. It often distracts the deer and they will leave it alone. I have one customer that has a beautiful oak leaf hydrangea surrounded by a belt of Berberis thunbergia – Red Barberry. Roses surrounded by Lavender also works.
Get a dog. Even non-aggressive dogs will keep deer away…. I’m just kidding really. Sometimes a digging romping dog is more trouble than the deer!
Share what you do to protect your plants from deer. Maybe you have a different problem like rabbits. They can be devastating too. What are your ‘go to’ tips for dealing with uninvited wild life?
by Susan | May 8, 2015 | LB Tutorial: Container Gardening, Plantswoman Design
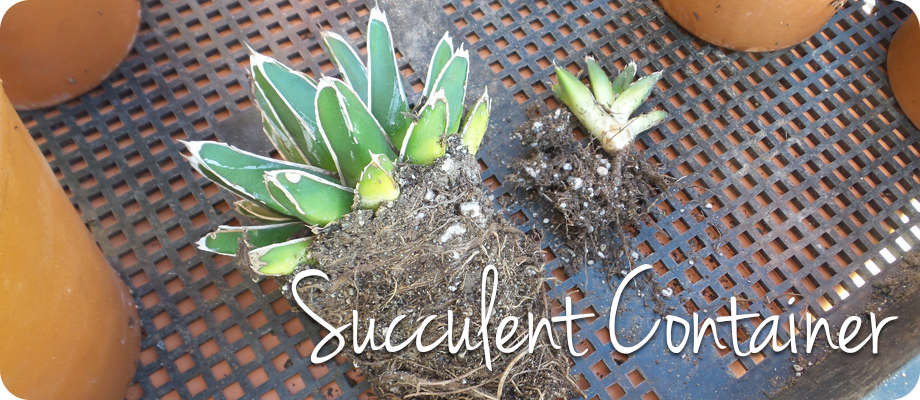
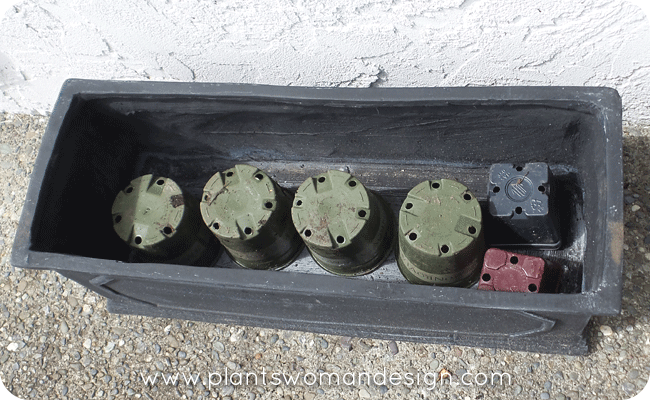
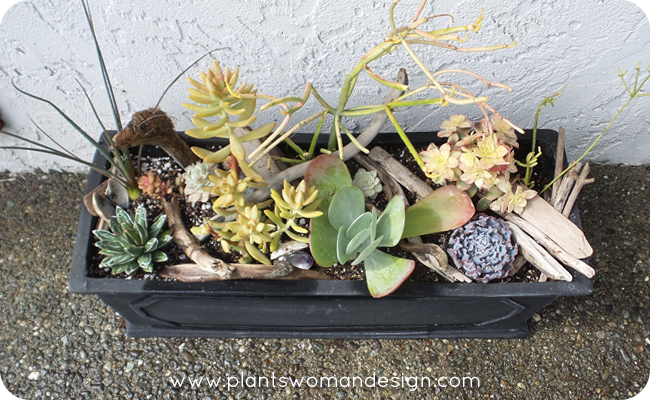
Succulents are all the rage right now. Every place I look, from the grocery store to the nursery, I see them. Many of them are not hardy in our area so they are treated like annuals. Surprisingly enough they are not hard to keep alive in your house with reasonable light and very little water.
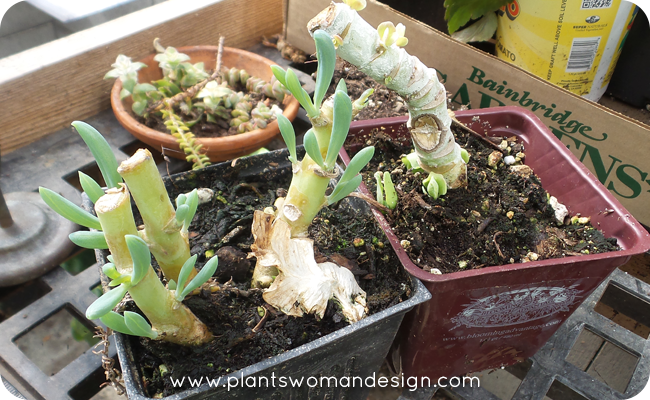 I hate to throw away plants so I try to keep them alive if I can. Now that the weather is getting better I’m ready to bring some of my previous saves back out. Sometimes I pick up a few more to add to the collection. Ready for a quick planting idea that you can engage your kids with?
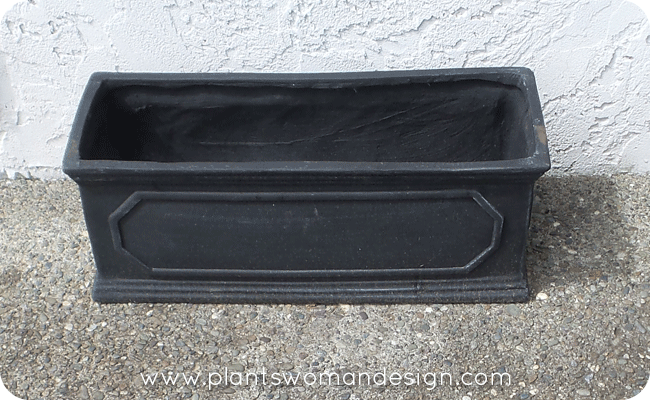 Lowes had a very lightweight rectangular planter. Just perfect for dropping some plants in! First I pushed out the plug in the bottom so the water would drain out. They come with a plug so they can be used as a water planter as well.
 The succulents only need a small amount of soil to survive. The hardest part of keeping them alive is soil saturation from over watering. The way to use a deep container like this is to use a filler of some sort so the soil level is much less than the entire volume of the planter. I have used several types of filler but this time I’m using old 4-inch pots. Dropping them upside down inside the container will leave airspace beneath them and less room for soil above them.
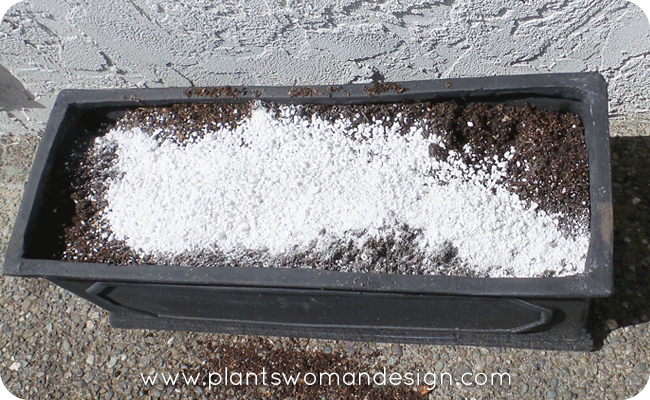 The soil used here is regular potting soil with extra perlite added to increase the air space in the soil. You can use a cactus mix but you can also mix your own soil from all purpose soil mix and adding different amendments.
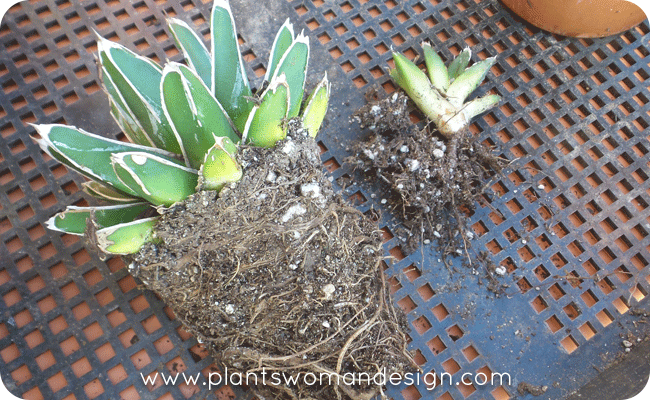
 Using what I had over wintered with some new plants I created a little mini garden.
 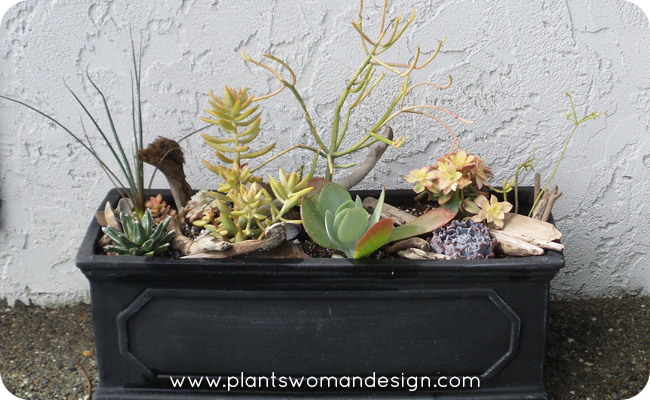 When planting try to plant contrasting leaves next to each other, putting tall things in the center or off center and build the contrasts around them. Firm the soil around the plants and soak the soil to settle it around the plants.
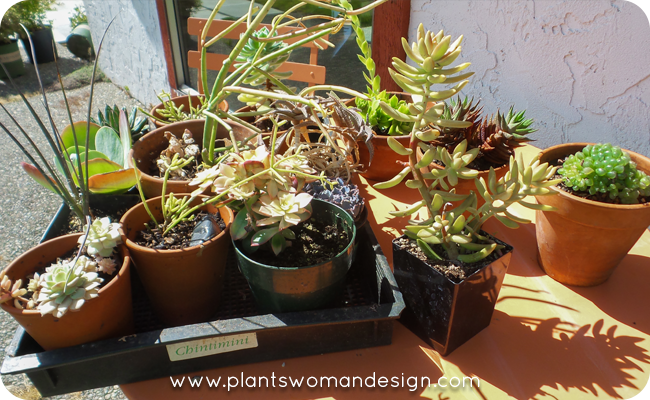
 For the finishing touch I grabbed some pieces of driftwood, and shells from the beach. This is the perfect opportunity to have your kids help. My grand kids are always picking up rocks and sticks from their outdoor adventures and these collections can be added to the top of the planter to act as mulch. Ask your kids to add what they’ve collected on top of the soil. Rocks, sticks, beach glass, feathers, seedpods, whatever they come up with is so much fun. I usually have the worse time keeping my puppy from dragging out a couple of pieces to chew.
 Do you have succulents? How have you displayed them?
by Susan | May 1, 2015 | LB Tutorial: Skills, Plantswoman Design
Many of my clients have heard me say, “I don’t put it in your garden unless I’ve grown it myself.’ I am always experimenting and trying out new plants. After one Northwest Flower and Garden Show the sales rep from Encore gave me several varieties of Encore Azaleas. I tucked them into my garden and gave them a year to grow on to see how they survived a winter. Of the seven varieties I received, two did well, and five didn’t do so well. The ones that did well bloomed well, recovered from a cold winter, and looked good coming out of it. The five that didn’t do so well looked bad, they struggled through the winter and didn’t bloom. Because of this field test, I was able to add two azaleas to my pallet of plants which I still use today.
But, because of my field testing, my garden can look a little haphazard. Sometimes I will put a plant in two different areas to test drainage, hardiness, or sun/shade. Or plant three or more of the same species of plant in various colors together. Experimentation is exciting when plants that are not hardy survive, unexpected color combinations present themselves, and learning that not giving a plant everything it wants keeps it under control. Dead plants will always be a design flaw. Invasive plants are also a design flaw.
Pictured above is a newly created bed in my garden. As I contemplate the design for this bed, I’m taking a walk in my client’s shoes. The result is a design that would satisfy many of my customers. Striving for a minimal color pallet in leaf color, bloom and texture it looks and will look amazing. All the foliage in the bed is bright green and blue-gray. The flowers will be either white or lavender and blue. I dropped in three contrast plants to make the bed continue to pop in the late summer. A gray leafed Lobelia tupa with a brick red flower, and colocasia sangria, a gray leafed elephant ear with a red stem, and a low groundcover geranium ‘Hocus Pocus’ with a dark red leaf and blue flower.

Here’s how I planned this bed along with 5 useful tips for designing your garden bed.
1. Choose for height. There are higher plants in the center with graduating heights toward the edges. The far end of the bed has a taller section with an evergreen Eriobothrya japonica (Loquat) for screening from the neighbor.
2. Choose evergreen, deciduous, and perennial plants. I want to be sure that the bed looks good year-round. This bed is right in front of the window that looks towards the koi pond. So I made sure to strike a balance between all the elements so there are no big blank spots that would show up in the winter or summer because of dormancy.
3. Choosing color and texture. I pay close attention to the play of texture and color in leaves. The balance of texture between the Carex ‘Evergold’ and Stachys Bella Grigio’s blooms is just as exciting as the contrast in leaf color. The spikes of Agapanthus ‘Blue Leap’ between Lavender ‘Richard Gray’ and Spirea ‘White Gold’ are also an exciting combination.
4. Bloom time. Surprising enough, the last thing that gets consideration from me is the flowers. Because there are so many great plants to choose from, it is easy to get the flower color right. Early blooms from the geranium and the campanula ‘Dickensens Gold’ will be the first to show here. The Agapanthus, Lavender, and Centaurea simplicicaulis will be next. Later season blooms will be Caryopteris ‘Dark Knight’, Salvia elegans ‘Gold’ and the Lobelia Tupa.
5. Site considerations (AKA where is the sun). Usually, this is pretty easy to define. Sometimes you can add something that likes shelter behind something more prominent. The Lobelia tupa wants to have shelter, so I planted the Pittisprorum ‘Blue Wave’ between the water and the lobelia. This arrangement should protect the lobelia from the brunt of the weather.
Variations in the number of plants are flexible and entirely up to the designer. Repetition of plants creates rhythm and looks natural because, in nature, plants do seed around and create groups.
Plant List for Hot and Bright!
Lobelia Tupa, Caryopteris ‘Dark Knight’, Agapanthus ‘Blue Leap’, Spirea ‘White Gold’, Geranium ‘Hocus Pocus’, Campanula ‘Dickenson Gold’, Carex ‘Evergold’, Colcasia ‘Sangria’, Lavender Richard Gray, Centaurea simplicicaulis, Salvia elegans ‘Gold’, Pervoskia atripicifolia, Stachys ‘Bella Grigio’, Saxifraga crustata, Salvia nemerosa ‘Blue Marvel’, Panicum ‘Ruby Ribbions’.
by Susan | Apr 24, 2015 | LB Tutorial: Skills
One of the most amazing things about gardening is the way that gardeners share information. We are (and should be) willing to share methods and tips about gardening, things that worked for us and things that didn’t. What I want to share with you today is a gardening method that was shared with me by a great gardener over 15 years ago.
I was just out of college and was beginning to realize all that I didn’t know about gardening. Many people think they know so much when they get out of college, ready to tackle anything. I quickly found out that people who had been gardening since before I was born actually did know more than me. Ah, the arrogance of youth defeated!
Karen had been slowly reclaiming her forested plot into garden one bed at a time. She would plan out where she wanted the bed, clear it of sticks, large clumps of foliage (just cut back), and move anything worth saving. We have a small appliance company on the island and she would ‘recycle’ their cardboard by taking what she needed from the dumpster (original recycling at work). Several layers of cardboard with staples and tape removed would be laid on the ground where the planting bed would be. Mulch was next, at least 3 inches of mulch was laid over the top. She would use whatever she had and purchase what she did not. Wood chips from a fallen tree, leaf litter and manure were the usual materials. Sometimes there would be enough compost from her compost pile to use as well. If there were only woody materials she would add good compost mulch to the top. The materials would then be thoroughly soaked with water, making sure that the cardboard beneath was wet through. Then she just walked away. Amazing! In just 4 – 6 months the bed would be ready for planting. The weeds, plants, and grass in the bed were dead, the cardboard was gone and the bed was full of worms and great airy soil.
Admittedly I was a skeptic, until I tried it myself. Now if I can wait and don’t need to plant immediately I do this same method. In fact I used it last year to put in a late veg garden after I moved into my new house, 4th of July Garden. Because I was planting the bed right away I piled all the soil needed for the veg beds on top of the cardboard, about 6 inches, and planted away. Vegetables only need about that much soil to be successful. The raised edges of the beds held the soil in.
Now as I’m planning and planting the edges of my property I’m working on some areas to get them ready but don’t need to plant anytime soon. In the edge behind the west planting bed I wanted to get rid of a grass strip between my neighbor and I.
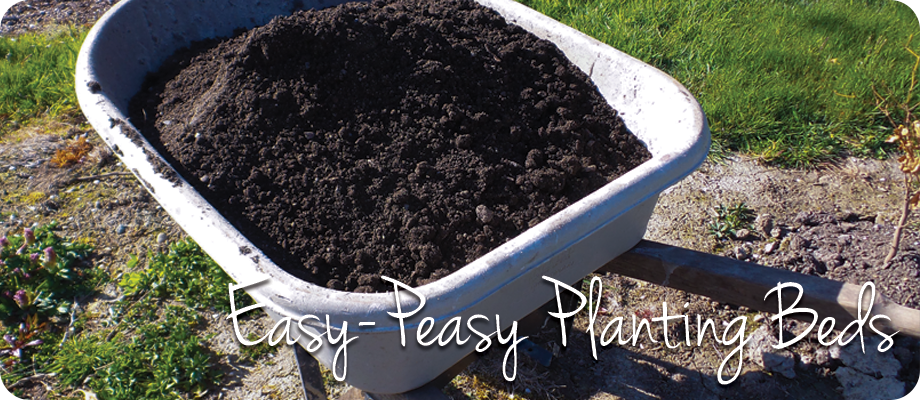
Here is a step-by-step guide for creating a planting bed the easy-peasy way.
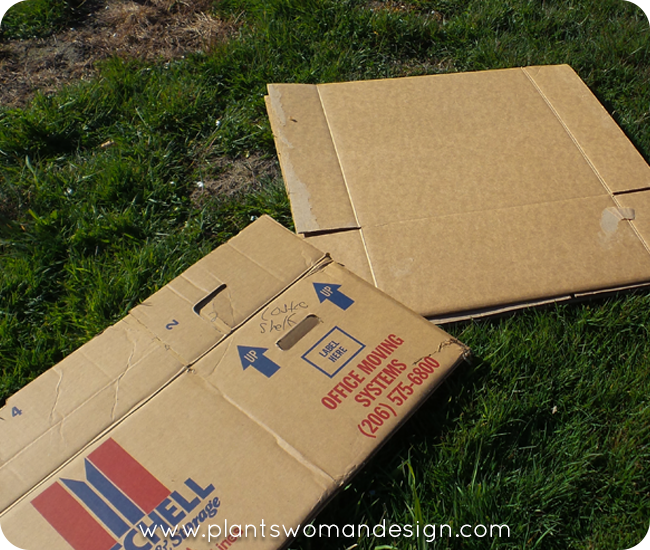
- Collect cardboard or newspaper. A layer of cardboard is a good choice but paper grocery sacks, newspaper and other recyclables can be used. No glossy magazines or plastic coated cardboard.
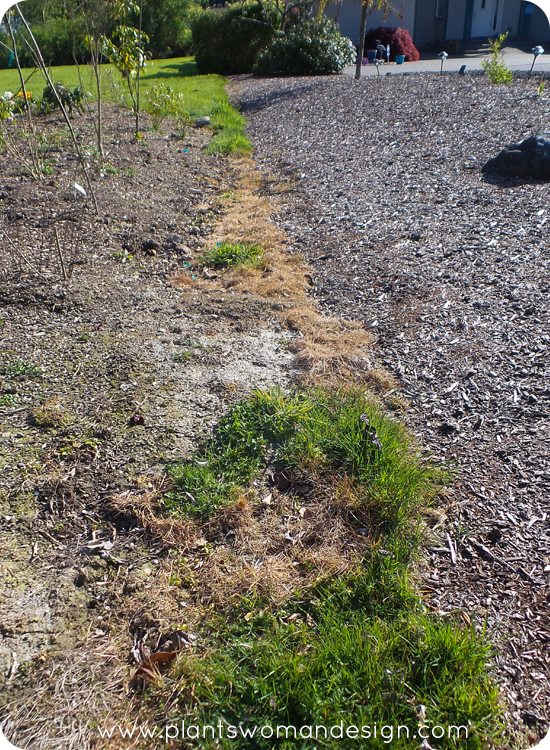
- Clear away any debris. Leave weeds, grass, bark mulch, etc. Warning- this method may not kill horsetail. It will lie dormant under it until you dig in the soil and will start again. It has killed every other weed I’ve covered.
- Layer paper material. It should be at least 1 inch thick. Cardboard can have just two layers.
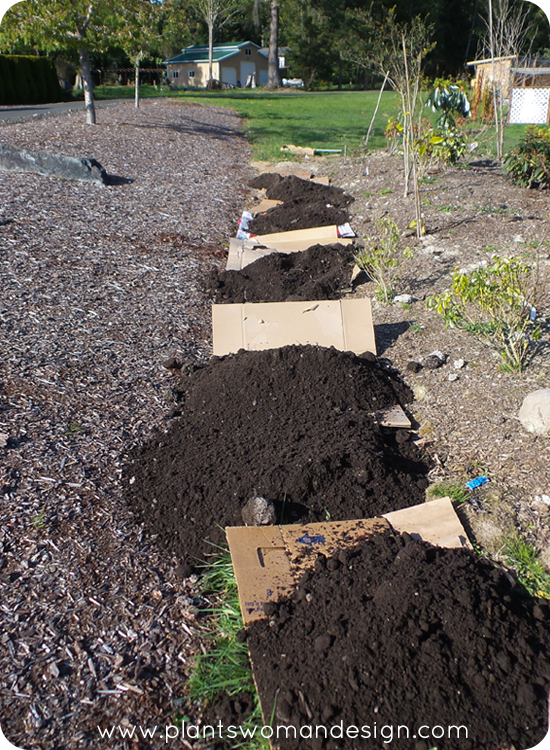
- Add composted material to the top of the cardboard at least 6 inches thick. I did not have any other materials so I used Fish Compost from our local supplier. If you do this in the fall there are lots of materials to use. The added benefit is that it is ready in the spring to plant. I can always add to the top as things become available.
- Water the whole thing in good. In the summer you will probably have to water it occasionally to keep it moist. The worms will come and live in the cardboard and paper material and do the work for you. The lack of light and heat from compost will kill the weeds and the action of worms as they create habitat will give you good worm casings and organic material as it all breaks down.
- Walk away. Check the moisture level occasionally and watch for blown in weed seeds.
Have you have tried this method before? I love it because it actually looks finished and it’s not. I have so much work to do here that some finished looking beds are a good thing.
Sharing the love of gardening and tried and true methods of gardening is really an added benefit of gardening. The social aspect of sharing plants, secrets and swapping stories never grows old and broadens our viewpoint.
by Susan | Apr 18, 2015 | LB Tutorial: Design Challenge
As many of you know I design and love beach gardens. When meeting with clients I always discuss several possible areas for sitting. So often they say they want to sit with the view of the water, obviously, that’s why they bought the property in the first place. But as anyone who lives close to the water knows there can be major fluctuations in climate between the different areas of your garden. The front of the garden facing the water can be windy and cold in the morning but warm in the evening, or warm in the morning and cool in the evening. Extremes in temperatures, wind, and sun need to be intentionally planned for. Having multiple areas for sitting and gathering provides a way to be outside whenever possible and that is important.
This winter has proven an eye opening (or eye closing) experience. Here is what I’ve learned…
- The wind is strong off the water even when elsewhere in the county there is no wind. (yes I said county…)
- The structure of the house is sound and has the ability to withstand the wind. The garden has to be the same way.
- The view to the water must be maintained but the exposure to the elements tamed, quite a challenge.
As I worked on an area in the back of the house I was reminded of my design suggestions I mentioned in the post What Comes First The Plant or the Plan. I have not thought this would ever be an area where I would hang out as it is behind the house with access through the kitchen door. It was the logical place for the BBQ but more of a ‘dart out there and do it’, than a destination. Two things this winter have changed my mind: 1. The seemingly constant wind and 2. The western exposure. Wind from the water is blocked by the house and the sun swings around the side of the house and ends up behind it. There are no windows on that side so I didn’t realize how sheltered it was until I was working over there. Hmm (which comes first the plant or the plan )….. While this little corner does not have a spectacular view of the sunset there is bit of water and the sky is lovely as the sun slips over the horizon. The back of the house retains warmth from the last bit of sun and actually provides a great place to sit in the eventide.
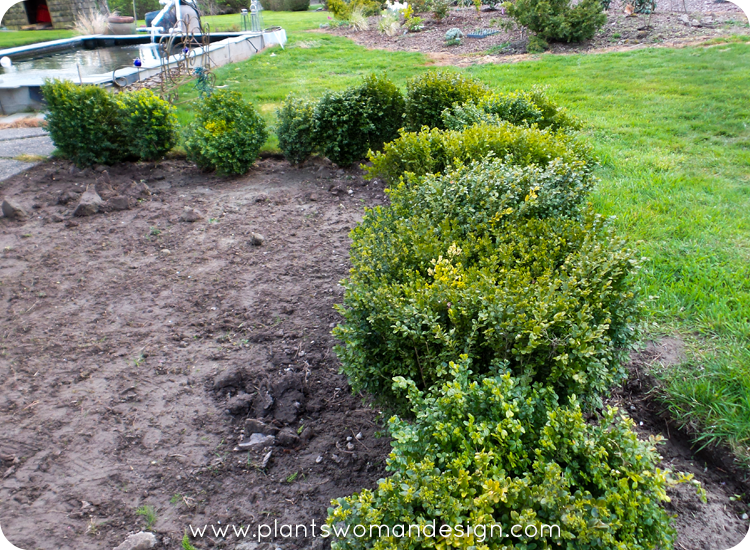 Now I had to plan for privacy from the neighbor’s driveway. When you don’t spend a lot of time in the back of your house there is not that great of need for privacy. The grass has been removed from the area and a boxwood hedge has been placed around the squared off area and I could see more screening would be needed, further away and a little taller.
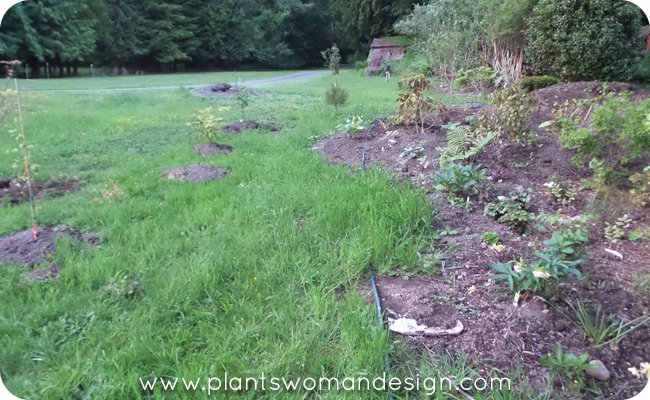
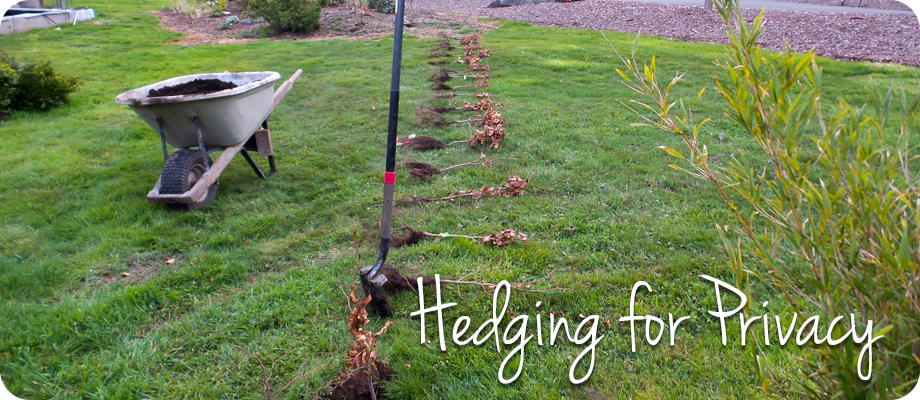
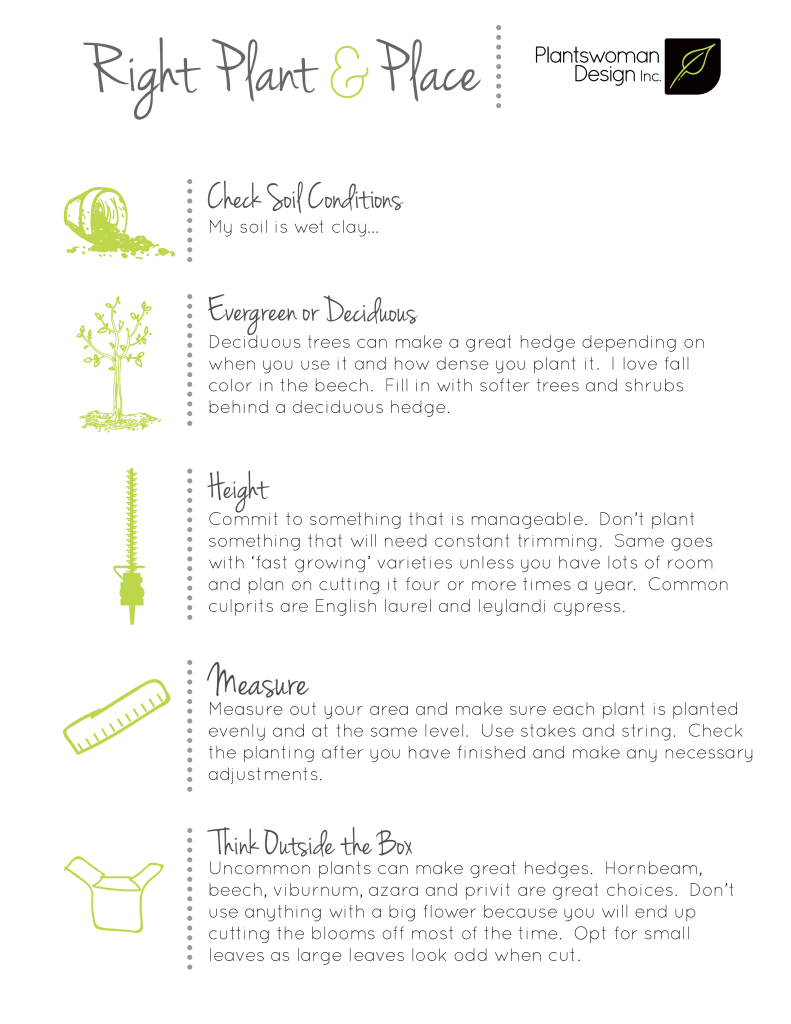
 The driveway behind goes at an angle but I did not use that angle to plan the line for the hedge. I picked an angle off the house that runs parallel to the house and repeats the line of the boxwood hedge. It is stepped back from the boxwood about 20 feet and connects to the propane tank covered area. I left a space for walking and mowing (will not mow this area eventually) and marked out the spacing for the hedging.
 It is early enough in the spring to get bare root plants still. Fagus sylvatica was my choice for the plant material. Measuring the area I placed the plants at equal distance apart and started to dig holes. This area is not totally cleared and prepped for the planting but because it is a hedge the ground can be worked after the plants have been established. Sometimes you just have to get plants into the ground and work the ground around it later.
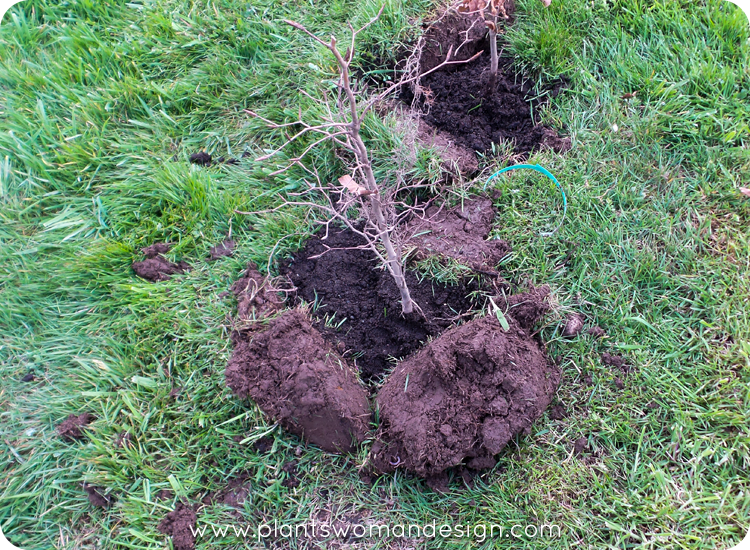
 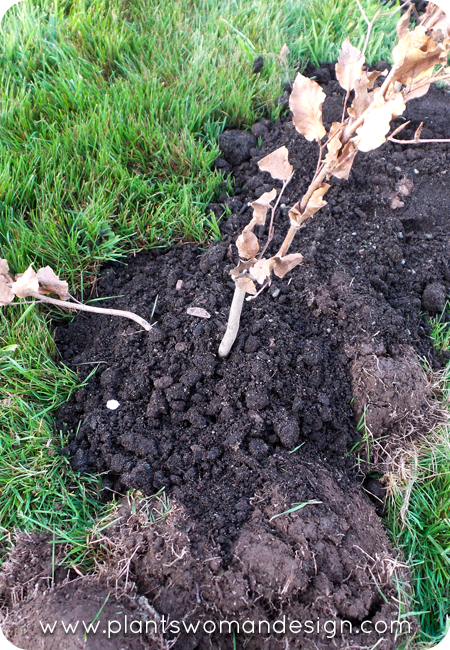 As you can see the holes were dug and the edges of the grass removed were just turn over and placed on the downhill side of the hole. Although not a big slope it does provide a little bit of a well for the water to remain around the plants. The soil in the hole was mixed with a good compost/soil mix I use in all my beds. The roots were then spread out over the soil mound in the hole and back filled with more good soil. Firm tamping down of the soil around the roots insures good soil connection with the roots. Yippee! The hedge has been ‘laid’ in English gardening terms. Later the lumpy grass clods will break down, and can be raked out. A great method for creating planting beds with cardboard and mulch will finish off the project (watch for this in an up coming post, ‘The Easy Peasy Planting Bed’). In the meantime here are some additional tips for planning your own privacy hedge.
by Kristen | Apr 10, 2015 | LB Tutorial: Growing Food
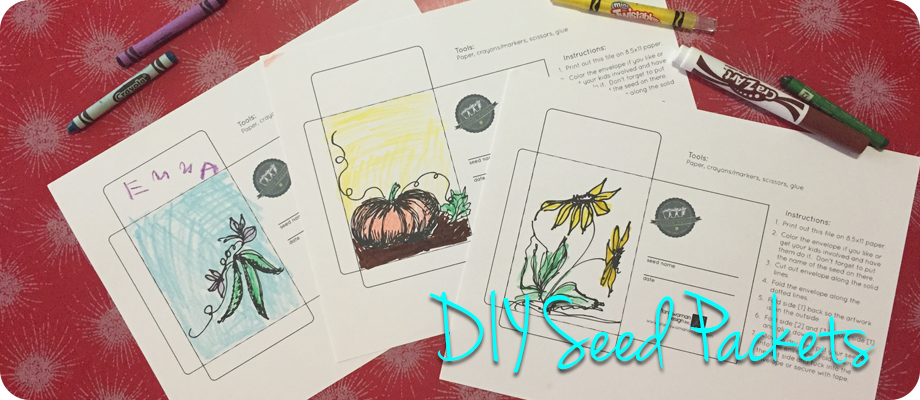
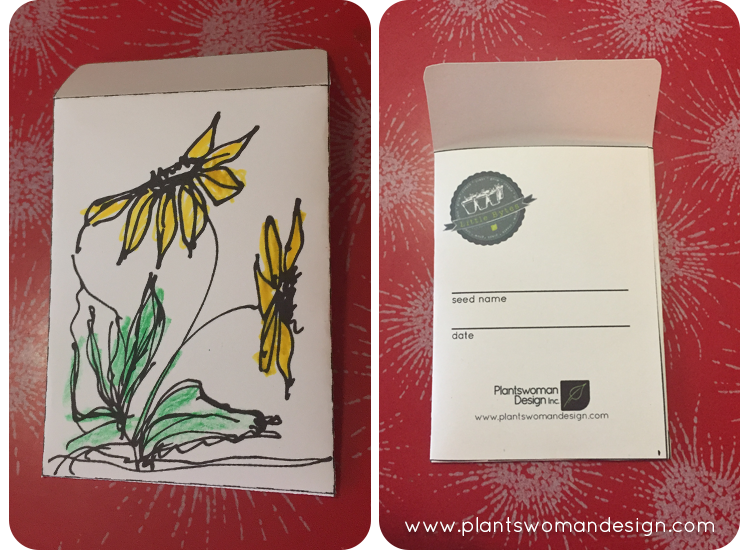
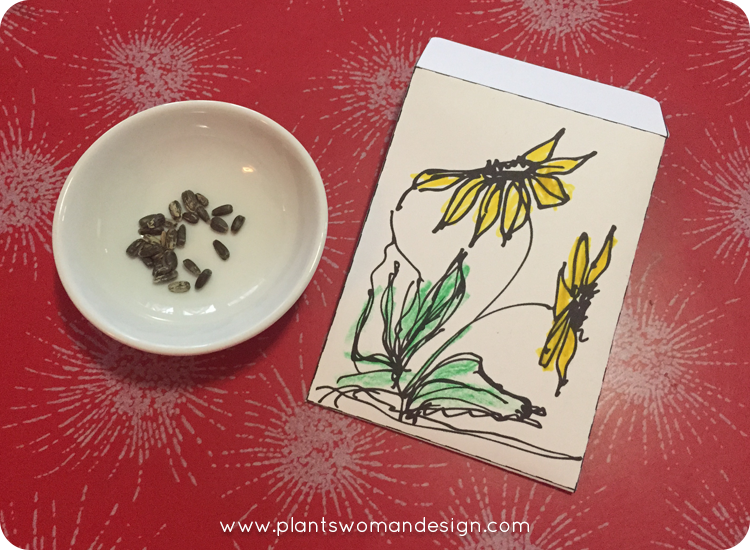
If you are coming over from the post Planting a Legacy welcome! Thanks for coming by. Susan Calhoun, of Plantswoman Design, hand drew art for your seed packets! Make a few seed packets to share seeds with or give seeds as a gift.
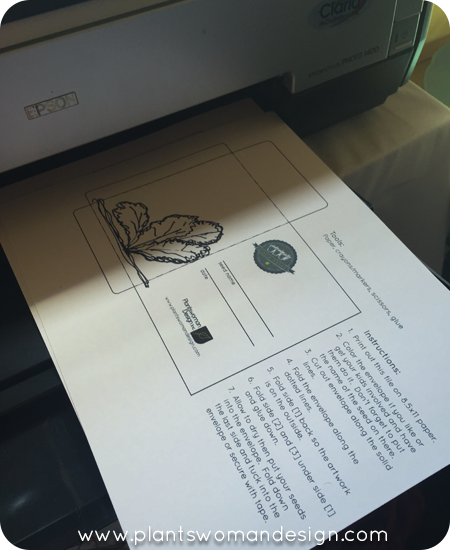
First print out the PWD Seed Packet Activity.
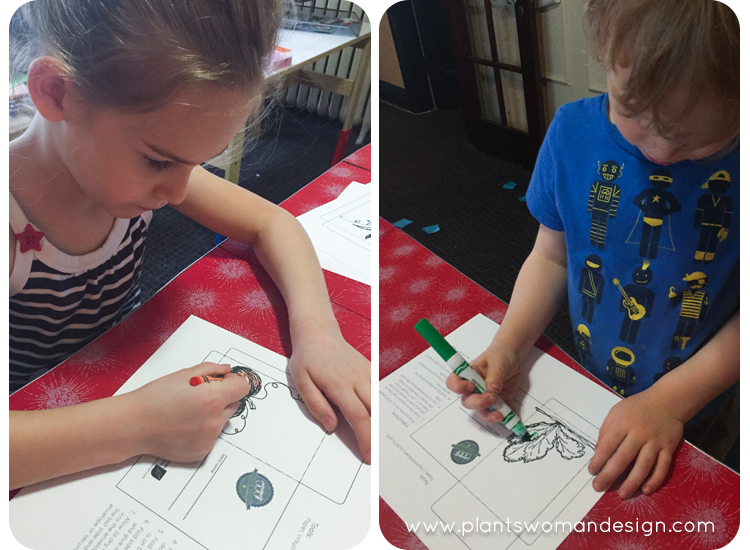 Have your kids color the pictures on the front of each packet (or color them yourself). Want to draw your own? Use the blank packet to draw or color any way you want. We’ve also included a special Arbor Day packet to share and plant seeds for that special planting day.
  Cut out the packet along the solid lines.
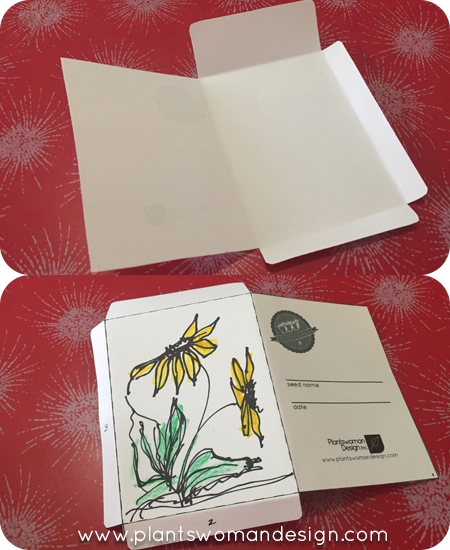 Fold along the dotted lines.
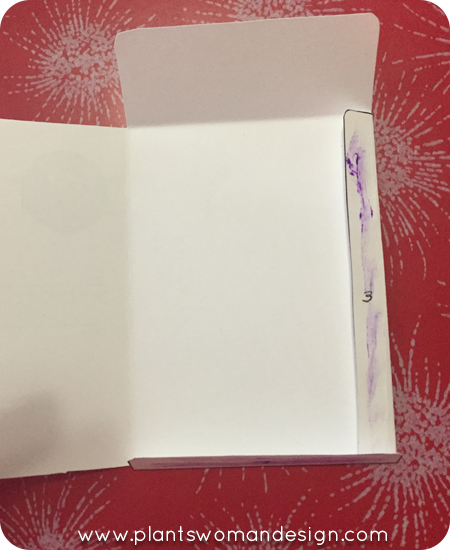 Glue along flaps 2 & 3, fold flap 1 over and press down.
 Wait until the glue has dried then put your seeds in and either tuck the flap into the envelope or secure with glue or tape.
Your seed packet is now complete! Now who wouldn’t want to receive seeds in a handmade packet? Great for Mother’s Day too!!! (hint, hint)
Before we go I just wanted to say a little something about doing this project with young kids. I did this project with Little Chef (3 3/4) and Miss E (6). They did the best they could do and for the 3 year old it was a little color here and a little color there before he wanted to cut the paper. He got the first line really quite well and then this face…
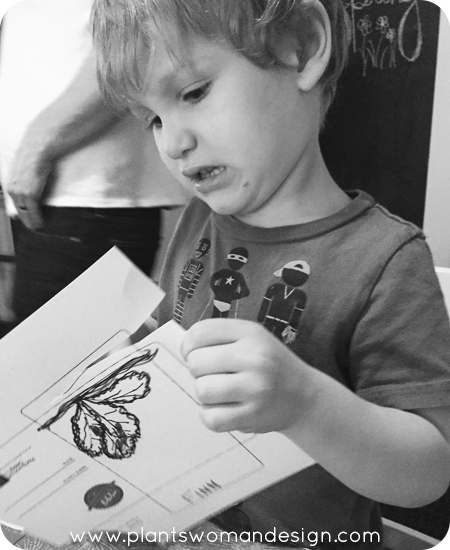 After which he promptly gave up and tore the whole darn thing to shreds. My point in telling you this is to help relieve any pressure you may have about working on this project with young kids. It won’t be perfect. Color won’t stay in the lines, things may be glued together that shouldn’t be and papers may be torn. It’s okay! Getting kids involved in gardening at a young age takes… well baby steps. This little guy in particular enjoys the digging in the dirt part of gardening much more than this part but he gave it a try and that is enough for me.
Enjoy! And send us a photo of your finished project via email to info[at]plantswomandesign[dot]com, on facebook or Instagram (#heyplantswoman).

by Susan | Apr 10, 2015 | LB Tutorial: Growing Food
“Planting a Legacy” may be a strange name maybe for a post about seed packets for the kids but… maybe not. Many of my clients want suggestions for how to encourage kids and grandkids to have an interest in gardening. There is a huge decline in the number of students entering the gardening studies. At the same time we are all becoming more aware of where our food comes from, how far away and at what cost to the environment. To participate in the food cycle we should also encourage our children to grow something at home. Food, flowers, strange and wonderful plants, or trees. This helps ground our kids in the earth and give them an appreciation of all growing and living things.
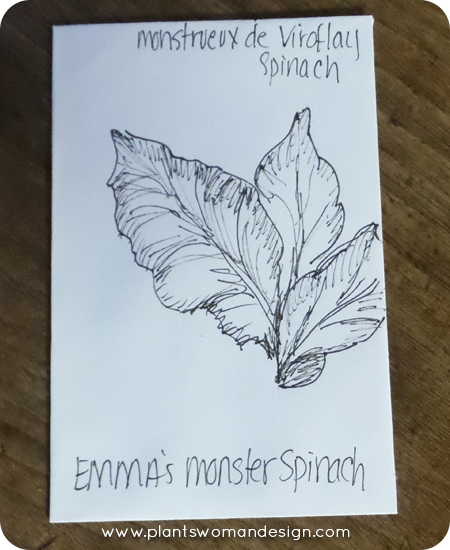
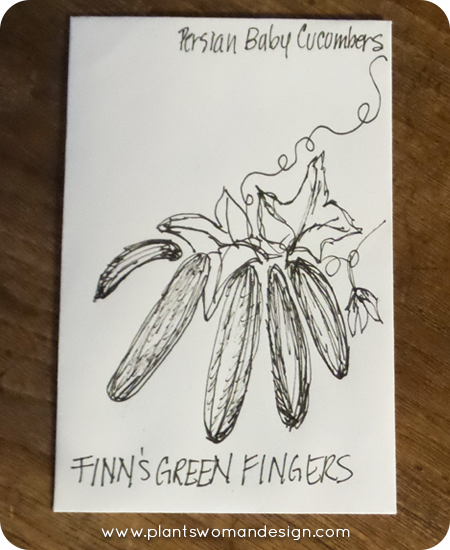 A fun thing I did for my grandkids this year was to make custom seed packets for them to color and to plant. They were excited to color it and see what the plant would look like. I even changed the common name on the package so it became even more personal. Persian Baby Cucumber called Green Fingers became Finn’s Green Fingers. The Monstrueux de Viroflay or Monster Spinach became Emma’s Monster Spinach.
I will have more packages for the seed saving after the harvest of the vegetables and they will be ready to collect and save the seeds for next year.
You can either do your own (I found the blank seed envelopes online as you can see there are many options) or download our free ones below to make your own and let the kids color them! Let’s do more to encourage the kids to grow something.