by Susan | Apr 3, 2015 | LB Tutorial: Skills
 In the
 blog ‘progress yes progress’ I wrote about pleaching my espalier cherry trees into each other. I thought it would be good to talk about pleaching and also create something fun for Little Bytes at the same time.
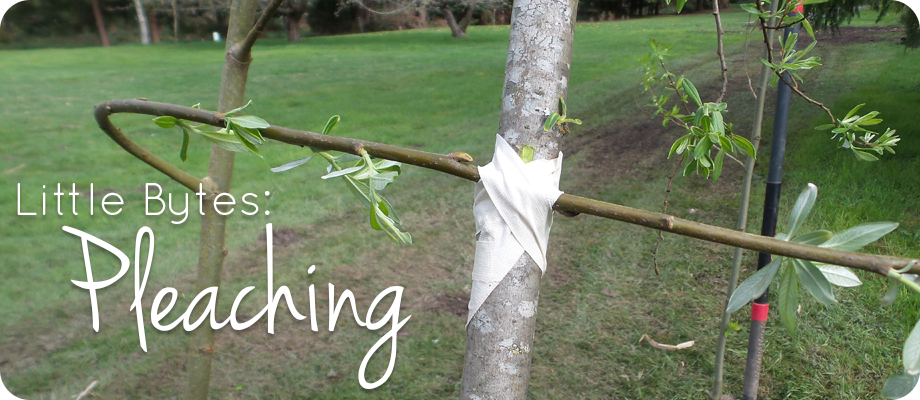
Pleaching is a type of pruning that causes two branches grow together. It is used in creating espalier fences, living fences and living art pieces. For Little Bytes I thought it would be fun to create a living hide out for kids. My grandkids will be here this summer (I hope) and they will be so excited to have the play structure to play in.
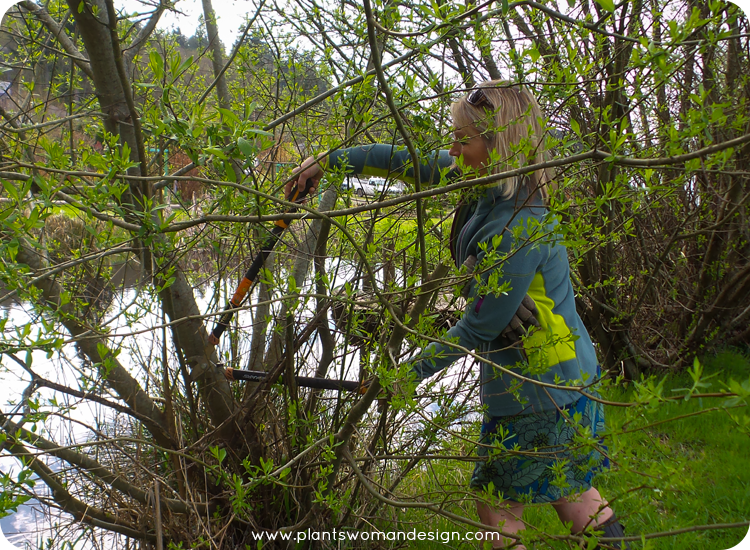 Here you can see I’m cutting off some branches off a willow tree next to the upper pond. I’m choosing willow because it is really easy to work with, it roots easily, it will be easy to pleach and since it grows on my property it’s free!
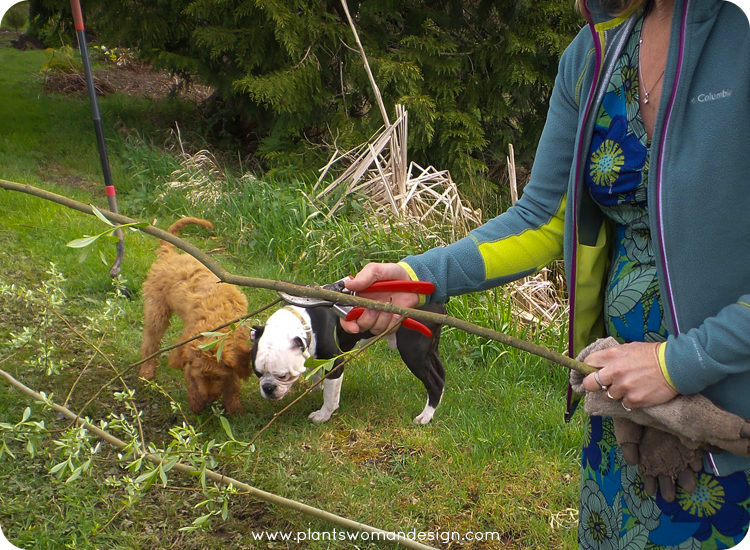 Choose long pieces and trim off lower branches. I left some of the upper branches because we will intertwine them and tie them together. You can see our helpers in the background.
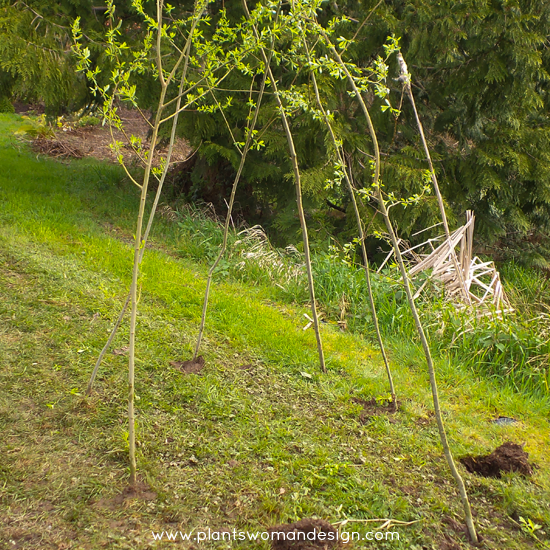 To make your hide-out lay out a circle and check the inner size, I had my assistant stand in the middle of it to make sure it would be big enough for two kids. (Thanks Jen)
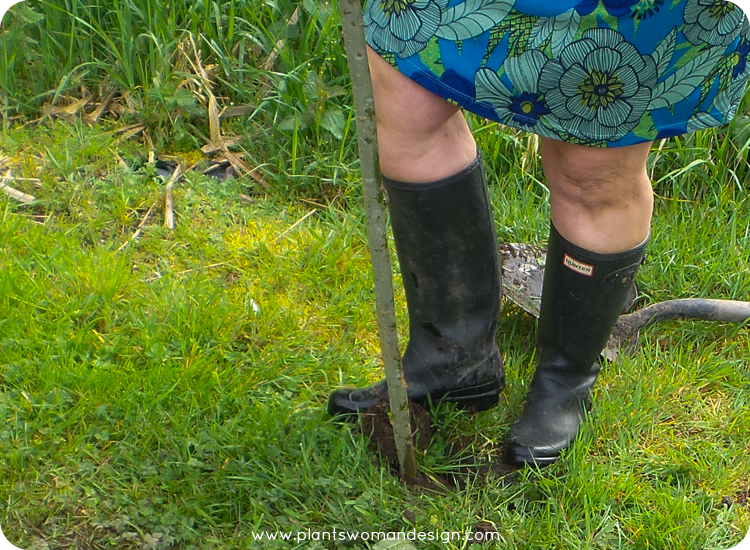 Using the shovel dig holes about 6 – 10 inches deep along the path you have laid out. Place the long willow pieces in the holes and stomp down the soil around them. This is a very wet area so the muddy soil held well. I planned the entrance to face the side yard with the pond behind the tepee. I was worried that some tumbling around might land the kids in the water so…. let’s be on the safe side!
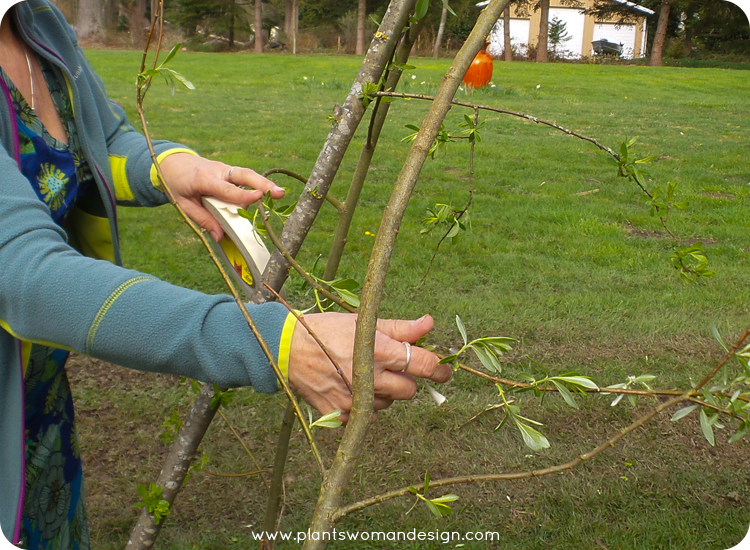
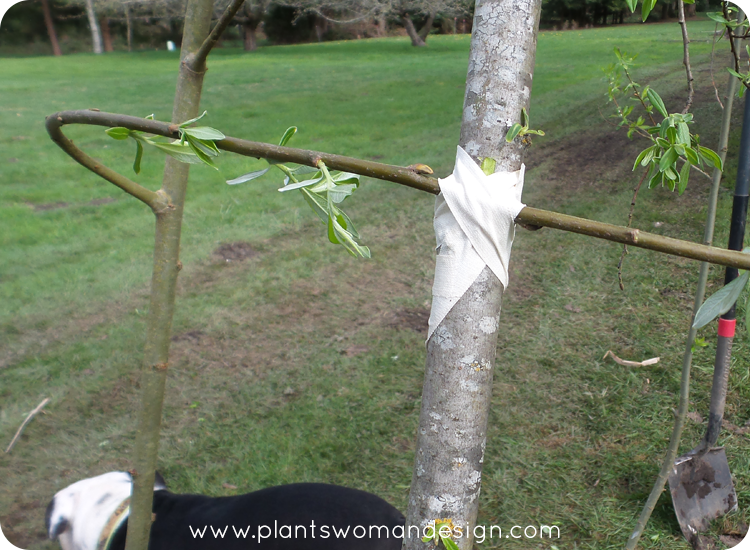 Using the upper branches that are still left and start weaving them together. Using the tape to secure them together.
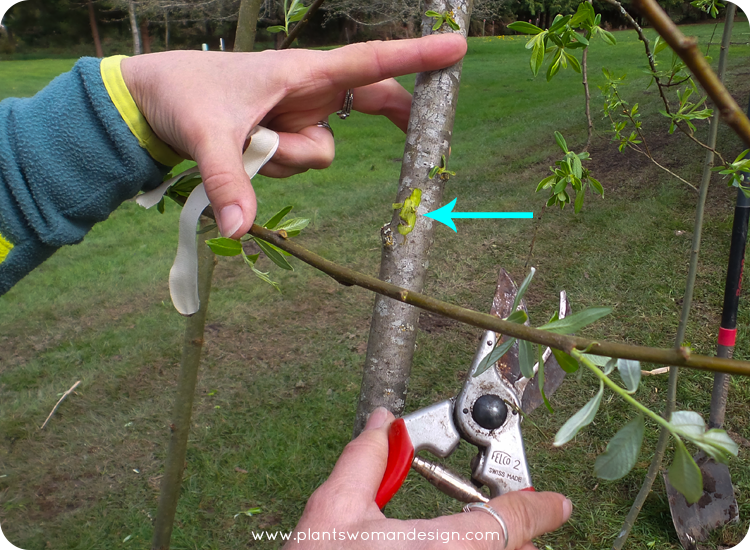
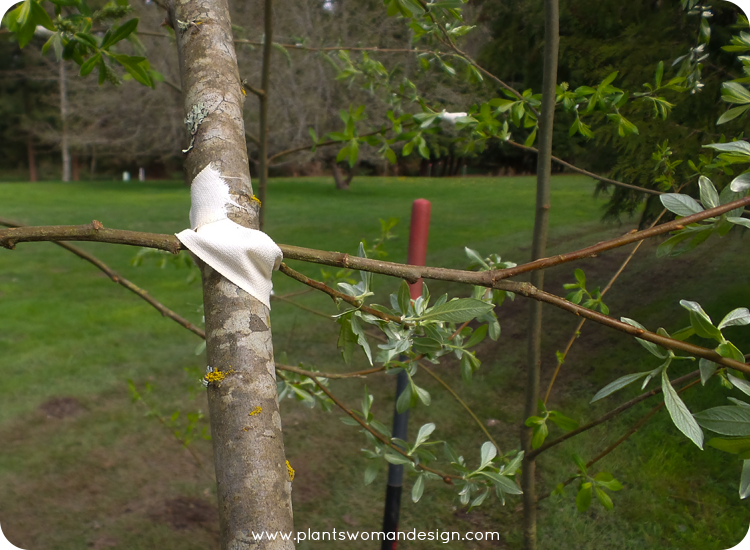 Choosing the strongest branches make a little cut on both sides of the branches and then put the cut edges together. Use the tape to secure the branches together so they are tight.
 Using the tape and weaving method connect the rest of the branches together. Now there is some danger of the grafts not taking because the willow have been cut and may not root out. I took some of the cuttings I didn’t use and put them into water to root them conventionally and will use them to re-graft later if necessary.
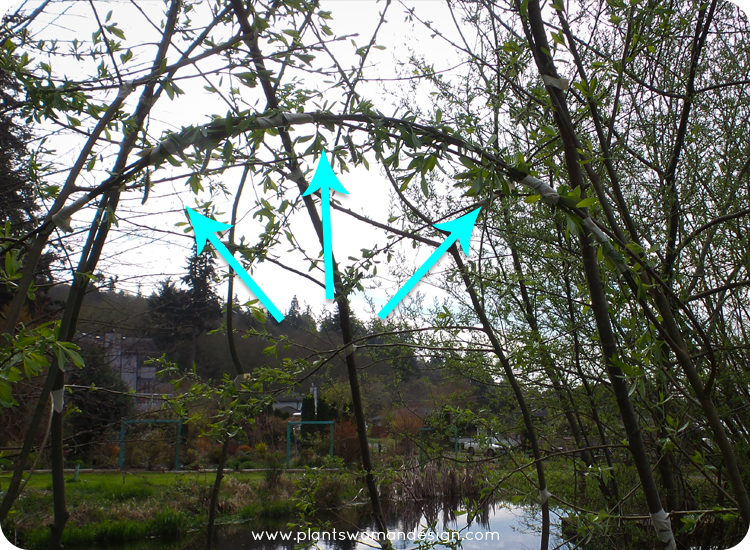 Here is a close up of the archway entrance. You can see the tape holding all the pleached branches together.
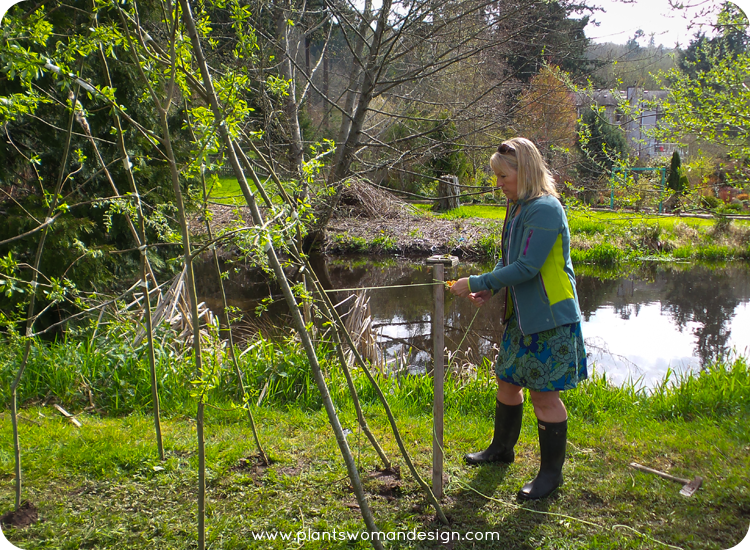 Place a stake towards the windward side of your tepee if needed. The structure will be weak until it is rooted in. I’ll keep you posted on how it roots in. The wax tape will fall off after about a year.
by Susan | Apr 3, 2015 | LB Tutorial: Design Challenge
 I often tell my clients when we meet that I come in and make a big mess before I put it back together again. That has to happen at my house too. Last week I pulled up all the metal pieces that I had for the vegetable garden.
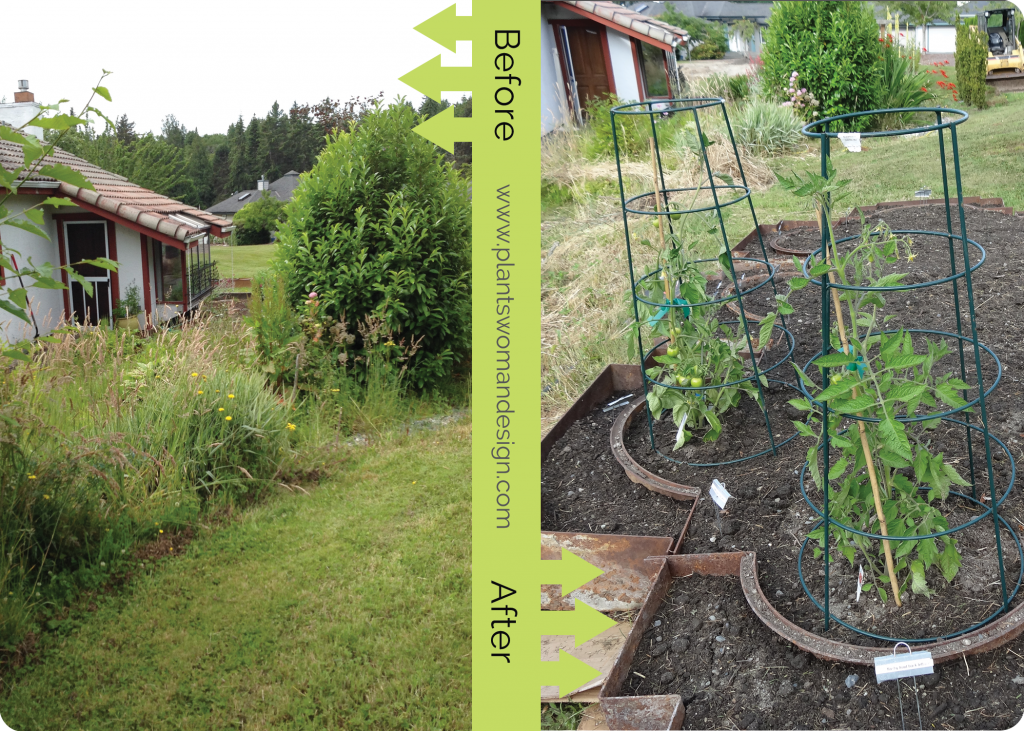
before: when I first moved in | after: metal edged garden
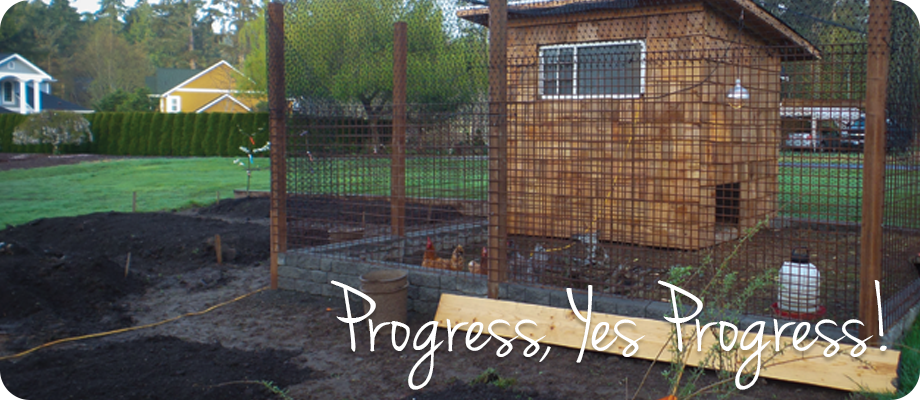
I removed grass (little bites at a time right?) and moved soil into beds. You can see the new chicken coop in the background. It is still a work in progress too (watch for a feature on the chicken coop soon).
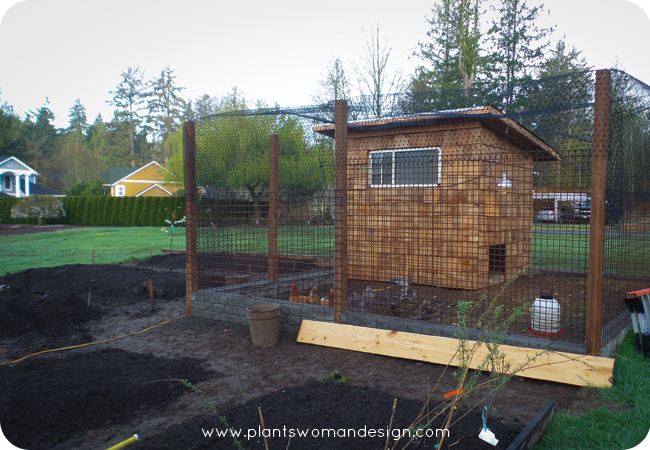 Spring is early this year and I’m looking forward to getting the vegetable garden planted. Several of my friends have looked at it and commented on the size. Yes it is a lot of dirt for just one person. BUT I have a method to my madness. There are several community service opportunities in planting vegetable gardens for the homeless and food bank participants.
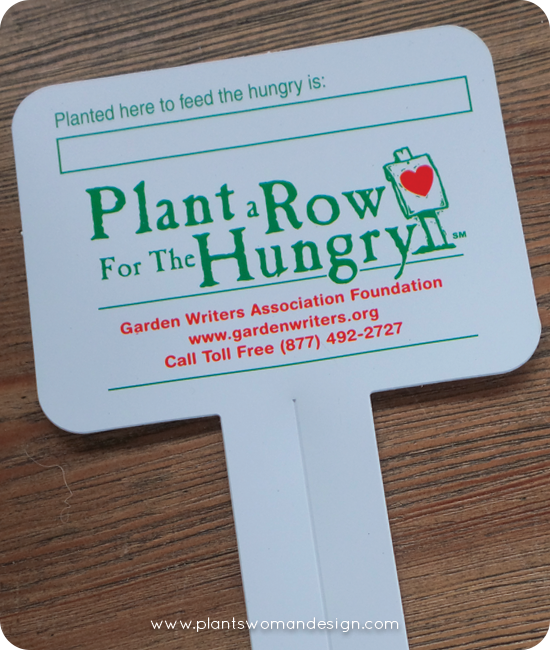 One such program is ‘Plant a Row for the Hungry’ by the Garden Writer’s Association of America. They encourage gardeners to not simply give away their excess but actually plant a row specifically for that reason. A great local resource is the Solid Ground website www.solid-ground.org. This web site has information about Seattle’s Giving Garden Network, P-Patch programs and Lettuce Link. In 2014 these community gardens donated 55,198 pounds of fruits and vegetables. We can all do our part too.
click here to read
For right now the soil is ready. I have to add some borders around the edges to keep the grass out and contain the soil and gravel. I will add gravel pathways for now and eventually put in pavers. The long beds will be the main vegetable beds. A shorter bed to the east will have the gogi berries from last year (click on the picture to read that post) along with rhubarb, blue berries, and raspberries.
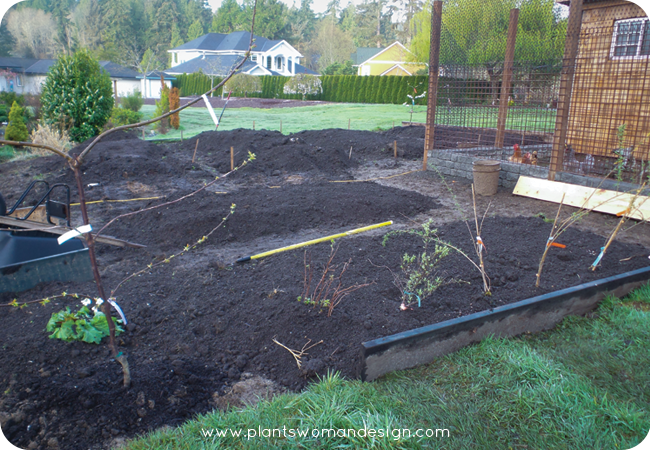 The corner has been planted with two espalier cherry trees and have three different types of cherries on the same tree. My vision is to weave the branches together and graft (called pleaching) them into a living fence in the corner.
click here to read
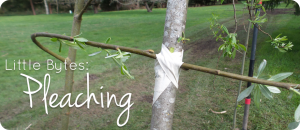
Pleaching is a simple type of grafting. Weaving and shaping branches in this way is an ancient practice farmers have been doing for centuries. By carefully interweaving plants, clever (and patient) gardeners have made gorgeous, functional, long-lasting structures out of trees and vines.
Grafting is easier than you think! It requires a sharp knife and some grafting tape or electrical tape. Creating a willow tent for kids play area will be a fun project that I will try first. Using something that is easily grafted like willow or red twig dogwood is the best for a first project. Fortunately I have many willows on the property so using them is easy.
The other side has two espalier pear trees in a row. One more is needed to satisfy my des ign brain. An old gate will go into the area between the row and the Chicken coop.
One of the biggest challenges is the soil on the bank between the greenhouse and the vegetable garden. It is very yucky clay soil and very wet. I had thought to put herbs there but because herbs mostly like dry soil that will not work. It would be a great place for Asparagus but the soil is not great so I’m not sure they would be happy there. A small wall could be created and the soil filled back in, so many choices. This is one of those times when leaving it alone is a good idea. Creating a pathway and a ramp will be necessary for travel back and forth. Working on a problem in design can be frustrating unless you take your time to think the problem through. Not doing anything until you come up with the exact right idea is better than doing the wrong thing a couple of times. I will admit sometimes I’m impatient and just want it finished and that usually gets me in trouble.
I’ll keep you posted on my projects as they progress. What projects are you working on this spring? Are you going to try pleaching with me?
by Susan | Mar 15, 2015 | LB Tutorial: Garden Critters
Back in February we wrote about Mason Bees and the tremendous job they do pollinating the garden. With our warm weather starting early this year I purchased my kit from my local nursery, Valley Nursery, two weeks ago. The guidelines say to wait until it is 53 degrees and warming in the daytime. It has been getting up to 58 – 59 in the daytime and yesterday was even warmer so I’m going to put my bees out.
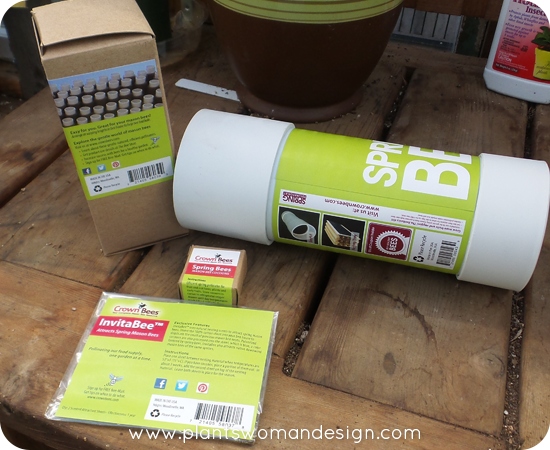 This is the Crown Bee Kit I purchased. The bees come separate so you can get more If needed. I had a hard time deciding where to put the nesting box. It needed to be where the sun would hit it early in the day to warm them, not near predators (birds mostly), and within 300 feet of a mud/water source. Wanting to see them in action I placed it on a post at eye level next to my vegetable garden plot behind the green house. Mason bees need a ready food source (something blooming) when they emerge. The espaliered fruit trees are almost ready to bloom so they will be available for early food for the bees along with the Forsythia, hellebores, and Indian plum (oemleria cerasiformis) blooming now.
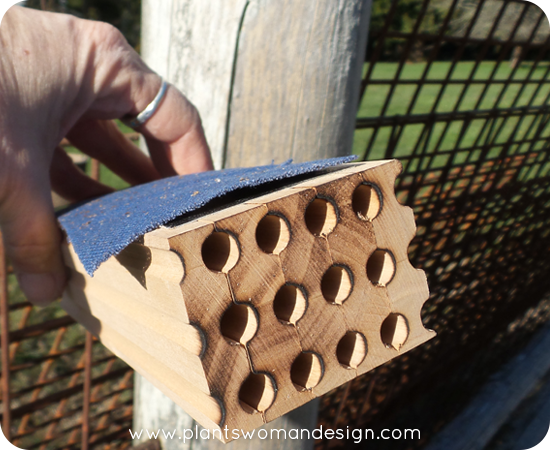 Following the directions, I placed the lid on the post and used screws to attach it. I left the top screw out a little and tightened the bottom one so there was a little slant. This helps to protect the home from rain. However, the downward slant can’t be too great or the block of nesting holes will fall out.When the tube was attached , I took off the clear plastic cover, slid the block inside and put the bee attractant, which helps the bees find their home when they first emerge, on the top.
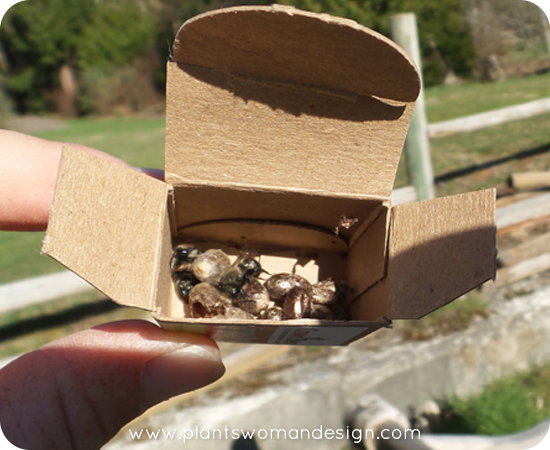 When I opened the box of bees, it was so exciting to see that a couple of the bees had already emerged from their cocoon! I could see them sleeping in there.
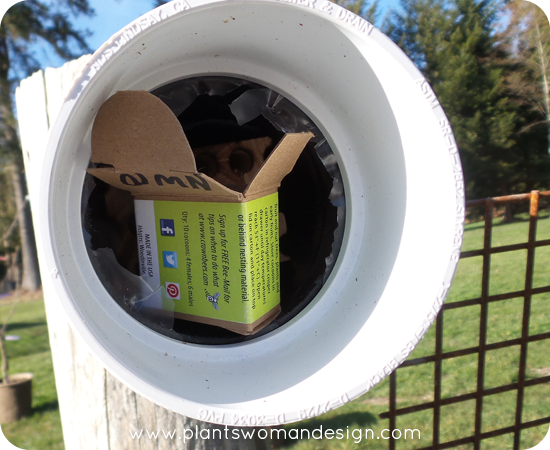 I placed the box near the opening so as they emerged they would see the nesting box. When I checked the next day I saw two bees flying around the box.
I want to build another box this weekend and try out the straws I bought. Straws are an alternative nesting material for mason bees that are disposable. When the season is over, the straws are taken apart to harvest the bee cocoons. The box I have now can be taken apart and cleaned after harvesting the new bee cocoons. The instructions recommend taking the cocoons out in the fall and storing them inside a refrigerator or cold shed until spring arrives to start the process again. Removing the cocoons and storing them protects them from predators in the winter.
Are you jumping into Mason Bees with us? We want to hear about it! Leave a comment below or follow us on Facebook.
by Susan | Feb 20, 2015 | LB Tutorial: Garden Critters
We have had some beautiful spring days….. Oh, wait a minute, it isn’t spring, it’s only February. I’ve been busy pruning my apple trees (severely) and watching the buds swell. The rest of the nation is covered in white and we are having 60 degrees and sun. No real accumulation of snow in the mountains probably means water shortages in the summer (all part of climate change I think). But I’m getting off track a little.
Mason bees, yes!
Very important pollinators of the fruit trees on my property and surrounding plants. Last fall I said I was going to get bees this spring and I am getting ready to bring them home. When I told Kristen I was getting bees this spring she thought honey bees for honey and wax. But that wasn’t what I was planning on getting. I’m getting Mason Bees. No honey, no wax just fantastic little pollinators that don’t need a lot of vigilant care.
There are a number of bees, called mason bees, that are very good at pollinating fruit trees, so much so that they are also known as orchard bees. Mason bees (members of the genus Osmia) carry pollen on their bellies rather than on their hind legs and they nest in holes. When building their nests, mason bees use clay to make partitions, or cells, for their eggs and to seal the entrance once the hole is full. This unique mud-building behavior leads to their common designation as masons.
Honeybees are very important to commercial agriculture, but native bees like the blue orchard bees are better and more efficient pollinators of native crops. There are 140 species of Osmia in North America. They are all known for visiting fruit trees, such as apples, plums, pears, almonds, and peaches along with any other flowers or veg that is nearby. The blue orchard bee or Osmia lignaria, is prized for its efficiency pollinating fruit trees and is one of the few native pollinators that is managed in agriculture.
Blue orchard bees are about the same size as a honeybee but there are a few key points that help you tell them apart. Blue orchard bees are a dark metallic blue, not striped brown and orange like the honeybee. If you pay attention to where they carry their pollen you can also easily tell apart masons and other leaf cutters from honeybees – honeybees carry round balls of pollen on their hind legs.

Osmia lignaria, the blue orchard bee. (Photo by Scott Famous, bugwood.org.)

Osmia ribifloris, the blueberry bee Photo by Jack Dykinga, bugwood.org
Masons are solitary like most native bees. This means that each one tends to its own brood, instead of having a queen and worker bees. However, they seem to like the company of others of their kind and happily build their nests next to each other. They also readily accept the hollow tubes provided by the orchard grower for this purpose. This proves to be very beneficial to the fruit tree grower because it makes it easy to manage this valuable orchard helper.
We, as home gardeners, also have the opportunity to have some orchard bees in our own gardens by placing hand-made or store-bought bee houses or bee blocks in our yards. These gentle bees rarely sting and if they do it is only in defense. The sting is hardly noticeable like a mosquito bite. Great for getting kids interested in watching pollinators.
The blue orchard bee season is early spring. Once they emerge they promptly mate, search for empty holes that are the right size and shape and go to work stocking their nests. The favorite food for their brood is fruit tree pollen plus some of their nectar. Females collect this food, bring it to their nests, and knead it into a ball, mixing it with nectar and their own saliva. Once they have a food store that is big enough, they lay an egg on top of this mass and seal-off the chamber with a little mud wall and start gathering food for the subsequent cell. They work this way until there are five to eight cells each with food and one egg. Then, they seal the entrance to the hole with a thicker mud wall. The larvae grow and, by the end of summer, metamorphose into pupae and later on into adults, which remain safe and sound inside the nest until the next spring. The new generation emerges the next spring usually in perfect timing with the blooming peach or apple trees.
A quick fact – the first brood cells that the orchard bee makes (those that are furthest back) will develop into female bees, while the ones closer to the entrance of the nest will become males. Scientists believe that bees do this for one of two reasons. Males need to emerge first so that they wait for new females during mating season – putting them closer to the entrance helps them emerge first. Bees also suffer nest predation, and the brood closer to the entrance would be predated first. I think it is interesting that females are much more important to the reproduction of a species than males are. Putting the males as a barrier increases the survival and fitness of the species.
I am picking up my bee houses this weekend and will post about building the houses when I get them finished. My bees will come in later when true spring arrives. In the meantime take a look at the Growing a Greener World episode about Dave Hunter, owner of Crown Bees in Woodinville, and his Mason Bee crusade.
(featured title photo by Thomas Boyd/The Oregonian)
by Kristen | Jan 16, 2015 | LB Tutorial: Recipes
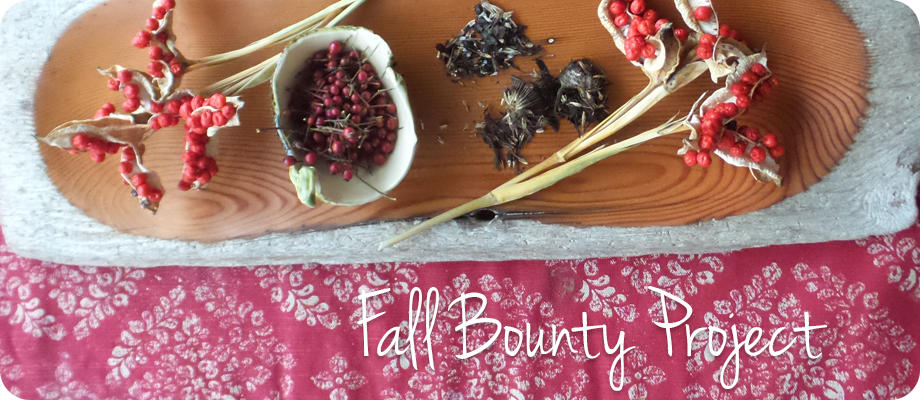
You may remember a few weeks back we gathered some items from the autumn landscape with the promise that we would have a project for you. Well, here it is, our Gather Fall Bounty project, Suet Cakes to feed our fine feathered friends out in this crazy winter we’ve been having.
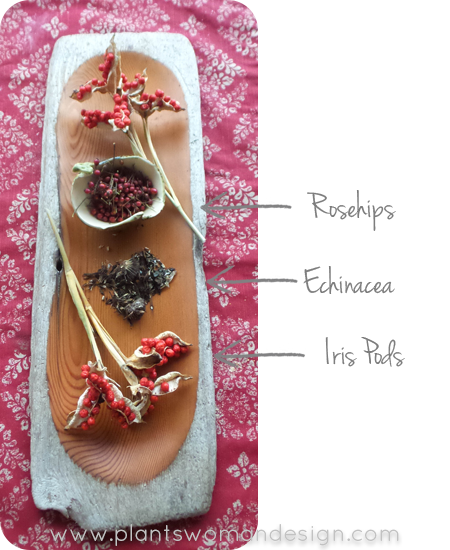
Here’s what we collected…
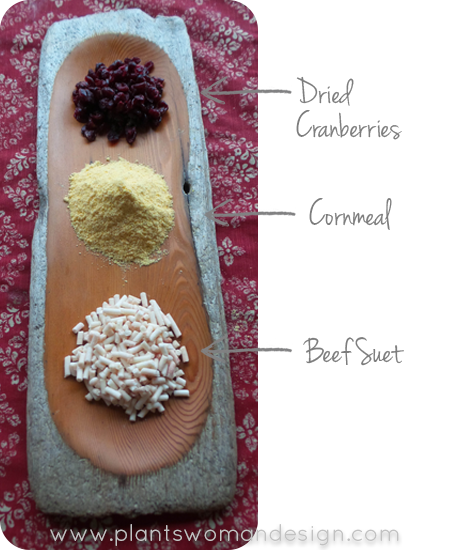
Here’s what we bought…
 And…
And…
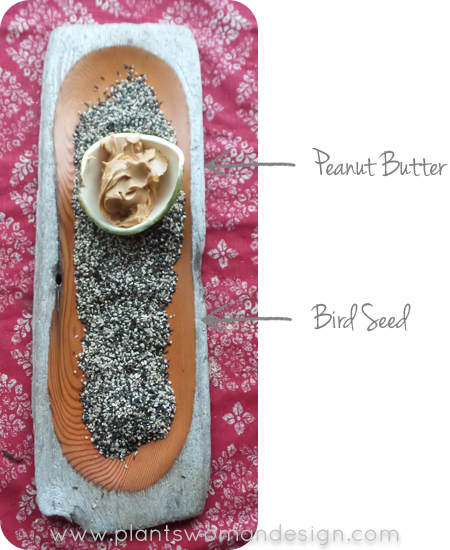 Along with an empty milk carton here’s what we found around the house…
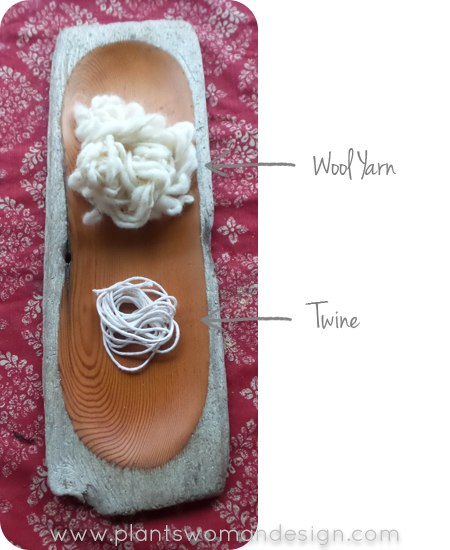 For our ‘recipe’ we adapted THIS recipe from the Farmer’s Almanac online.
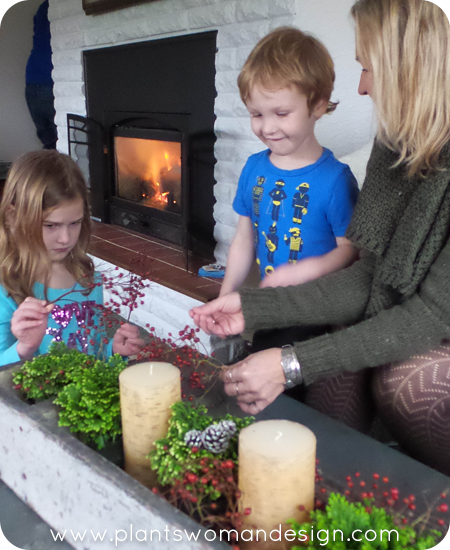 First we had the kids pick the berries from the items we had found. Little Chef was so excited to finally get to pick the ‘bird berries’ (Rose Hips) from the decorations around the house.
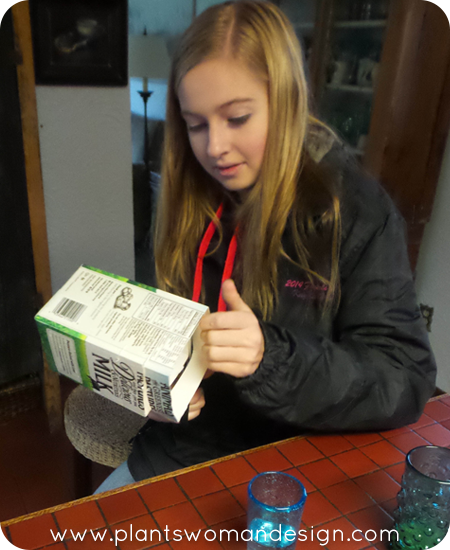 And we set the oldest helper to work cutting our milk carton to use as moulds for the cakes.
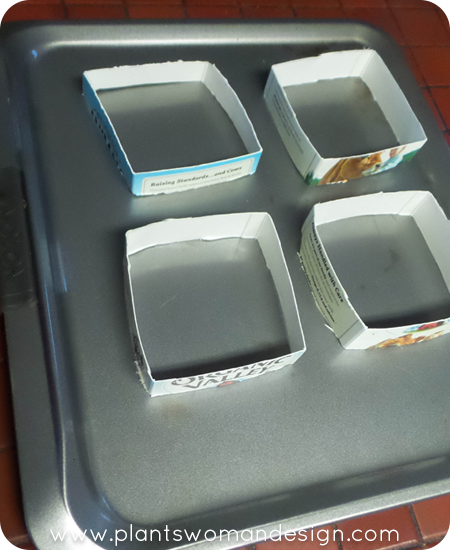 Set these on a cookie sheet for filling. This size should fit well into a store bought suet cake holder. You could free form this step if you wanted, just check your holder’s measurements to make sure whatever shape you end up with fits well.
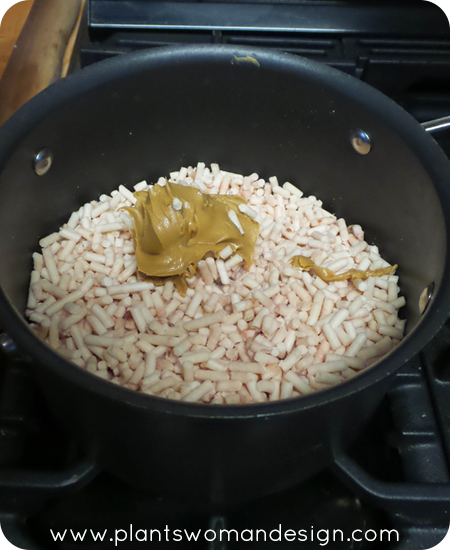 We put the suet and peanut butter in a sauce pan and melted until smooth.
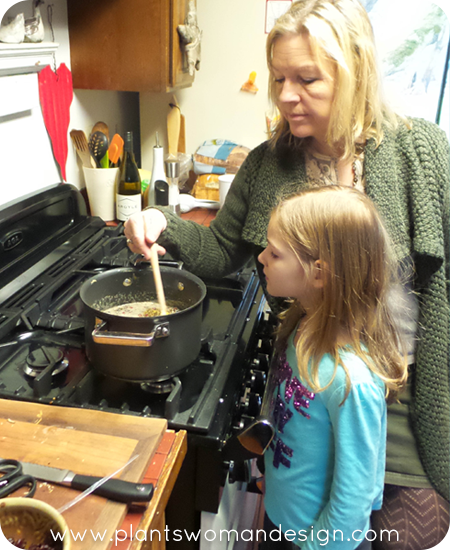 Then we added the rose hips, cornmeal and birdseed and stirred until the ingredients were evenly distributed through out. The mixture will seem soupy and that’s okay.
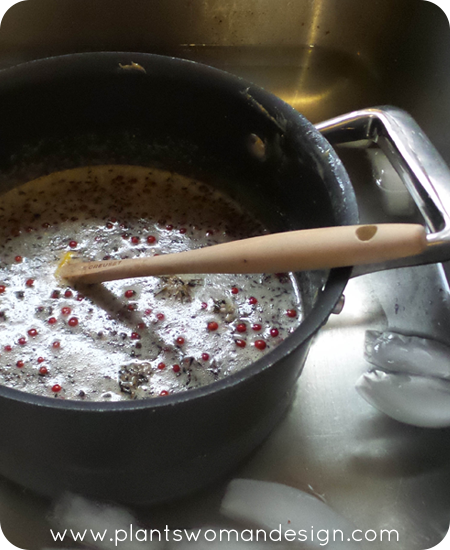 Because we are impatient we put the whole pot in an ice bath in the sink to help it cool down enough to handle it. The mixture will also start to solidify again. While the mixture cools take some time to cut some lengths of twine about 18″ long to form your hanging cakes around.
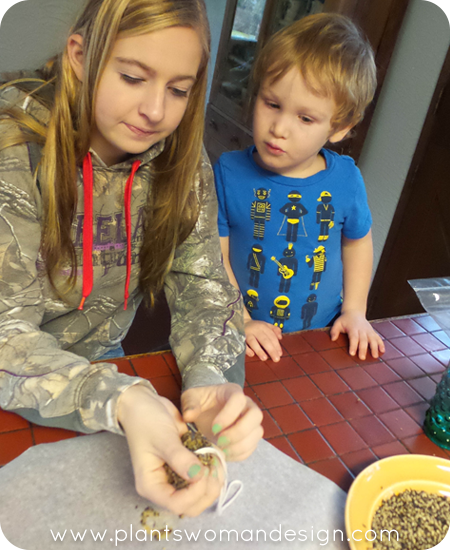
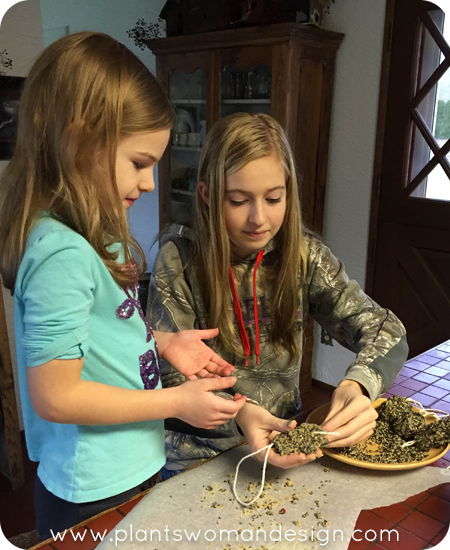 While the mixture is warm but solid enough to handle scoop out a handful and pack it around the string. Double up the string before packing the suet mixture to create a loop for hanging.
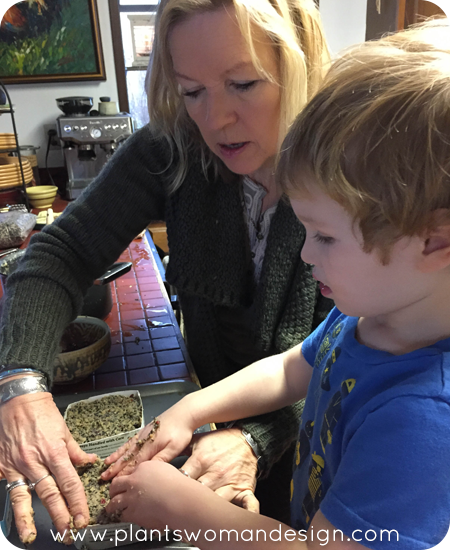
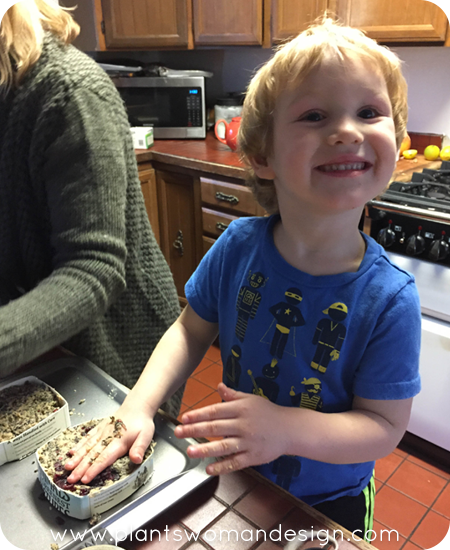 Pack the mixture into your moulds adding some extra dried cranberries to the outside. This is a great job for the smaller kids that may be helping you as it requires less coordination.
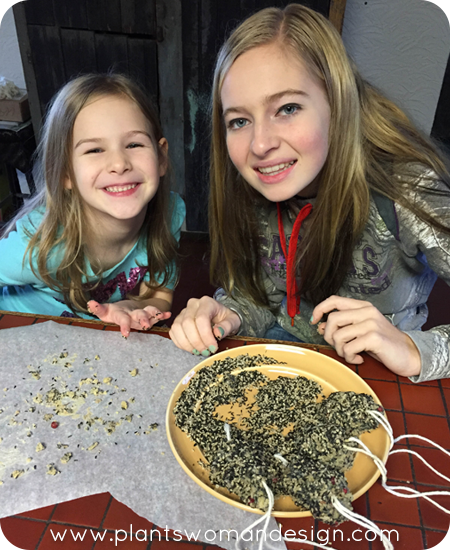
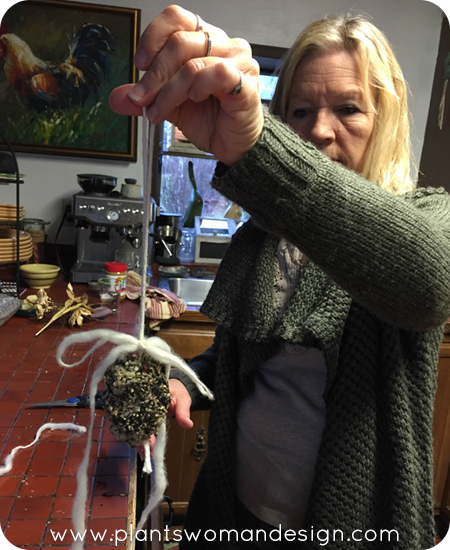 When the hanging cakes have solidified enough to pick up tie a piece of yarn or additional string to the top of the cake. This gives the birds something to hold onto while enjoying their little treat.
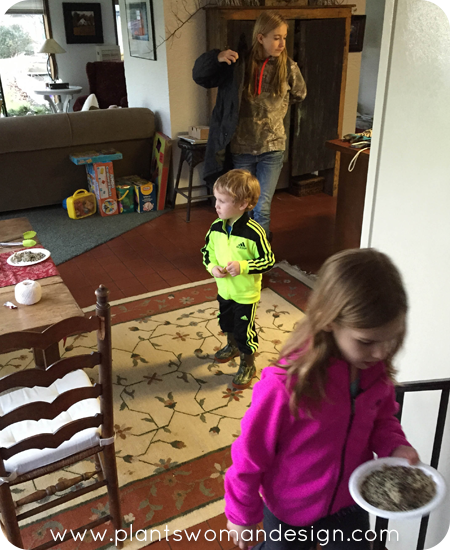
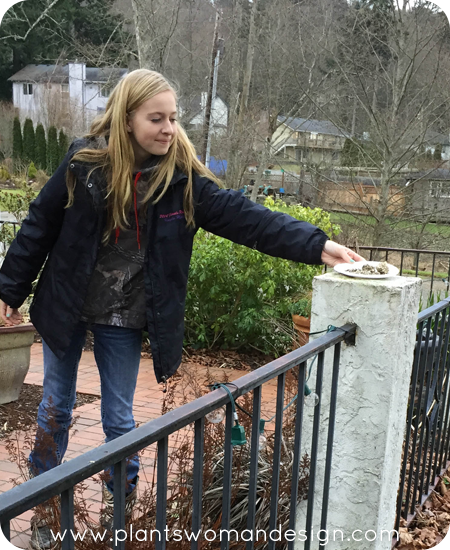
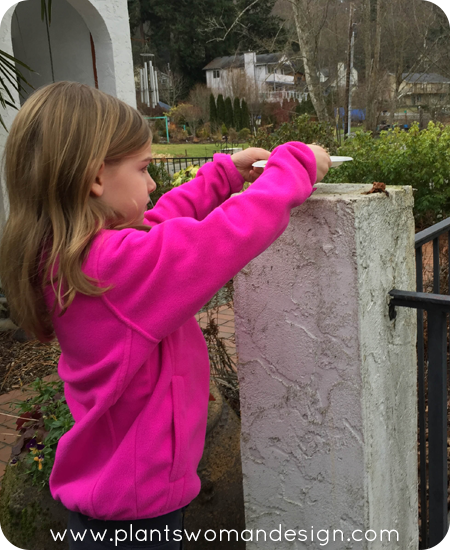 We had some bits that didn’t adhere to our finished product so, while the rest of the cakes finished solidifying, we let the birds help us clean up by putting the crumbs on plates and setting them outside for the birds to enjoy right away.
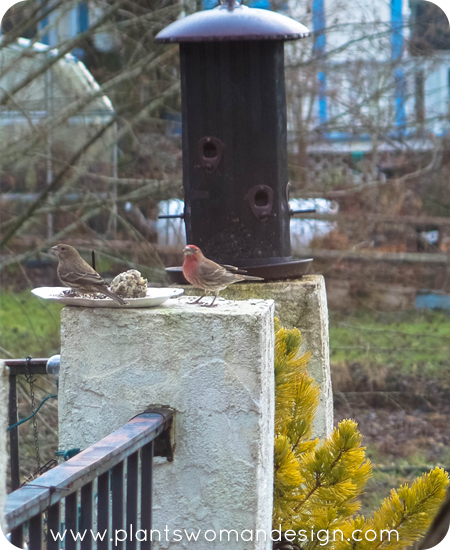
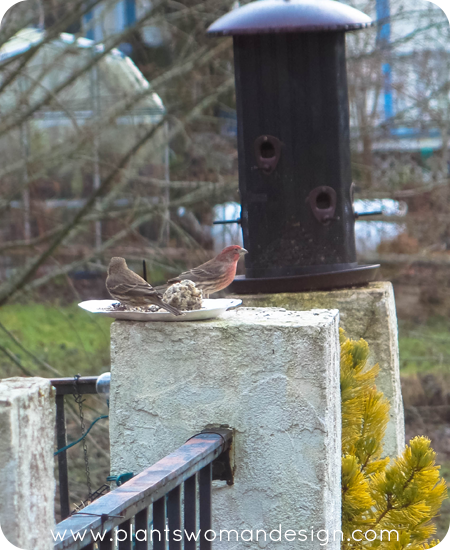
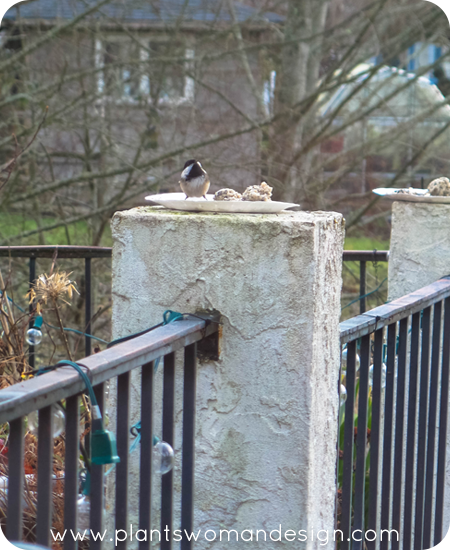 The next morning we had quite a few visitors to watch from the window.
We made more cakes than we needed to use right away so the extras will store in the fridge or freezer until we need them.
by Susan | Nov 26, 2014 | LB Tutorial: Bulbs & Tubers
In between rain squalls yesterday I ran out and planted the bulbs I had stored in my refrigerator. I had planned on doing it sooner but the freezing weather for almost two weeks delayed the process. I like to group bulbs together for maximum impact, no rows of tulips and daffodils for me.
Here are some step by step planting directions.
1. Scout out a location. I sometimes do it from the inside of the house so I can see where they would be popping up. Two reasons really — It is usually cold and rainy when they appear and it is important to see it from inside to draw you outside to see them up close, and it is usually cold and rainy when you plant them so looking outside with a cup of coffee in your hand is a good way to get ready to go outside and do it.
Think about what is happening around the spot you have chosen. Perennials that will come out later and cover dying foliage is a good background or companion planting. Nothing too invasive or they will not get along well and the bulbs may not be successful over time. Deciduous shrubs are also great because they are not always interesting before the leaves come out and the bulbs will show well against the tracery of branches. Evergreen shrubs that flower in contrast to the bulbs are also a good choice. Like a Azalea Autumn Amethyst with late blooming orange parrot tulips. Purple with orange/purple/red blooms can add wow!
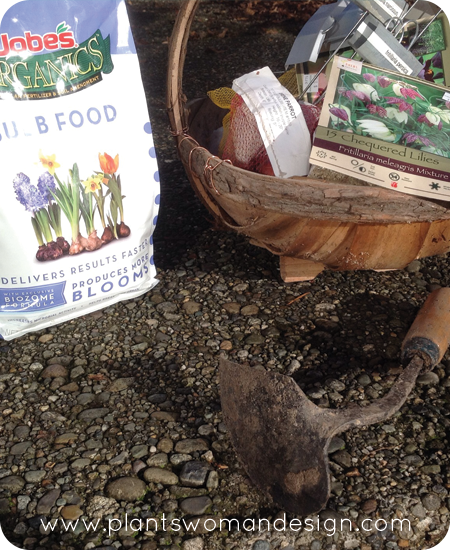
2. Gather your materials together. Grab your bulbs, pre-made markers to identify the location, a ‘claw’ (my favorite gardening tool), and bulb food.
3. Prepare your planting area and plant. Remove any weeds and dig a space with enough depth and breath to accommodate the bulbs. When you plant in a group you just dig one hole per group.
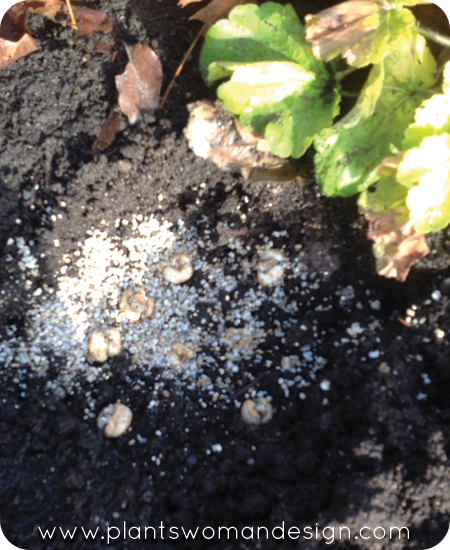
a prepared hole with bulbs and bulb food.
The general rule is depth three times the size of the bulb. This means a one inch bulb would be planted three inches deep. This is most important with small bulbs not to plant too deep. Spread isn’t that important but you want to leave room for them to multiply so I usually leave a fist sized space between them. I add the bulb food on the bottom of the prepared area, then place the bulbs on top with the bud end up. This usually means the pointy end but it is sometimes hard to tell . Look for bits of roots which would have been the bottom.
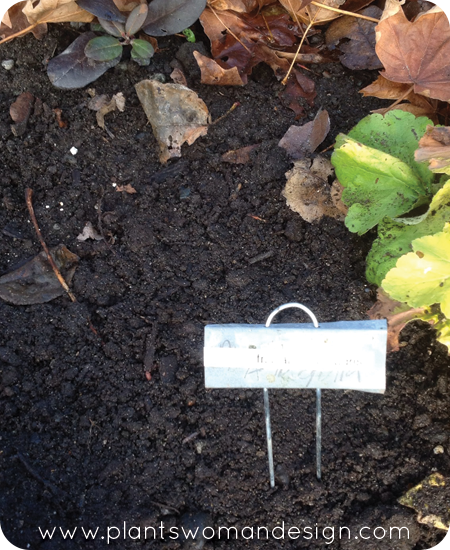
all covered up and labeled
by Susan | Nov 19, 2014 | LB Tutorial: Bulbs & Tubers, Little Bytes
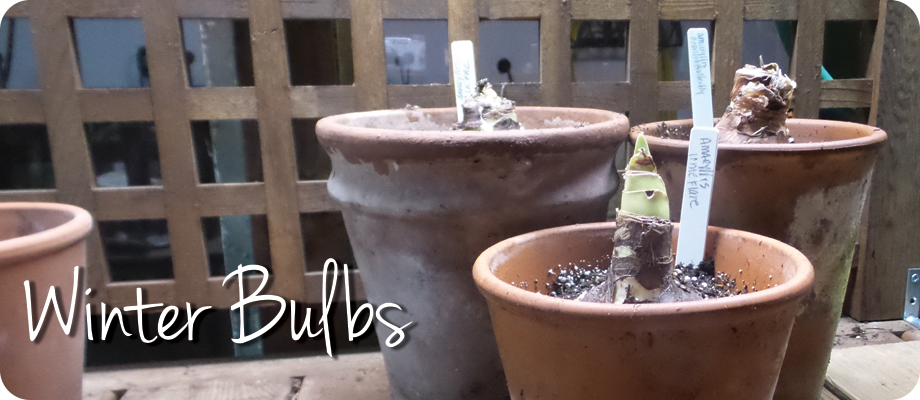
I love the bright colors of winter bulbs at Christmas. Somehow the colors and freshness of living plants with the rest of the Christmas decorations are such a great contrast. Surprisingly almost any bulb can be forced for winter color but I love Amaryllis bulbs so I grow those each year. I usually try and experiment with new varieties. This year Amaryllis Papilio Butterfly beckoned along with Amaryllis Lime Flare and Amaryllis La Paz.

www.easytogrowbulbs.com
The orchid like flower of the Amaryllis Papilio Butterfly, with its lime green petals and dark maroon accents, is truly exotic looking. It takes about 40 -60 days to bloom so getting it in the pot early is important if you want a bloom during the Christmas season.

www.easytogrowbulbs.com
Since we are on the subject of lime green the Amaryllis Lime Flare has brilliant lime green petals which I just love. This one flowers in 40-70 days.

www.easytogrowbulbs.com
Amaryllis La Paz has similar coloring to the Amaryllis Papilio Butterfly but the maroon is more pronounced and the petals thin and recurved back. Exotic looking as well, they sometimes bloom a little later than the Papilio Butterfly. Allow 50-70 days for full bloom.
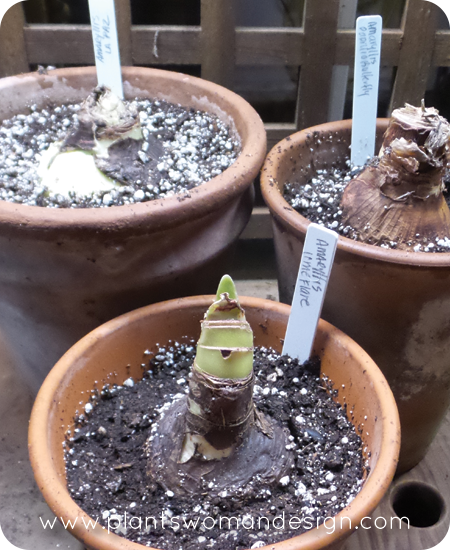 When you get your bulbs, put them in a pot with the top of the bulb about 3 inches above the soil level. Evenly moist soil but not saturated will make the bulbs grow well. Since they don’t like saturated soil keep them a little on the dry side. I like to use heavy terracotta pots and keep them there when I bring them in for display. Putting moss around the base of the bulb gives a festive finished look. Because the blossoms are heavy support is usually necessary. I like to use twigs around the outside of the bulb with either twine or raffia to tie it all together. Dressing it up with ribbon or copper wire is also fun.
Mine are in the greenhouse right now. I’m not sure how greenhouse cultivation will effect bloom time but I’ll keep you posted. I would imagine you could manipulated it by planting them at different times to have your bulbs blooming at the same time or through out the holiday season.
Being halfway through November already is a little late in the season for blooms by Christmas. But, do you have a gardener to buy for this year? These wonderful bulbs make a great gift and will provide lovely color this winter to tide your gardener over until spring gets here!
Do you have a favorite holiday bulb or plant? I’d love to hear about it.
by Susan | Oct 29, 2014 | LB Tutorial: Recipes
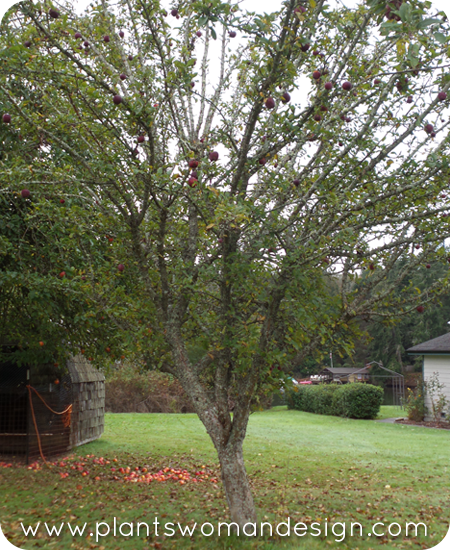
 We’ve been mostly enjoying the 6 apple trees that I inherited over the summer with the new house. The one closest to the house has been bombing me most of the summer. It is very overgrown and branches were reaching over the top of the house. Many times at night I was woken by ‘bomb’s’ of apples hitting the roof tiles and rumbling down to the ground. Finally that tree quit when all the apples were down and removed by me. Some were eaten but most of them when into the compost pile. Yes, I did put the word out for volunteers to come and take apples but got very few takers. Now the apple trees further out are ripe. The geese in the neighborhood all know about the free food so they are hanging out all the time. Not being able to stand the guilt from not picking and using them I’ve started using them, apple cake for a dinner party, applesauce on Friday (it was ok with a sweet flavor) and apple butter today… Some friends came and got some yesterday, which was nice. I was wondering if anyone made apple butter anymore so I looked up a couple of recipes online and found a lot of information. Of course I could not use just one recipe but a mixture of several to come up with an apple butter all my own. I wanted a twist so this one has apple brandy added and I used a crock-pot because many recipes said you could use one to help the slow cooking process. It was great! Some recipes call for just putting the finished apple butter in the refrigerator and serving after a couple of weeks but I prefer to put it in canning jars and use a water bath process to preserve it.
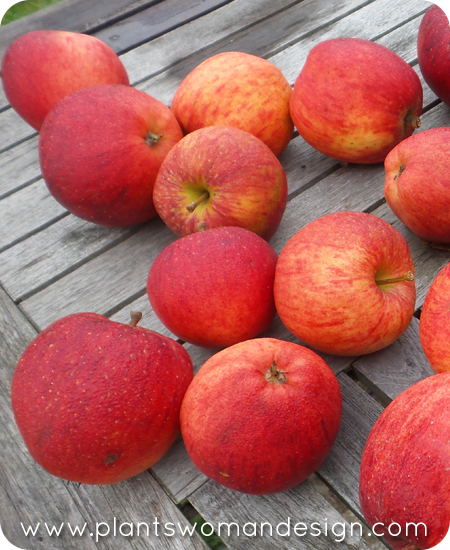
Of the three trees that are ripe now, there are two red delicious apple trees and one unknown variety. The red delicious apple used to be the best eating apple in the 1970’s. Usually grown east of the mountains they don’t usually do that well here on the west side. These, however, are very very good. Most recipes call for mixing varieties of apples for flavor. Red delicious apples are not usually good for cooking so mixing them was a good idea. Here’s the recipe I used.
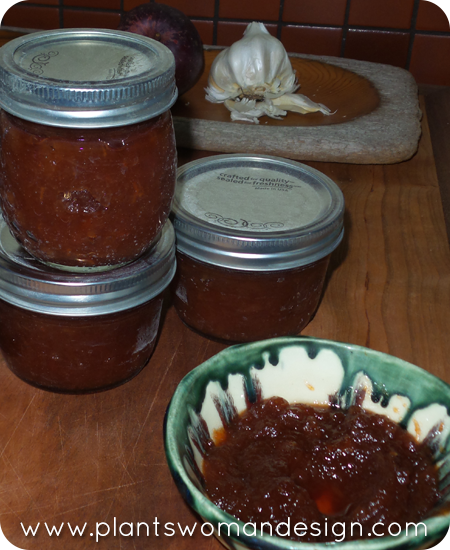
Ingredients:
- 3 Quarts of a variety of apples
- 3 cups plain sugar
- ½ cups water
- ½ cups brown sugar
- 1 tsp ground cinnamon
- 1 tsp ground ginger
- ¼ tsp ground cloves
- 1 cup apple brandy
- 7-10 ½ pint jars with lids and bands
Step One: Peel, core and chop (not too small) your apples and place in your crock-pot. Stir in the plain sugar and water and heat on high until the mixture comes to a boil. Turn the crock-pot down one level and cook for another 1 ½ hrs or until apple chunks are softened.
Step Two: Add remaining ingredients (brown sugar, cinnamon, ginger, cloves, brandy) and let cook another 2 hours or so. The apple butter will be done when it reaches a dark caramel color and stays firm when cooled on a spoon. I like my apple butter on the chunky side.
Step Three: Sterilize the ½ pint jars and lids. Pour the boiling butter into the jars and process them in a water bath for 25 minutes. (new to canning click here for more information)
Try warm bread and butter with a spoonful of apple butter for a great fall treat!
by Susan | Oct 22, 2014 | LB Tutorial: Growing Food
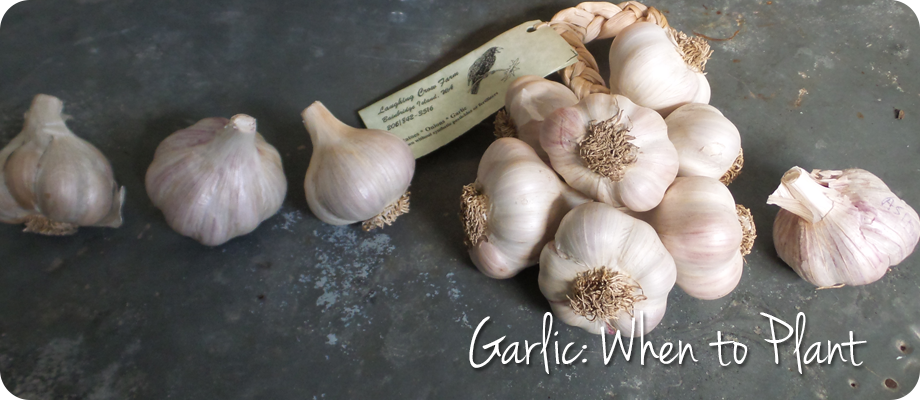
Here in the PNW we don’t really have to plant garlic in the fall. There are fanatics that say ‘have to’ and other that say ‘no big deal’. I even read a article from Gardeners World from England about the controversy of planting garlic in the fall. The general consensus is that hardneck varieties should be planted in the fall and softneck varieties can be planted in the spring or fall. Hardneck varieties can be grown in very cold areas where there is snow cover. Softneck varieties can be grown in all milder areas in the spring or the fall. Softneck varieties keep really well up to 1 year when properly cured. Harneck varieties are often milder and have interesting flavors. (yes flavors in garlic who knew?) One of reasons fall planting is suggested because the bulbs have a longer season to put our roots and increase in size. It is suggested to plant no later that end of October in our area.
For my experiment I am going to use garlic grown here on Bainbridge Island from the Laughing Crow Farm as well as some others.
The hard neck varieties :

photo from www.territorialseed.com
Chesnok Red Garlic – Late-season. Characterized by its beautiful purple stripes, this Middle Eastern hardneck comes to us from Shvelisi, Georgia. One of our best all-around cooking varieties because its full-bodied flavor lingers and is retained after cooking. Especially nice choice for baking as it has a very creamy texture. Easy-to-peel. Stores 4-6 months. (Territorial Seed)

photo from www.gourmetgarlicgardens.com
Russian Red – Russian Red is a Rocambole garlic with a rich, musky, garlicky flavor and is very hot when eaten raw. Rocambole garlics have brownish-purplish bulb wrappers and easy to peel brownish clove covers and so does Killarney Red. Rocamboles are valued for being early harvesting full flavored garlics that you can enjoy while waiting for the longer storing ones to mature and harvest. Russian Red’s cloves are all of similar large size with no small cloves. Usually harvests in late June/early July and stores into mid-winter at room temp.
Soft neck varieties:

photo from www.burpee.com
Nootka Rose Garlic – HEIRLOOM – Silverskin softneck with bright white skin and rosy streaked cloves; excellent for braiding. Nootka Rose is a late maturing garlic – the latest variety among the Silverskins – but well worth the wait. Flavor is rich and warm, but not overly hot. This is a very long-storing garlic that easily holds into the next spring or even summer. This heirloom comes from the San Juan Islands off the coast of Washington. Softneck. (High Mowing Seeds)

photo from www.gourmetgarlicgardens.com
Asian Rose Garlic – A smooth, silvery-skinned garlic with rose-colored cloves and mild flavor, it ingeniously evokes and amplifies the flavors of other recipe ingredients. This is the garlic of choice for braiding because it keeps for 6 months. Bulbs are loaded with up to 12 cloves. Very fast-growing. Softneck variety. (Gourmet Garlic Gardens)
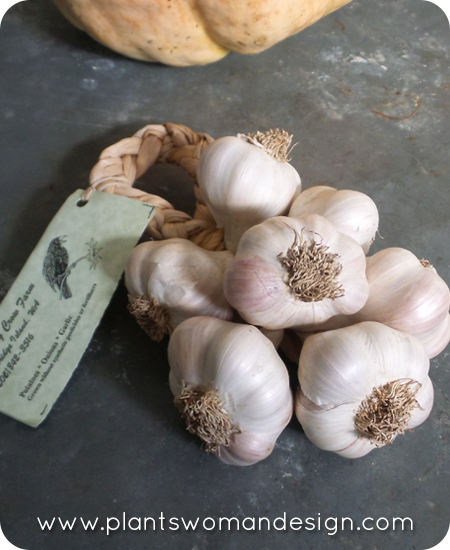
Silver White – It has silvery skin, easy to peel (slip skin). This is the last garlic to mature each season and they store the longest. Wrappers are tight and creamy white. Great garlic for braiding. When grown in northern (cooler temperatures Silver White can have quite a bite when eaten raw.. It’s a lot mellower when cooked.
I will plant one row of each and then eat the rest. Maybe I should have a garlic tasting party. Would you come?

 In the
 blog ‘progress yes progress’ I wrote about pleaching my espalier cherry trees into each other. I thought it would be good to talk about pleaching and also create something fun for Little Bytes at the same time.
 Here you can see I’m cutting off some branches off a willow tree next to the upper pond. I’m choosing willow because it is really easy to work with, it roots easily, it will be easy to pleach and since it grows on my property it’s free!
 Choose long pieces and trim off lower branches. I left some of the upper branches because we will intertwine them and tie them together. You can see our helpers in the background.
 To make your hide-out lay out a circle and check the inner size, I had my assistant stand in the middle of it to make sure it would be big enough for two kids. (Thanks Jen)
 Using the shovel dig holes about 6 – 10 inches deep along the path you have laid out. Place the long willow pieces in the holes and stomp down the soil around them. This is a very wet area so the muddy soil held well. I planned the entrance to face the side yard with the pond behind the tepee. I was worried that some tumbling around might land the kids in the water so…. let’s be on the safe side!
 Using the upper branches that are still left and start weaving them together. Using the tape to secure them together.
 Choosing the strongest branches make a little cut on both sides of the branches and then put the cut edges together. Use the tape to secure the branches together so they are tight.
 Using the tape and weaving method connect the rest of the branches together. Now there is some danger of the grafts not taking because the willow have been cut and may not root out. I took some of the cuttings I didn’t use and put them into water to root them conventionally and will use them to re-graft later if necessary.
 Here is a close up of the archway entrance. You can see the tape holding all the pleached branches together.
 Place a stake towards the windward side of your tepee if needed. The structure will be weak until it is rooted in. I’ll keep you posted on how it roots in. The wax tape will fall off after about a year.


 And…
And…


